|
|
Post by phil1rowe4 on Jun 8, 2017 15:11:45 GMT 1
I finally worked out how to separate the RGV fork inner and outer tubes so have now replaced all the seals and bushes and reassembled them. Put the front end back on, so it looks like a bike again.

Also painted one of the callipers so here's the before and after shot. 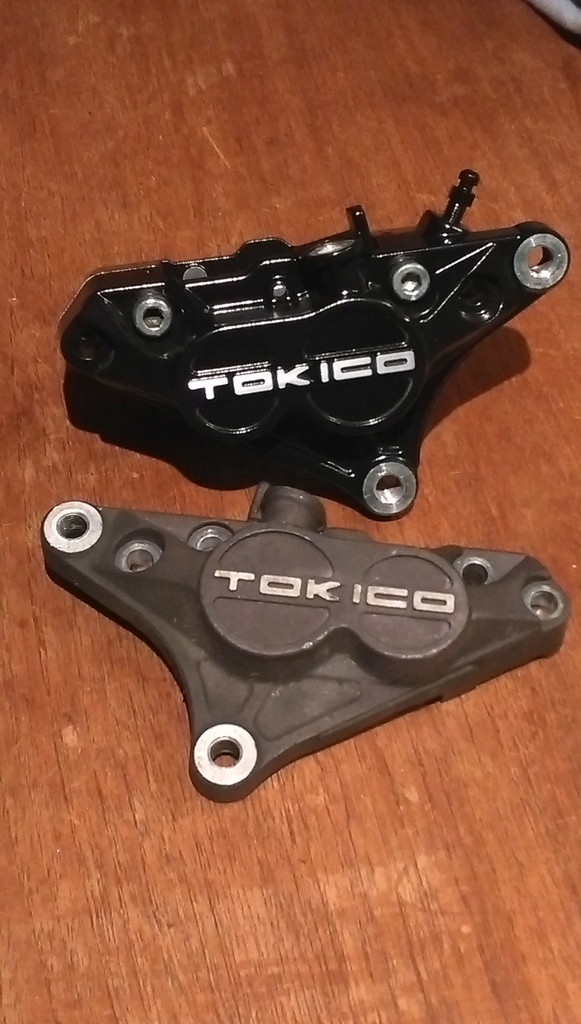
|
|
|
|
Post by leaky on Jun 10, 2017 10:36:38 GMT 1
Cracking build you have fella, now watching with interest 😎.
|
|
|
|
Post by auspaul on Jun 15, 2017 12:44:30 GMT 1
Somewhere in all this I took it outside to look at it from a distance and see the overall look. Also played around photo shopping a possible paint scheme.


Looking great |
|
|
|
Post by phil1rowe4 on Jun 19, 2017 15:14:30 GMT 1
Waiting on a few bits to arrive, but this one arrived today, after travelling half way around the world. (Italy-> France-> China-> Singapore-> Australia).
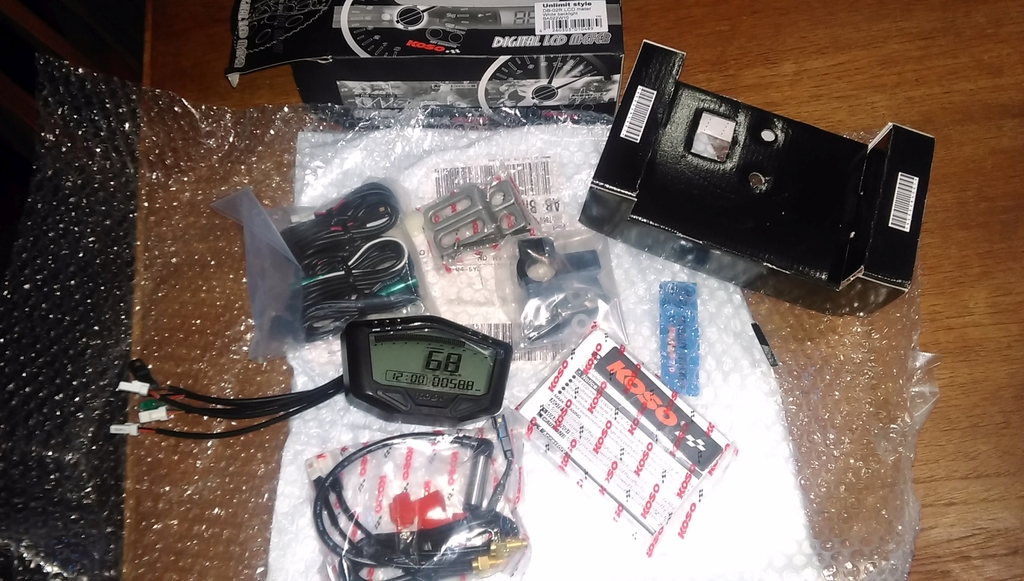
A few other jobs completed: custom oil tank and bracket fitted, switch cases repainted, battery box made and regulator bolted underneath. A nice dash for the instruments next.
|
|
|
|
Post by phil1rowe4 on Jun 20, 2017 12:50:02 GMT 1
Here's some pics... Dash finished tonight, just waiting on clear coat to set. Thought I'd do it in period correct brushed Ali.
This is just a cardboard template 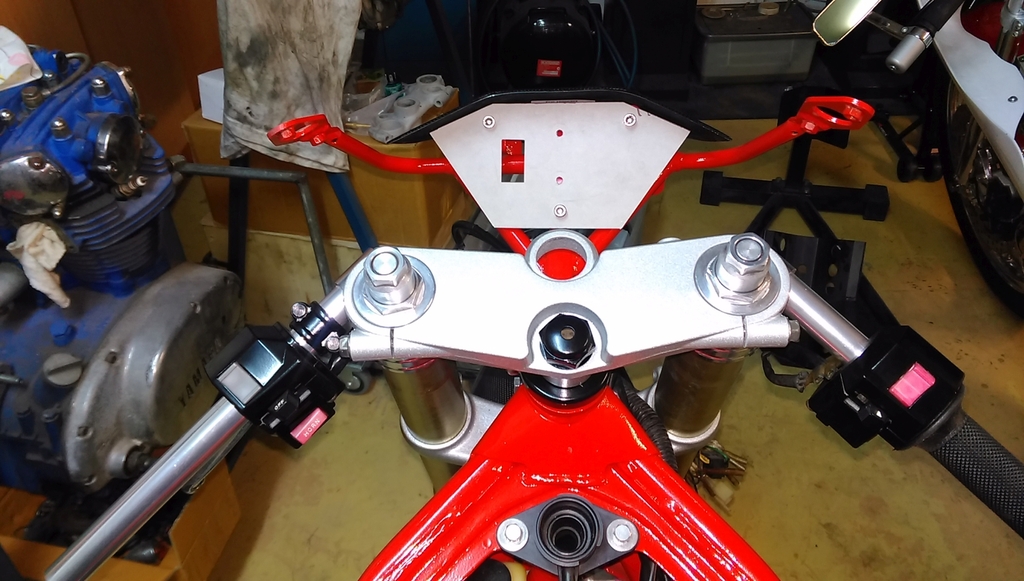
|
|
|
|
Post by phil1rowe4 on Jul 2, 2017 15:24:47 GMT 1

Photo bucket now wants me to upgrade my account to be able to share photos. OK, but not to the tune of $400!
The pic above is a test share from dropbox.
|
|
|
|
Post by markhoopy on Jul 2, 2017 15:42:04 GMT 1
|
|
|
|
Post by lb on Jul 4, 2017 12:23:58 GMT 1
Geez that blows chunks Phil.....profitbucket.
Well the dropbox worked fine for me,also that red certainly pops....bike looks great.
|
|
|
|
Post by phil1rowe4 on Jul 5, 2017 16:21:47 GMT 1
I'm slowly uploading all the pics to Flickr and updating the links in the forum. What a pain in the butt !
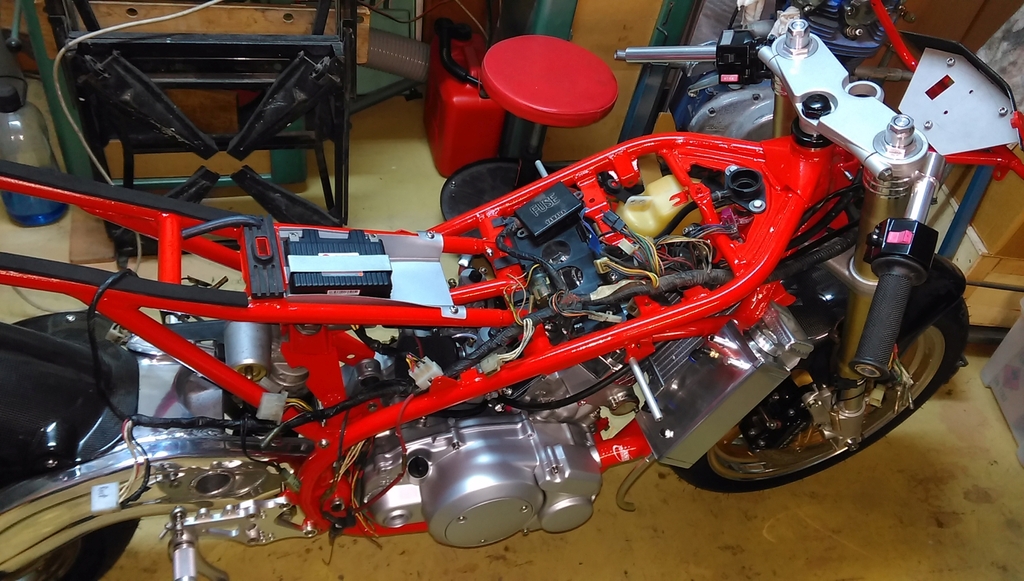
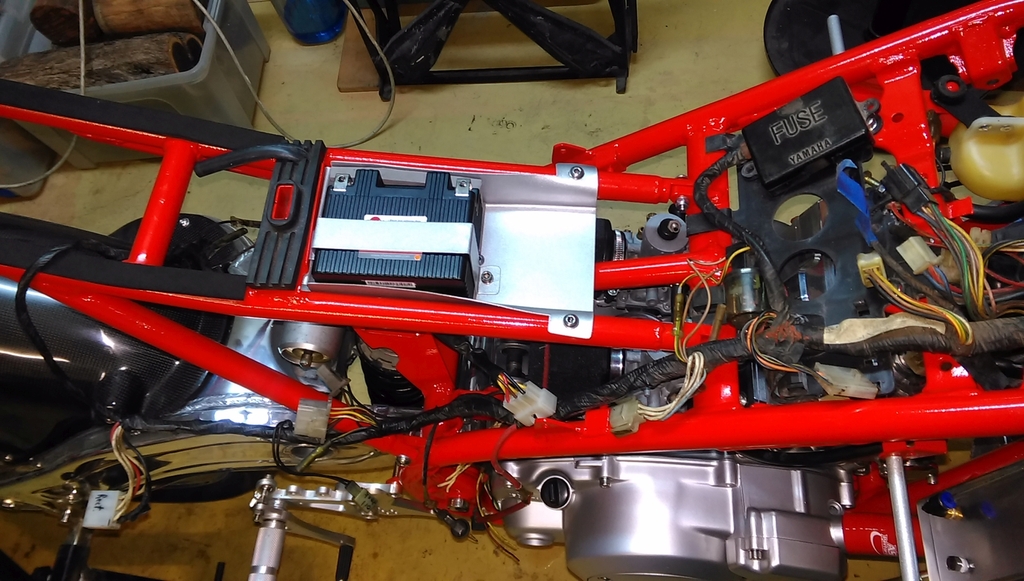
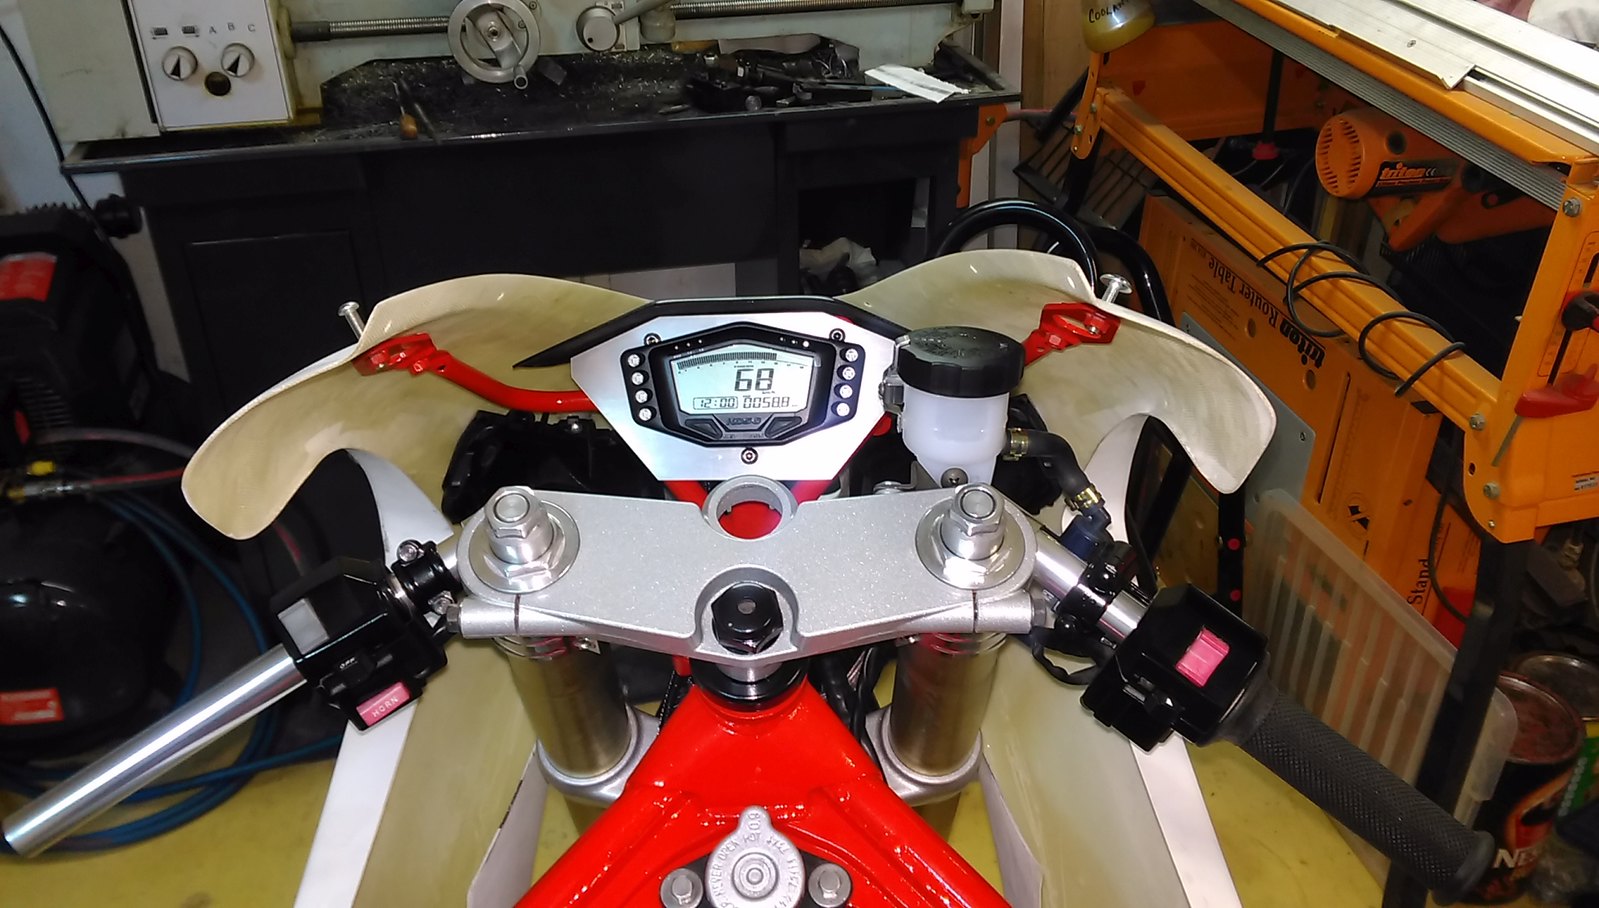
Since the last update I've been waiting on parts to be delivered and working on lots of small detailed jobs as parts become available. The dash is finished now that the indicator light attachment to the dash has arrived.
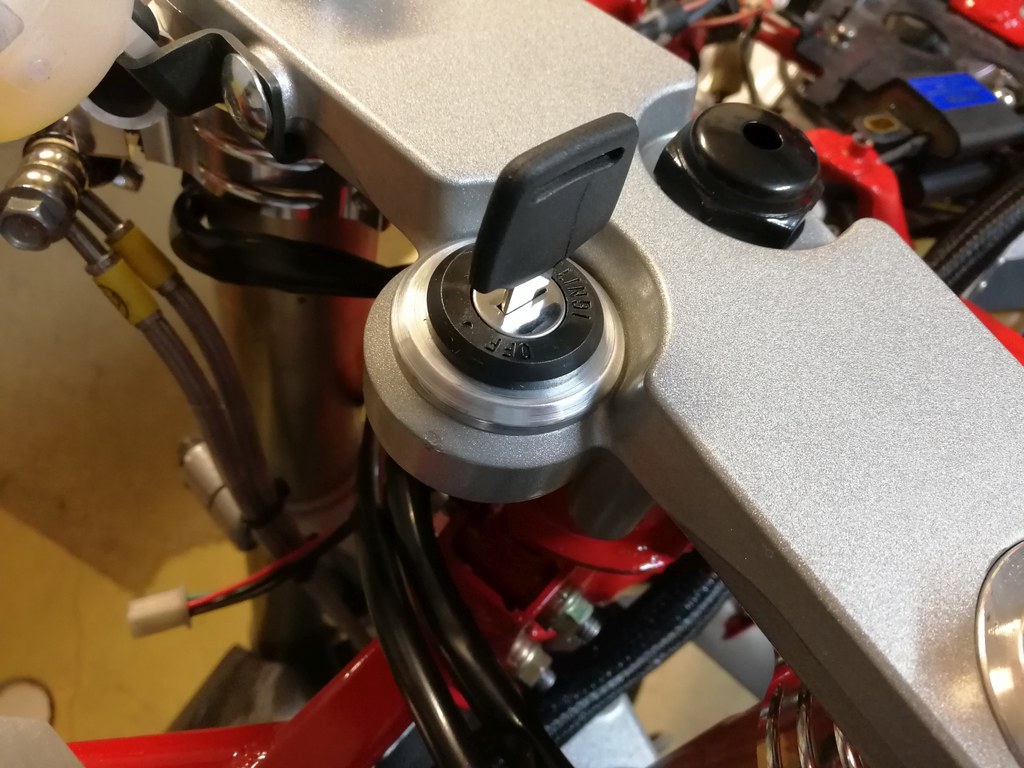
Front brake calliper has been repainted, refurbished with new seals, new braided hoses attached and I now have working brakes  Rear brake calliper has also been painted, reconditioned and waiting on the master cylinder refurb kit. Clutch cable fitted, adjusted and now working along with a lot of other small fitting things up jobs. Dyna coil and Zeeltronic ignition arrived and coil fitted. Ign leads made and fitted. I've also started making a template for a rear chain guard because the original ones are no longer available from Suzuki. Waiting on a delivery of electrical connectors and fuse box before I can start the wiring properly, but fitted an ign key lock after turning up an adapter for the Suzi top clamp.
|
|
|
|
Post by phil1rowe4 on Jul 13, 2017 13:14:32 GMT 1
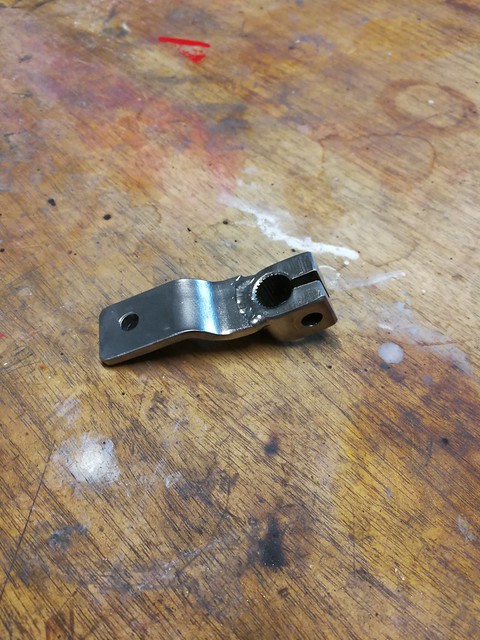
Latest update: been messing around with lots of little jobs as pasrt arrive. Fitted rear indicators, cut a hole in the side panel for the fuel tap, fitted up the oil pump & water pump so sump now has oil and radiator has coolant. Found a small coolant leak around the temp sender so I'll have to drain some coolant and use some sealant on it. I also ground off the old gear changer arm and bent up a new one facing down that misses the frame and side stand spring.
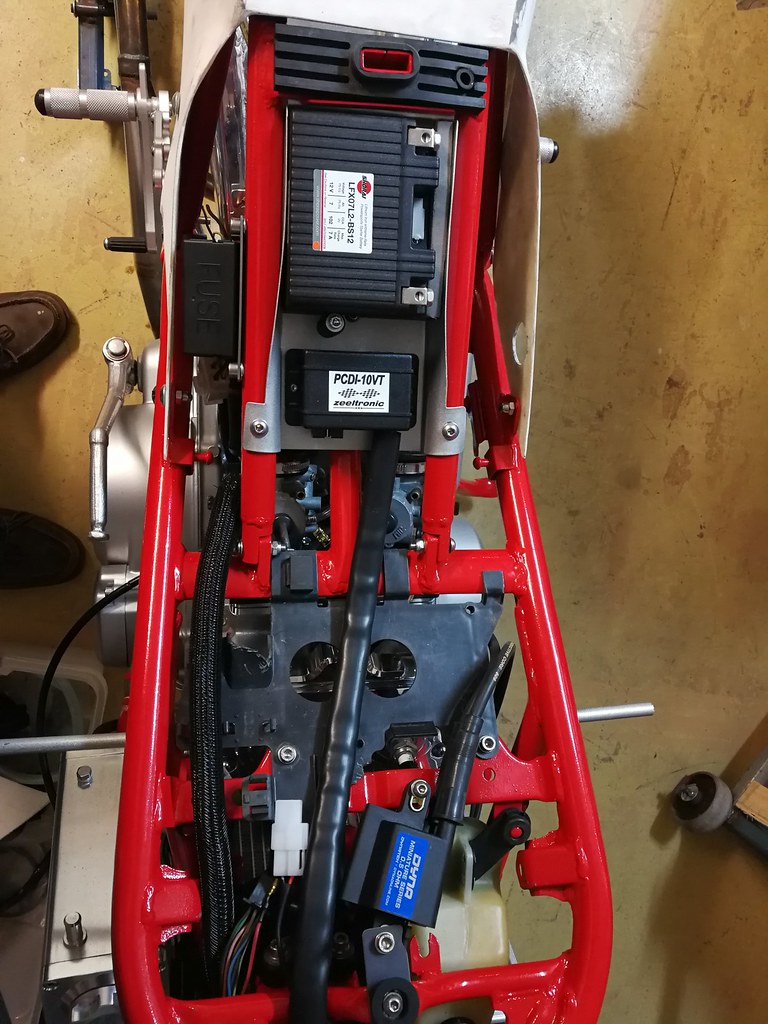
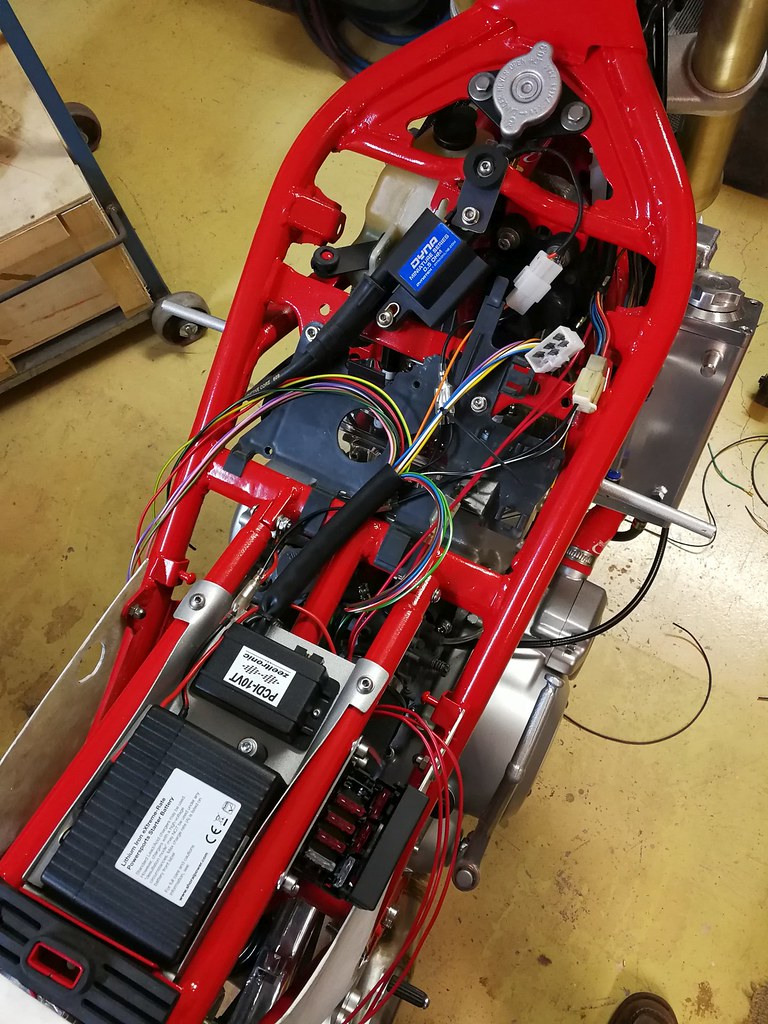
The electrical bits have arrived so I've fitted up the new fuse box, cdi and have started on the wiring today. With a bit of luck and time, I might be able to try starting the bike on the weeknd, although I would like to modify the exhausts while they're still clean inside, so maye next weekend.
|
|
|
|
Post by phil1rowe4 on Jul 15, 2017 14:11:57 GMT 1
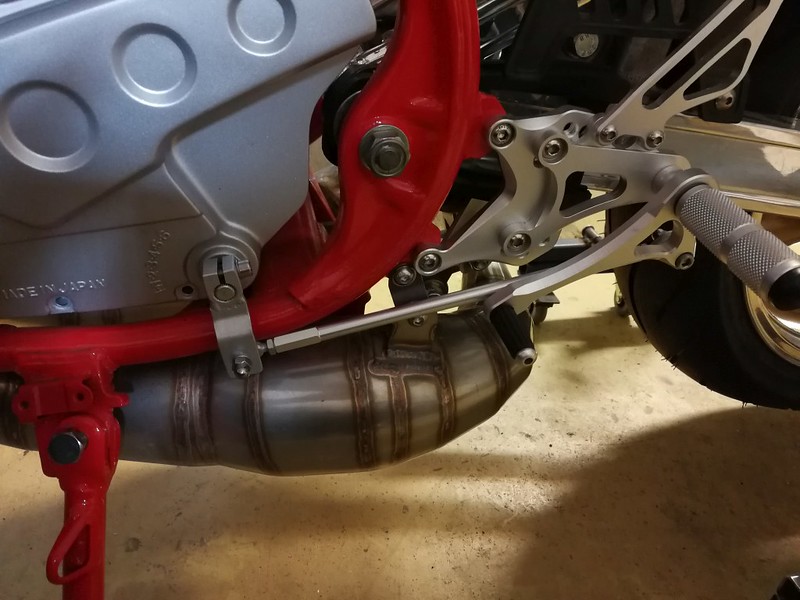
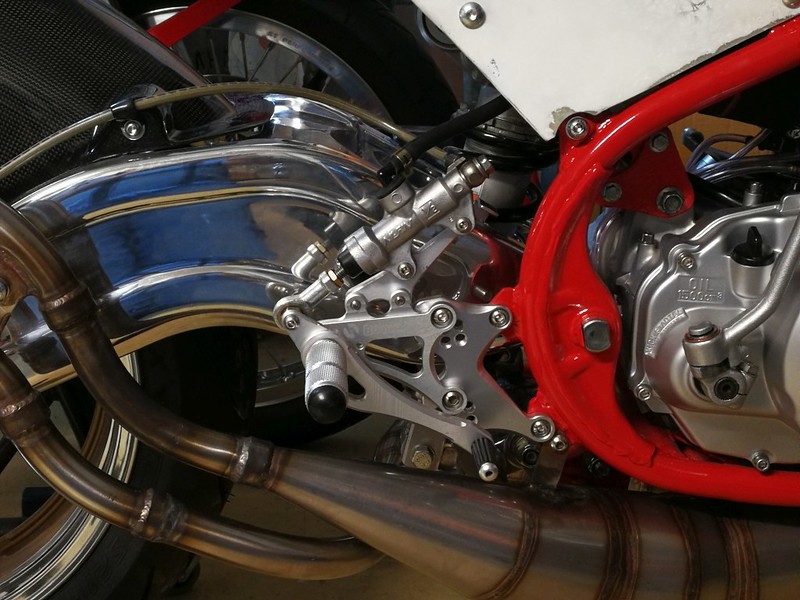
Core electrics (Ignition and instruments) done and nothing melted when I turned it on! It was so nice to hear the PV cycle test when I first turned it on. Even managed to get the Zeeltronic to talk to my laptop. So I moved onto modifying the exhaust pipes, especially since I got so much feedback on here about the pipes being too long and low.
Here's a pic of one pipe in the old position and the other in the new position.
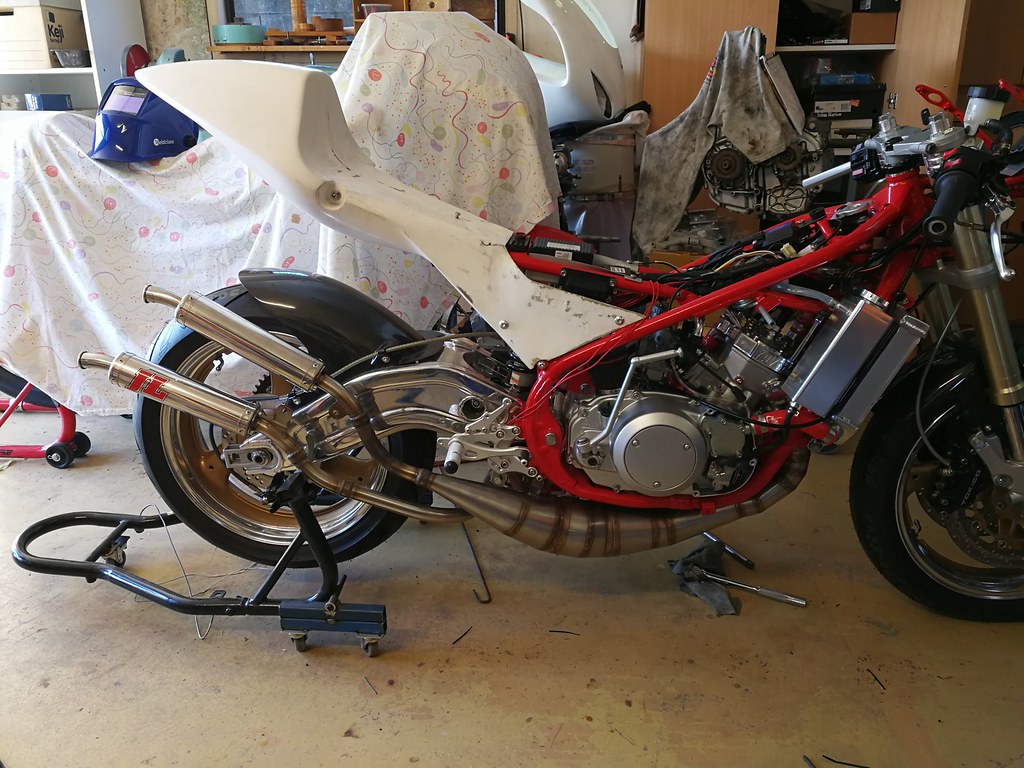
Here's a pic of them in their final position. I should have used the same camera position. They're probably still a little conservative but I like them there.
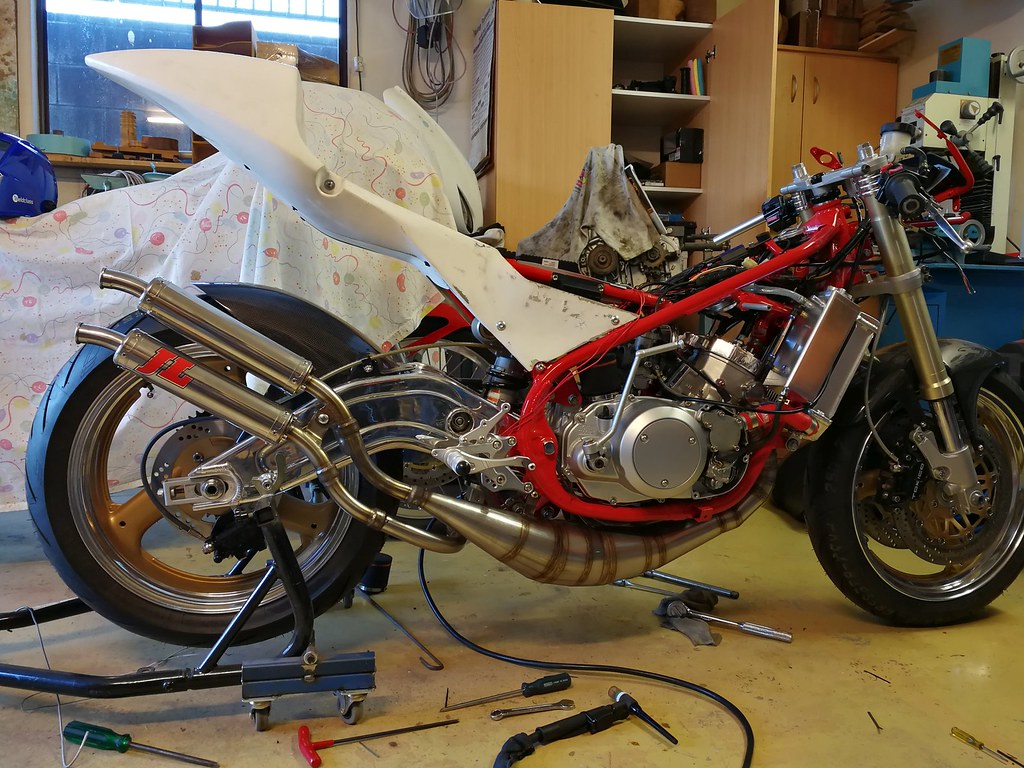
So here it is ready for some fuel to go in tomorrow and see if it starts! 
|
|
|
|
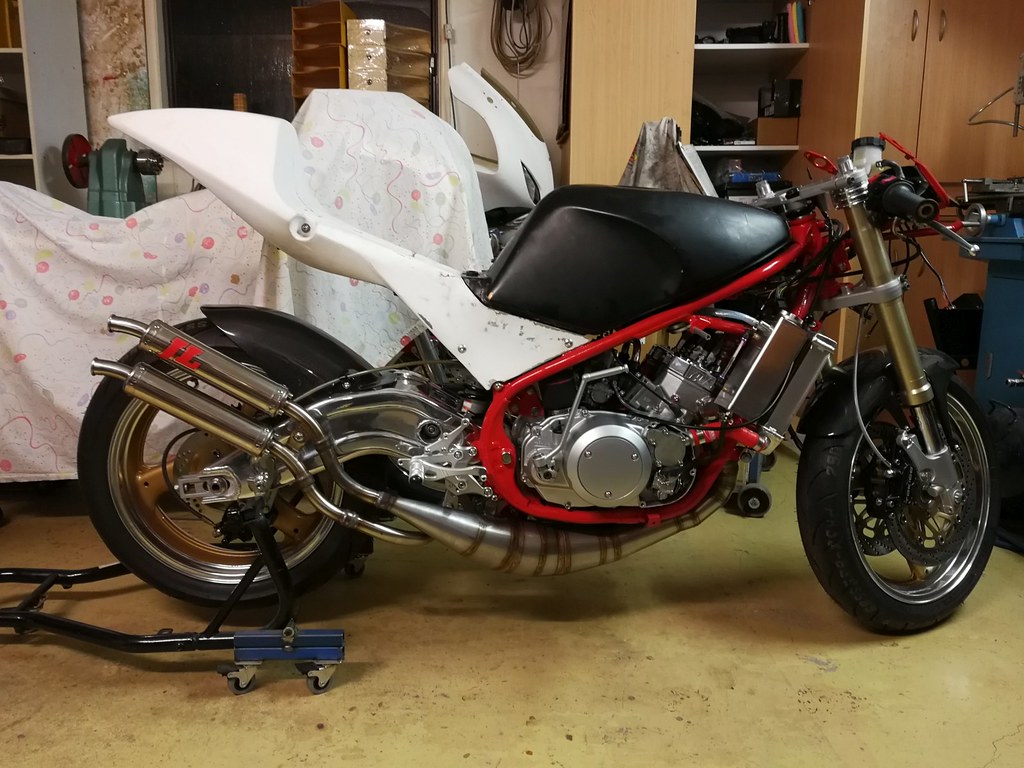
Post by phil1rowe4 on Jul 16, 2017 9:05:34 GMT 1
After a bit of messing around adjusting float levels.... It Lives ! Lots of tuning and adjusting to do but at least it runs.
|
|
|
|
Post by phil1rowe4 on Jul 17, 2017 9:39:48 GMT 1
I'm a bit surprised by the lack of comments recently, especially given all the earlier feedback on the pipes. Plenty of views but everyone's keeping quiet.
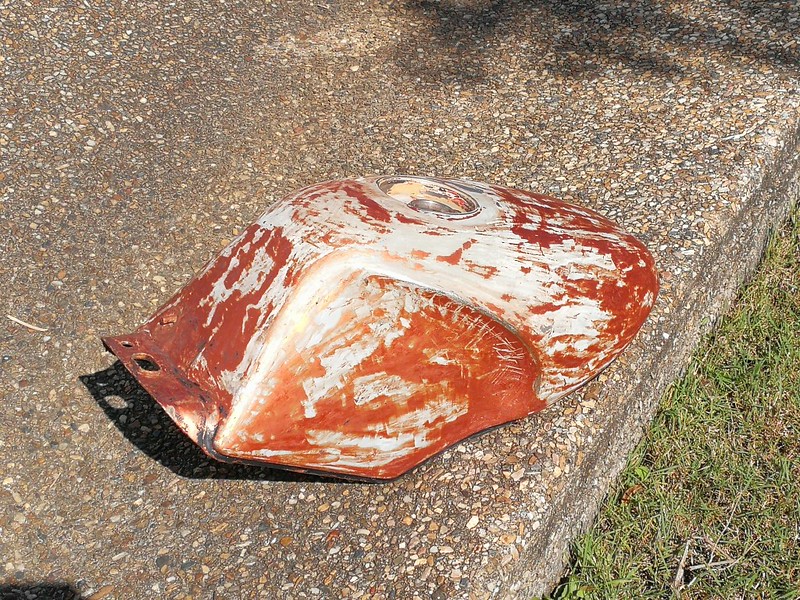
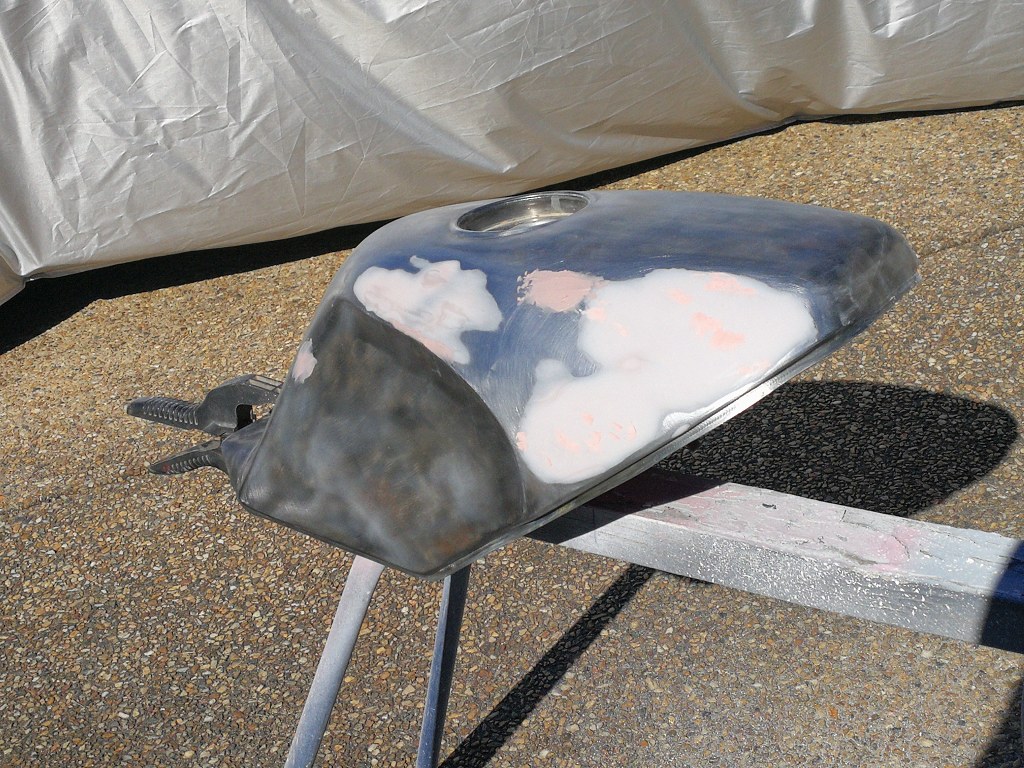
Anyway, still more tuning and tweaking to do (bigger pilots going in next) but started cleaning up the tank ready for a tank liner. Last project I did, I didn't put in a tank liner and a pinhole let petrol fumes under the paintwork and created a paint bubble. I had to take it all back and redo the whole tank, so I'm not making that mistake again!
It's interesting how you can see the history of a bike by stripping back some paint. At some stage it was bright metallic orange before someone attacked the bike with a matt black aerosol can.
|
|
|
|
Post by phil1rowe4 on Jul 23, 2017 8:31:29 GMT 1
Latest update: Tank has been stripped of paint and a POR-15 tank liner fitted. Should be able to etch prime it and put it on the bike with fuel soon so I can test ride the bike. 520 chain has arrived and been fitted. Rear brake caliper parts arrived so the rear brakes are now done and working. I forgot to fit the hydraulic brake switch , so a messy job ahead to fit the switch and re bleed the brakes.
I had some issues with the bike producing a lot of smoke from one exhaust while the other was cold. I also found that there were a lot of air bubbles in the oil pump feed line to the 'cold' cylinder. (Clear feed tubes) My conclusions were: - that the oil pump needs a service as it seems to not be delivering oil evenly to each cylinder and may be sucking in air on one side only. Other side is fine with no air bubbles. - I also found the 'cold' side had a partially blocked pilot jet so cleaned again and it worked much better.
I've since changed the pilots from 22.5 to 25, +1 slot on the needle and 230 to 250 mains while running on premix to take the oil pump out of the equation. The plugs still seem wet to me but its idling nicely and comes off idle ok. I'm presuming the wet plugs is because its mainly idling and not at speed or under load. I hope to ride it around the block soon to see how it goes under some load and throttle.
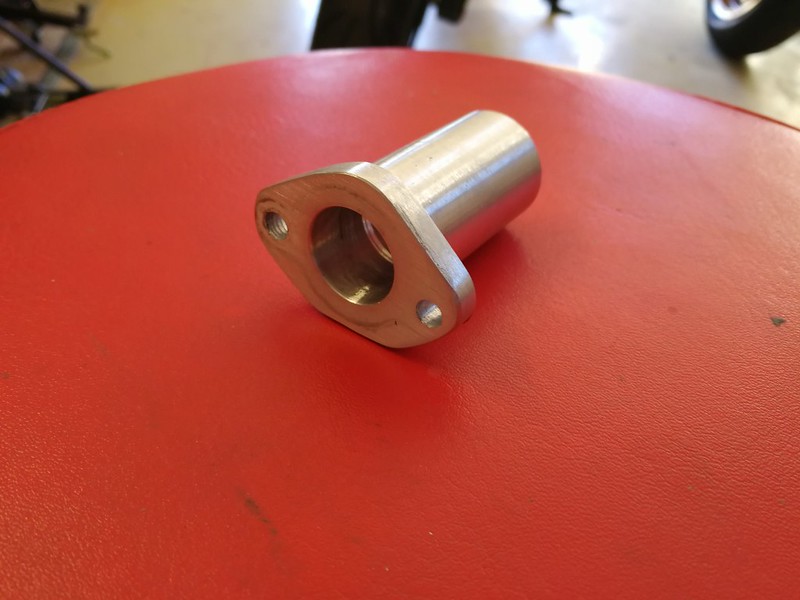
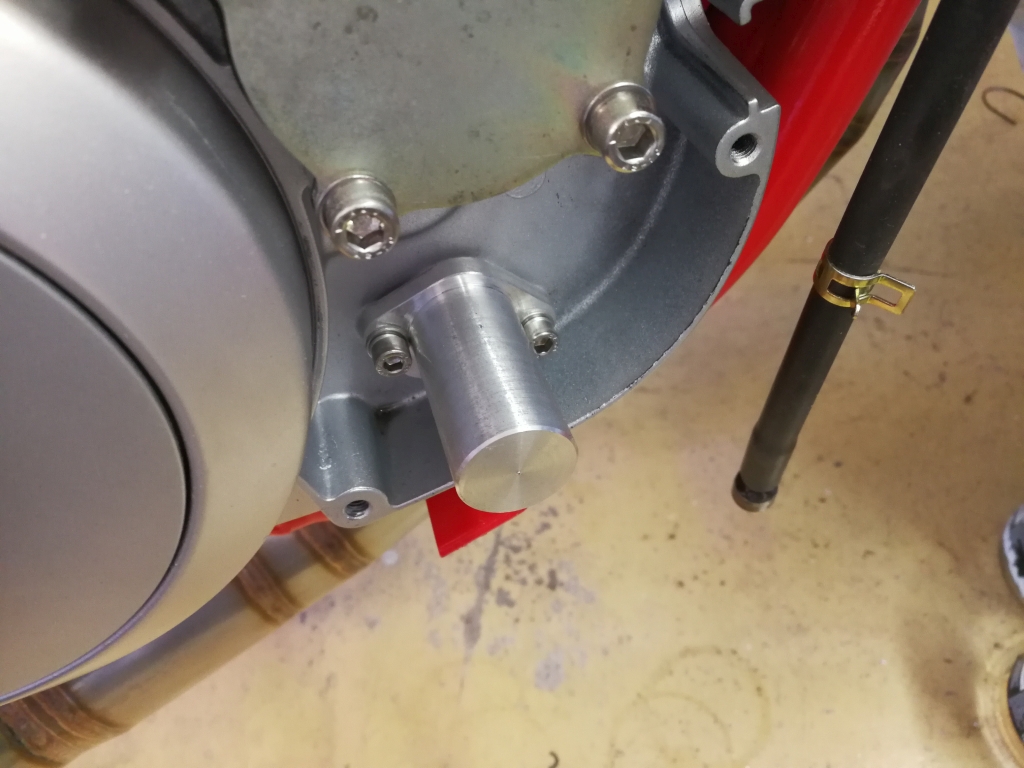
Because I'm now running on premix until the pump gets a service, I had to find a way to run without the oil pump. I didn't want to drain all the fluids and remove the clutch cover to remove the oil pump shaft, so I made a blanking plate that incorporates the oil pump shaft. I can now run premix and re-fit the oil pump in five minutes.
|
|
|
|
Post by veg on Jul 23, 2017 10:25:03 GMT 1
Well I like it, a lovely build and some great ideas. We in the UK sometimes forget how lucky we are what with so many suppliers on our door. Dedication is definitely needed if you aren't UK based. Well done.
|
|
Deleted
Deleted Member
Posts: 0
|
Post by Deleted on Jul 23, 2017 15:32:32 GMT 1
Brilliant idea on the oil pump blank
Send the pump to Arrow, he will sort it for you
|
|
Deleted
Deleted Member
Posts: 0
|
Post by Deleted on Jul 23, 2017 15:33:11 GMT 1
Oh and BTW I like the new positioning of the pipes, looks much better
|
|
|
|
Post by doohanno1 on Jul 24, 2017 15:30:51 GMT 1
Yes, pipes look in proportion now and an ingenious idea with the pump blank to keep you on the road..You should sell those..💰💴💵...
|
|
|
|
Post by marsbar350 on Jul 24, 2017 22:28:26 GMT 1
man of many skills phil  really well thought out build dont normally like red frames but this looks pukka  |
|
|
|
Post by phil1rowe4 on Jul 25, 2017 5:59:12 GMT 1
Thanks for the comments guys. It certainly would be easier if Norbo (or other suppliers) lived across town/ county and could ship things overnight. We have to wait 2-4 weeks for any shipment which can really slow down the momentum.
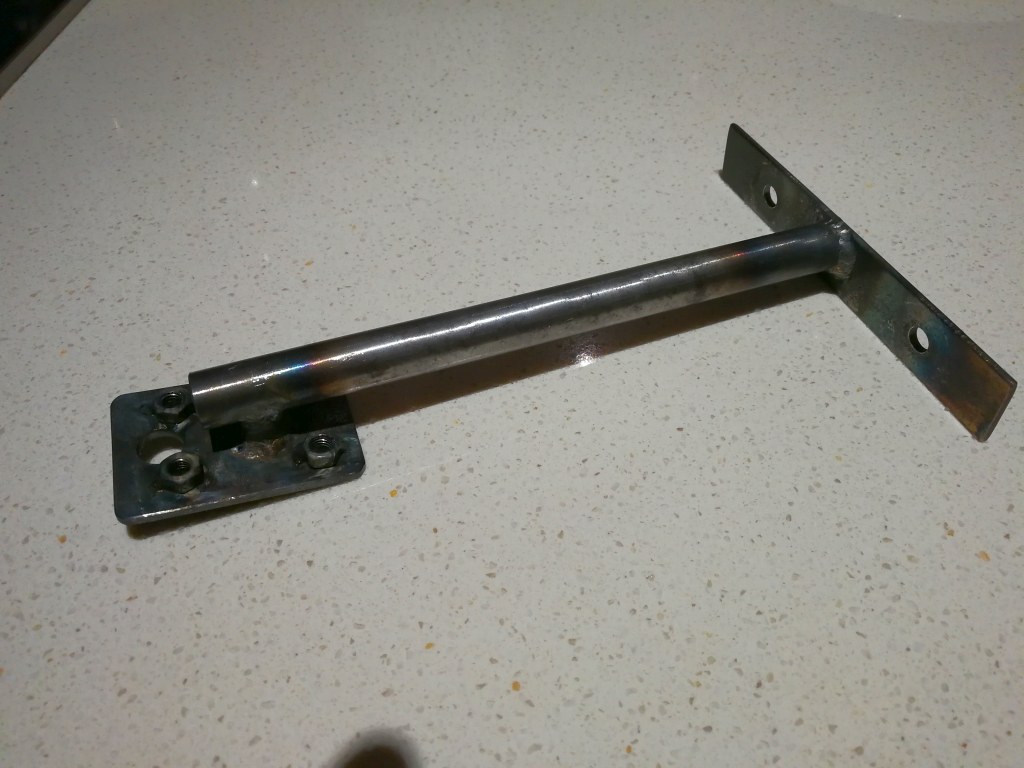
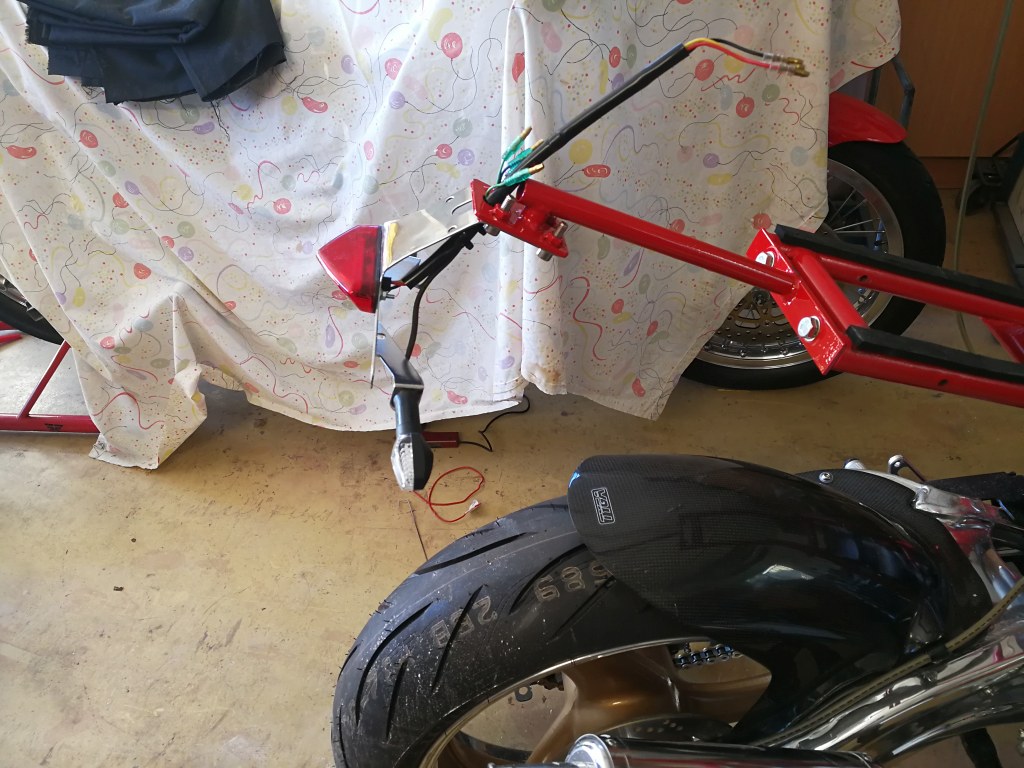
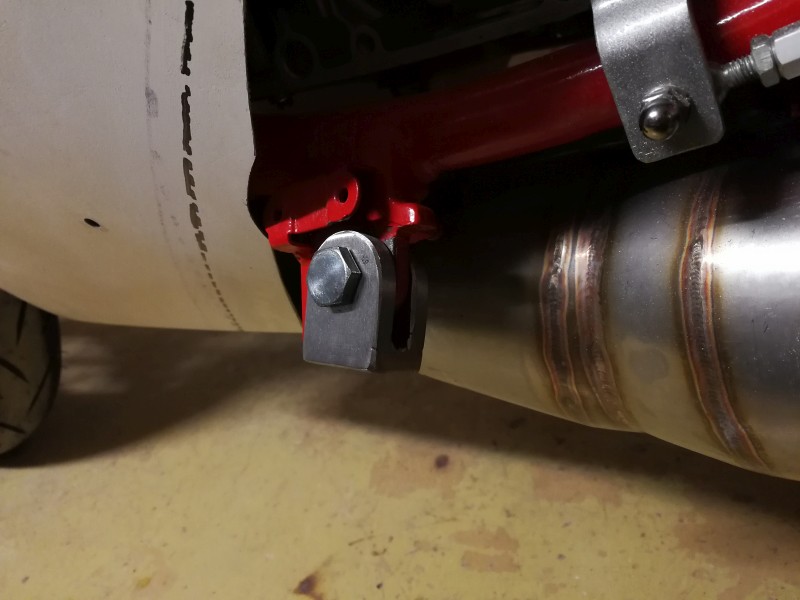
I made up a bracket to hold/support the rear brake lights assembly as I didn't think the fibreglass tail would be strong enough, over time. It was a bit fiddly working under the tail to get the fitting right but turned out ok. The second photo shows it fitted without the tail (obviously!) to show how it works inside the tail unit.
Meanwhile the tank is getting some attention. A few ripples on the RHS, nothing major but still requiring some attention. The bike's heading towards the final prep\paint stage which is something I do enjoy but it's a lot of time and effort. So much sanding, especially with a full fairing. Next bike isn't having a fairing!
|
|
|
|
Post by phil1rowe4 on Jul 30, 2017 10:22:16 GMT 1
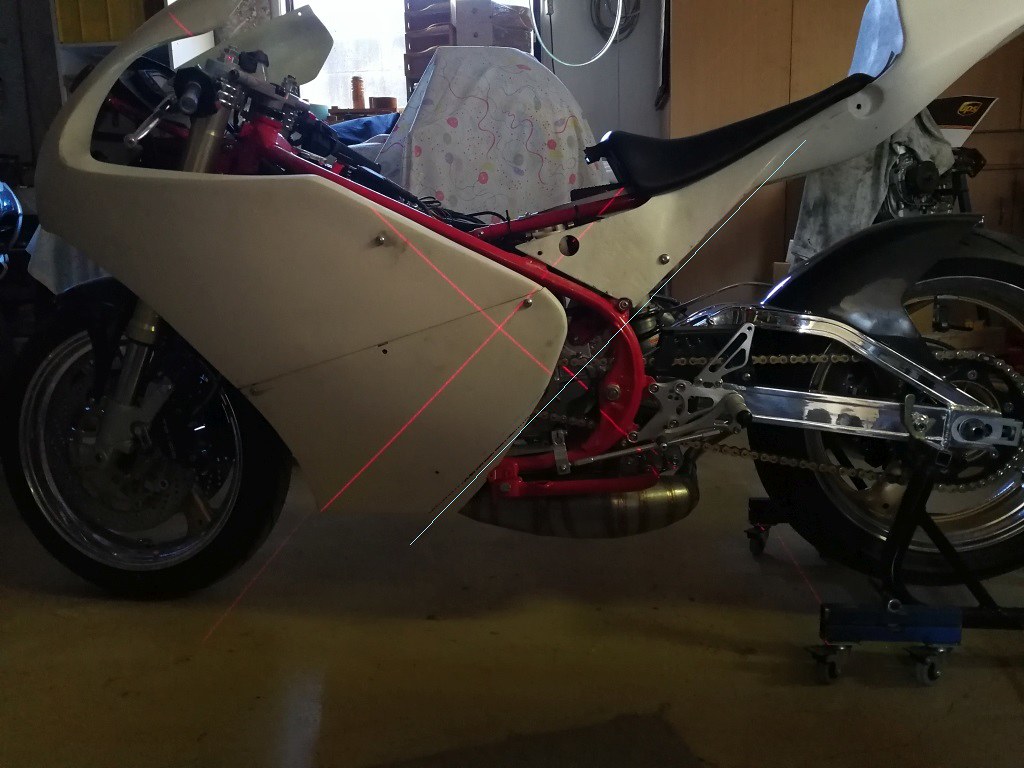
Still messing around with little jobs: - fitted the front indicators to the fairing - flush mount ones. - re-gluing the seat because the first glue I used is not holding well enough so I've had to redo it. - trimmed the fuel tap hole and fitted a very handy fuel line disconnector. (disconnect fuel line without spilling fuel) - experimenting with a different undertail cover piece made from poly propylene sheet. (more flexible and easier to fit) - determined final fairing shape using a building laser level angled to match the line of the tail unit. (added a blue line to pic to show angle and cut line on the lower fairing) - started making a new side stand that won't interfere with my foot under the gear lever.
|
|
Deleted
Deleted Member
Posts: 0
|
Post by Deleted on Jul 31, 2017 14:56:02 GMT 1
I'm hearing you on the sanding, I still haven't finished my headlight fairing yet
Still I'm working crazy hours ATM so not surprised
Iv remanufactured the side panel mounting lug and the top of the belly belly pan to make sure they all fit together
You are coming along in leaps and bounds and way way ahead of me
Nice job
|
|
|
|
Post by phil1rowe4 on Aug 1, 2017 10:27:25 GMT 1
Hi Howard,
I reckon your restored fairings will be a great achievement. Keep at it. A little bit every week.
|
|
Deleted
Deleted Member
Posts: 0
|
Post by Deleted on Aug 1, 2017 11:49:47 GMT 1
Hi phil
trust me, little bits, actually very little bits are all ive had time to do
|
|
|
|
Post by rostrumorhospital on Aug 4, 2017 20:39:30 GMT 1
Just read through your build and very impressed with both your workmanship and vision, really like the drawings and the work on the bodywork, great hands and the red / white / black is always my favorite colour scheme, definately gonna look the business
|
|
|
|
Post by phil1rowe4 on Aug 11, 2017 12:30:04 GMT 1
Thanks Rostrum, I appreciate the kind words.
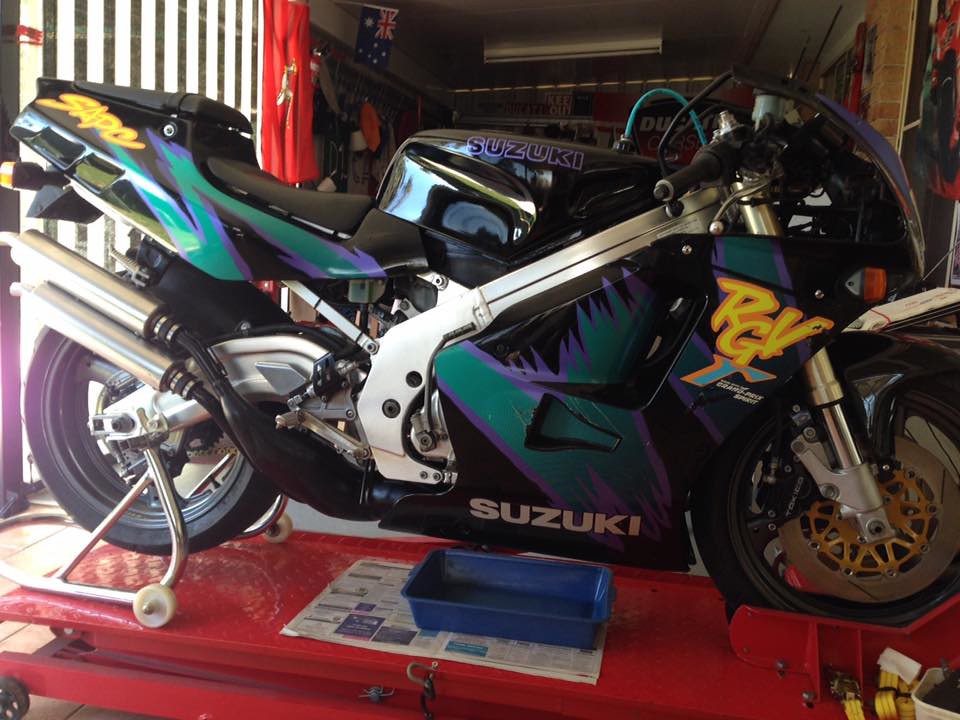
Since I'm heading towards the painting stage I've been busy finalising the paint scheme in my head. After probably 20 variations done in pencil drawings and computer drawings I've landed with a paint scheme that I really like. Do you want to see the final idea or wait until its finished?
I've also been a little distracted by a bike I saw at a price I couldn't resist, so I bought it. Might convert to a Lucky Strike colour scheme to match all my other red and white bikes! My missus is now calling me Angelina Jolie for adopting all these stray bikes
|
|
|
|
Post by phil1rowe4 on Aug 13, 2017 12:11:35 GMT 1
Sidestand fabricated this weekend in between lots of sanding of the fairings. 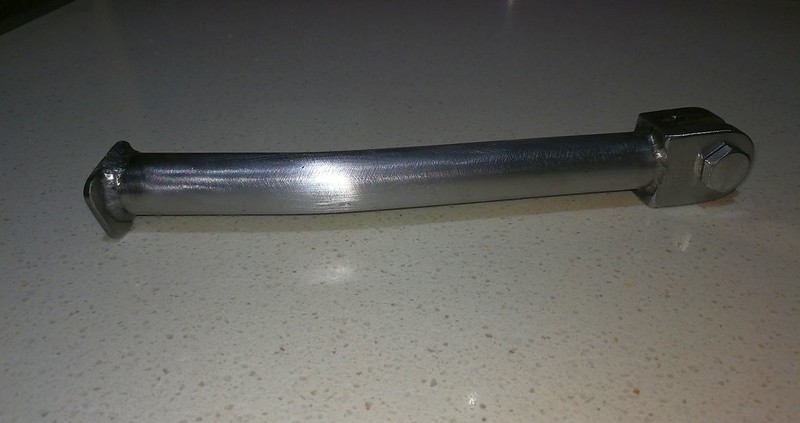 Here's the planned paint scheme. 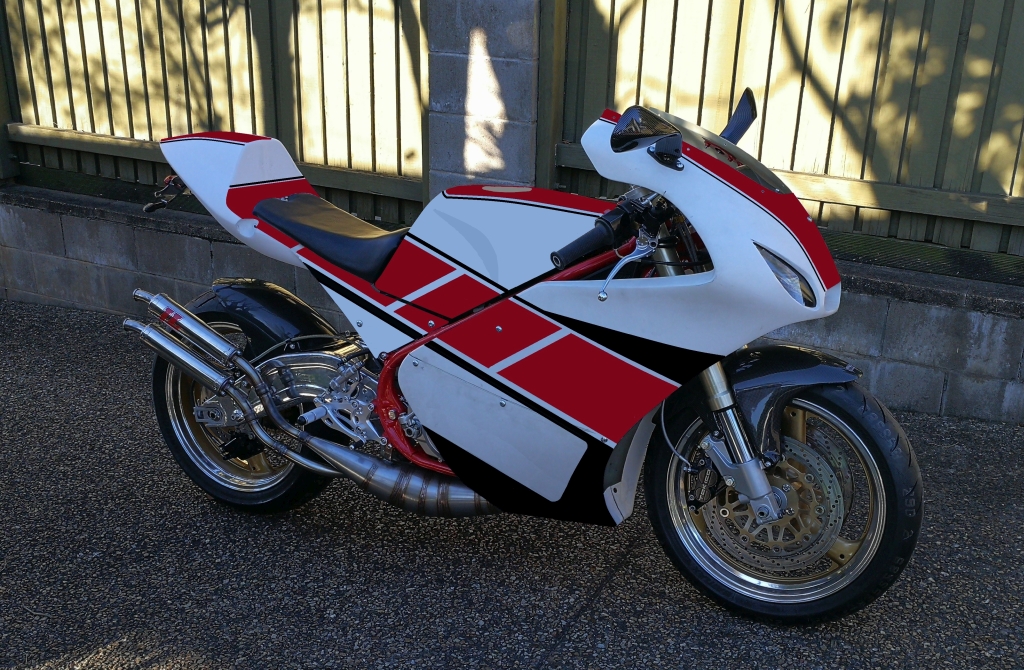 |
|
|
|
Post by dusty350 on Aug 13, 2017 12:38:18 GMT 1
Hi Wow, that is looking stunning I'm not a fan of fairings but that looks wicked ! And the paint scheme really suits it. Really great build - a credit to you  Dusty |
|
|
|
Post by phil1rowe4 on Aug 13, 2017 13:39:34 GMT 1
Thanks Dusty,
It's only photo-shopped at this stage, but a lot easier to make decisions and changes on the computer than in the paint booth.
There will be some Yamaha decals as well but the paint program isn't good at doing words
Phil
|
|
|
|
Post by marsbar350 on Aug 13, 2017 18:58:43 GMT 1
Thanks Rostrum, I appreciate the kind words.
Since I'm heading towards the painting stage I've been busy finalising the paint scheme in my head. After probably 20 variations done in pencil drawings and computer drawings I've landed with a paint scheme that I really like. Do you want to see the final idea or wait until its finished?
I've also been a little distracted by a bike I saw at a price I couldn't resist, so I bought it. Might convert to a Lucky Strike colour scheme to match all my other red and white bikes! My missus is now calling me Angelina Jolie for adopting all these stray bikes
keep the colours as they are phil.gaz eyrey has a shell suit to match that  very 80s-90s colour scheme the lucky strike pepsi schemes been done to death how much was it  |
|


