|
|
Post by phil1rowe4 on Apr 11, 2017 14:49:33 GMT 1
Hi,
I'm new to the forum, so should probably start with an introduction.
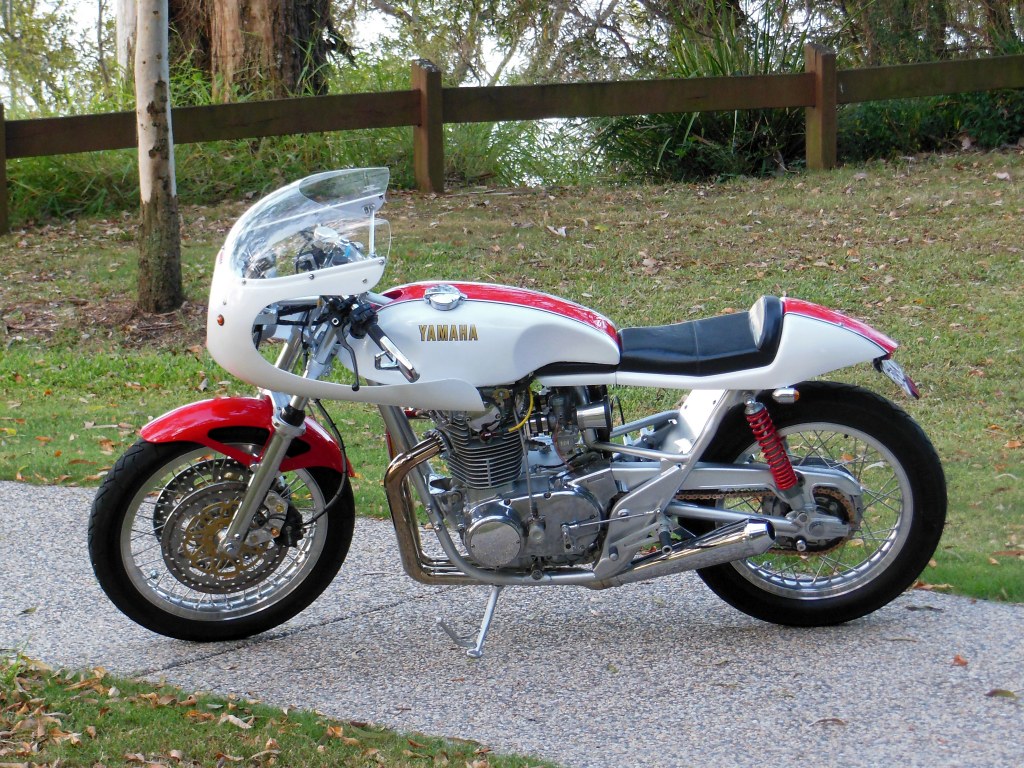
I've been riding since the late 70's and bought a brand new RD350LC back in 1980. I had an absolute ball on it until the magistrate told me to sell the bike or lose my license! Since then I've had lots of different bikes including an XS650, XS750, GS1000S and XJ650 back in the day. Even did some road racing on an RD400. Nowadays I've got a few bikes including an Aprilia RSV1000R, GSXR1000, SV1000 and recently rebuilt XS650 café.
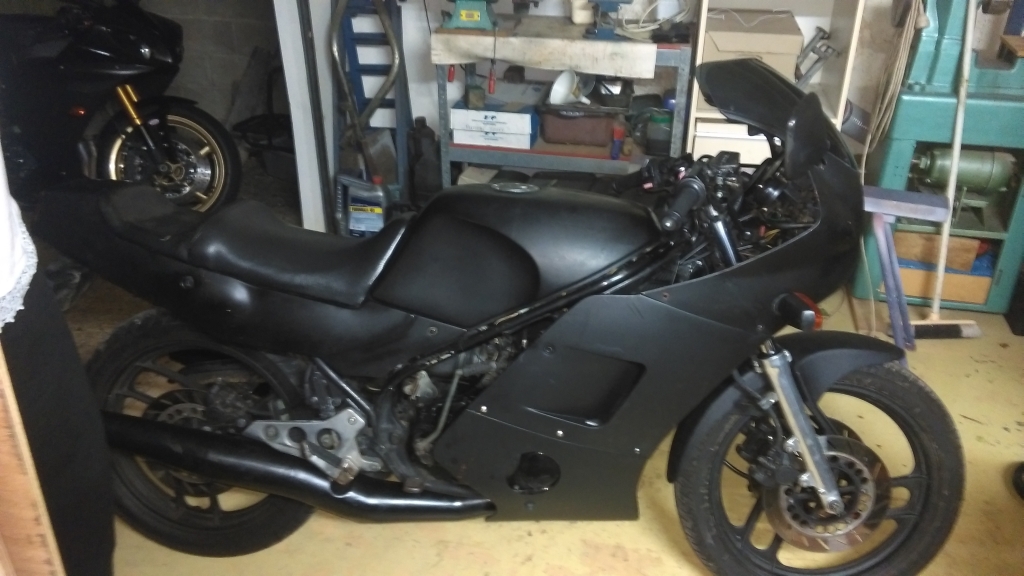
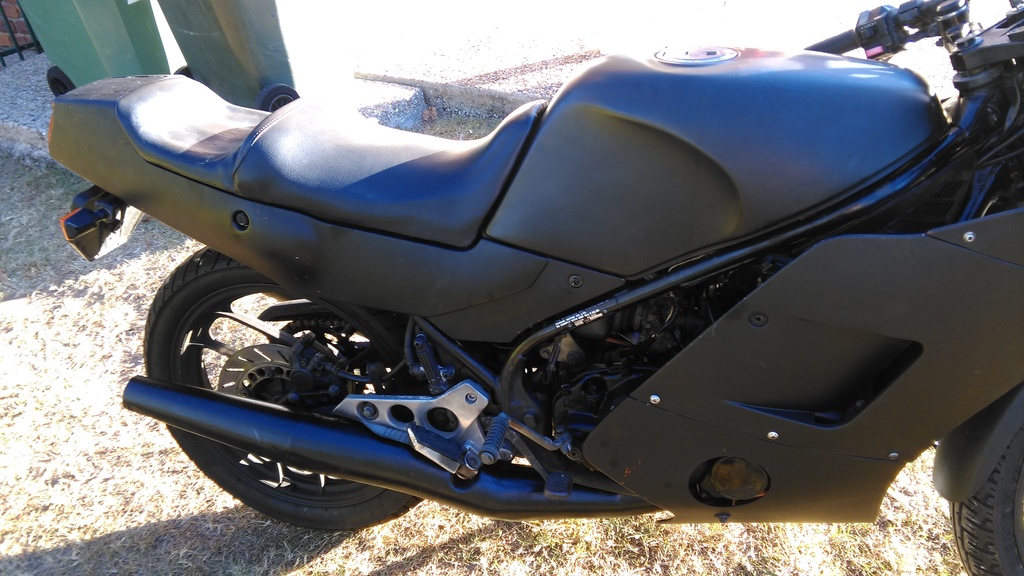
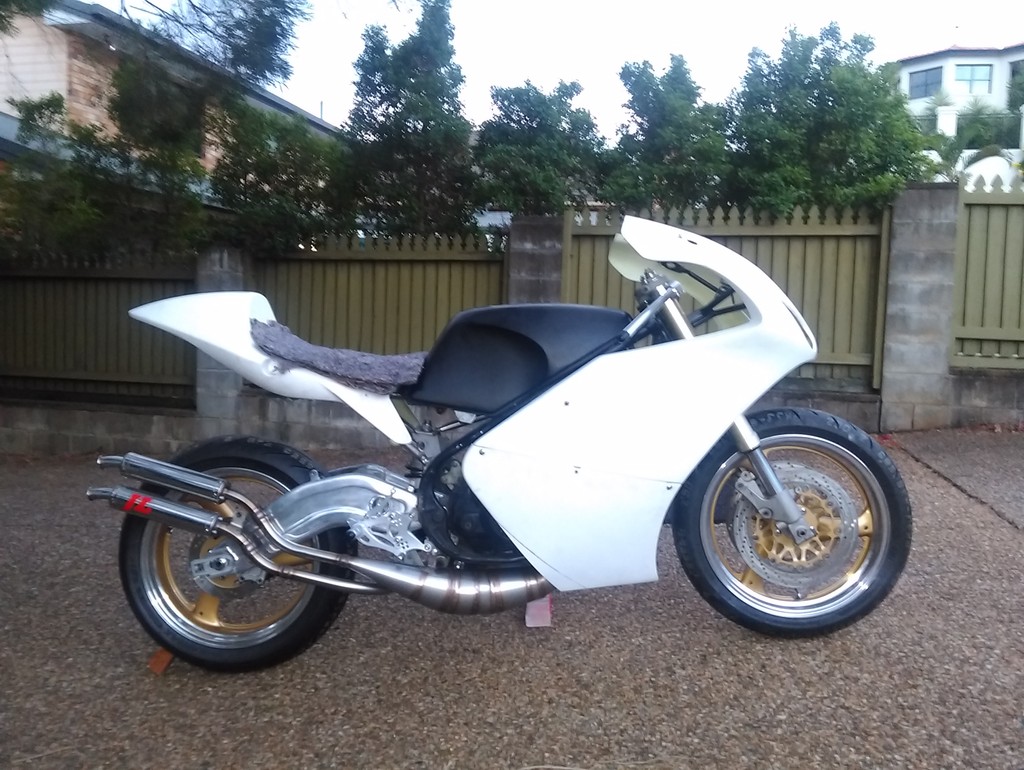
About a year ago I decided that it was time to re-live my fun times on the RD350LC, but they are rare and expensive now and so settled on a very tired old RZ250 with a 350 motor fitted. It was looking rather tired and only ran on one cylinder so was a good candidate for the hybrid project I had in mind.
Pic of XS650 café project build (Yes I know its a diesel!)
Before shots:
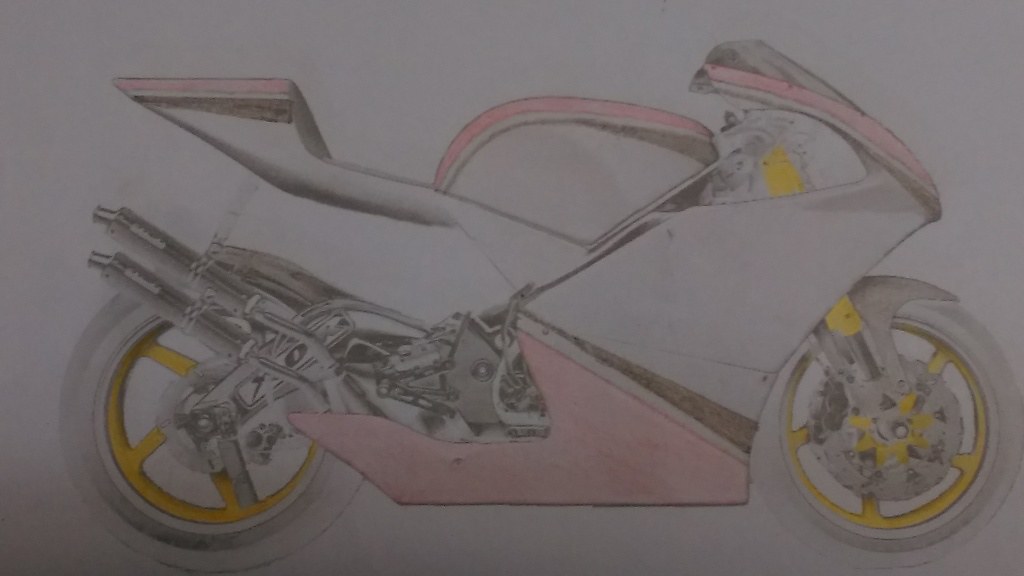
Concept idea
|
|
|
|
Post by phil1rowe4 on Apr 11, 2017 14:57:23 GMT 1
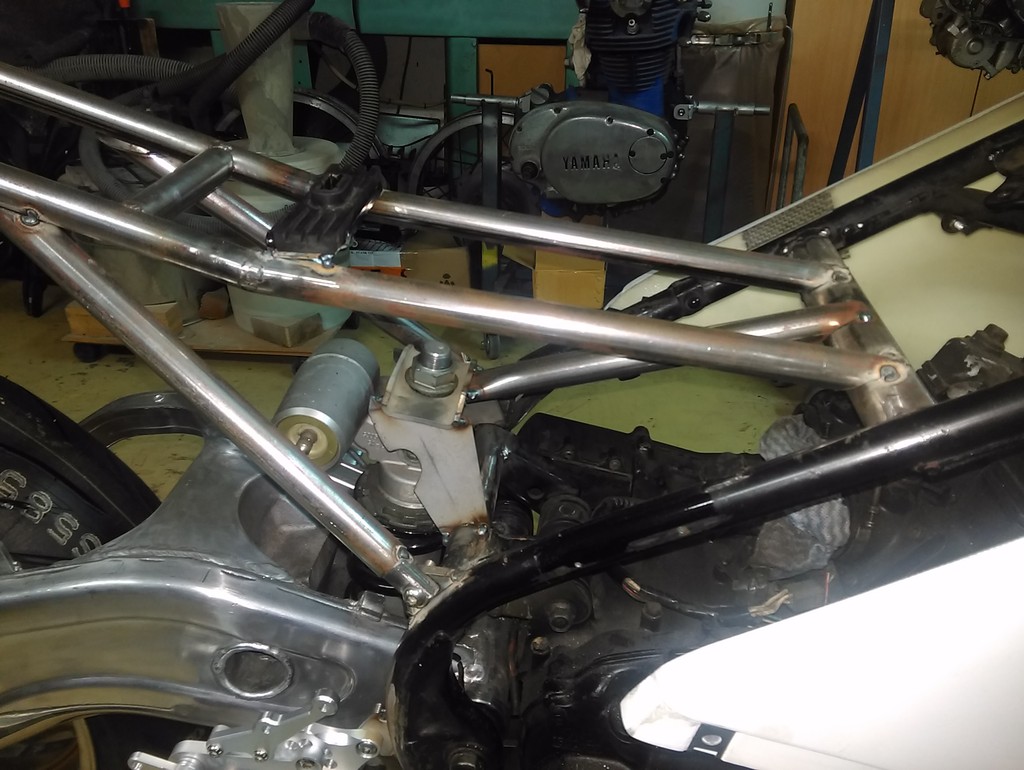
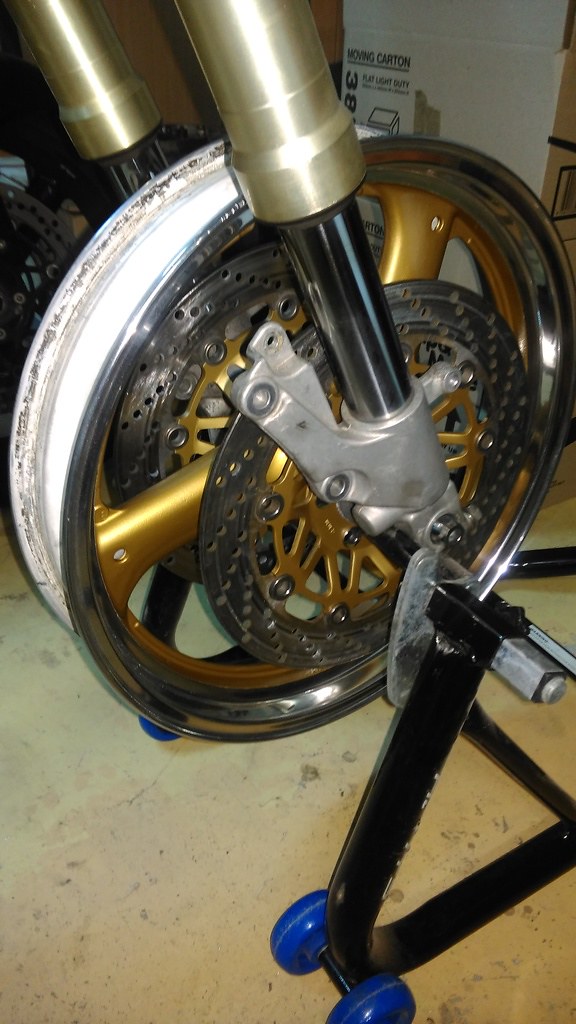
I managed to find the suspension, wheels and brakes from an 1990 RGV250 and so the build was on.
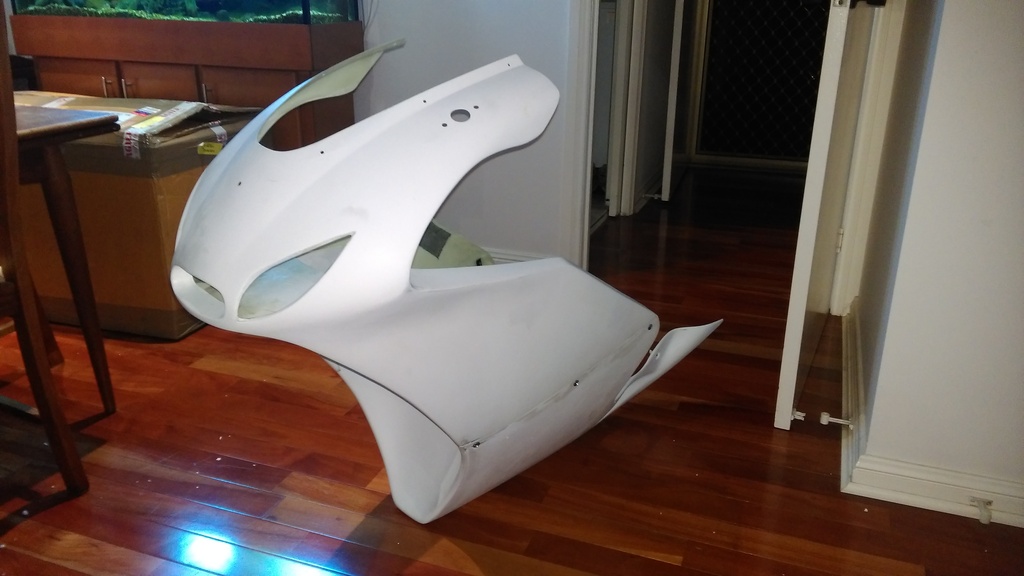
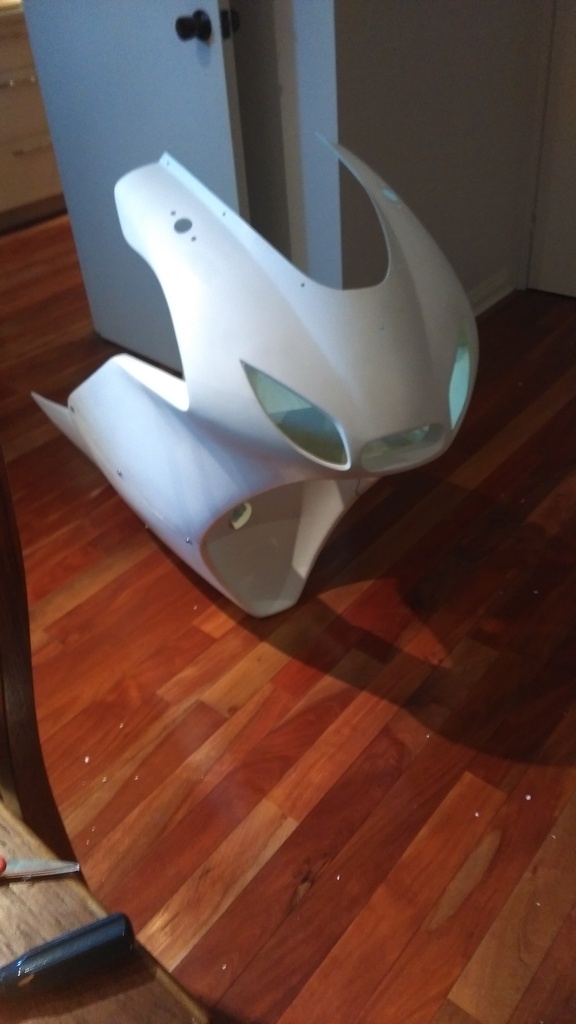
I also got an Aprilia fairing from Tyga and a Honda 125 racing tail section and some other goodies.
This got me to a basic rolling chassis fairly quickly ( and visually the changes are much slower now!)
|
|
|
|
Post by phil1rowe4 on Apr 11, 2017 15:26:26 GMT 1
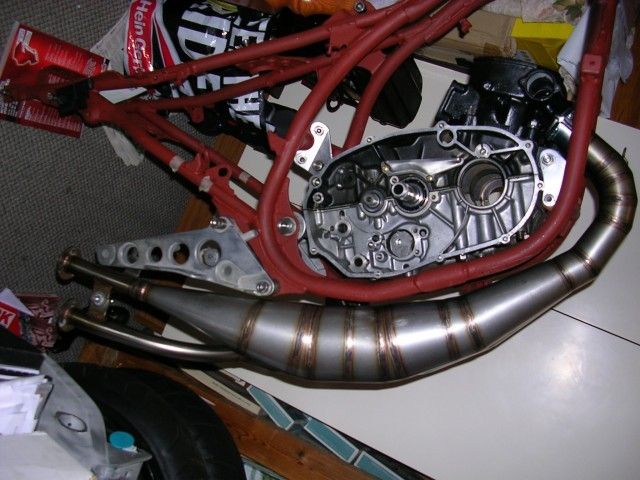
I wasn't happy with the rear suspension so ended choosing a GSXR600 rear shock that then needed the top mount moved up to fit better. (I've seen others with an R6 rear shockie but I couldn't get the clearance I needed so the longer GSXR unit worked better) I planned to chop the rear sub-frame out to make a new bolt-on one for the Honda tail section so next was some chopping and fabricating.
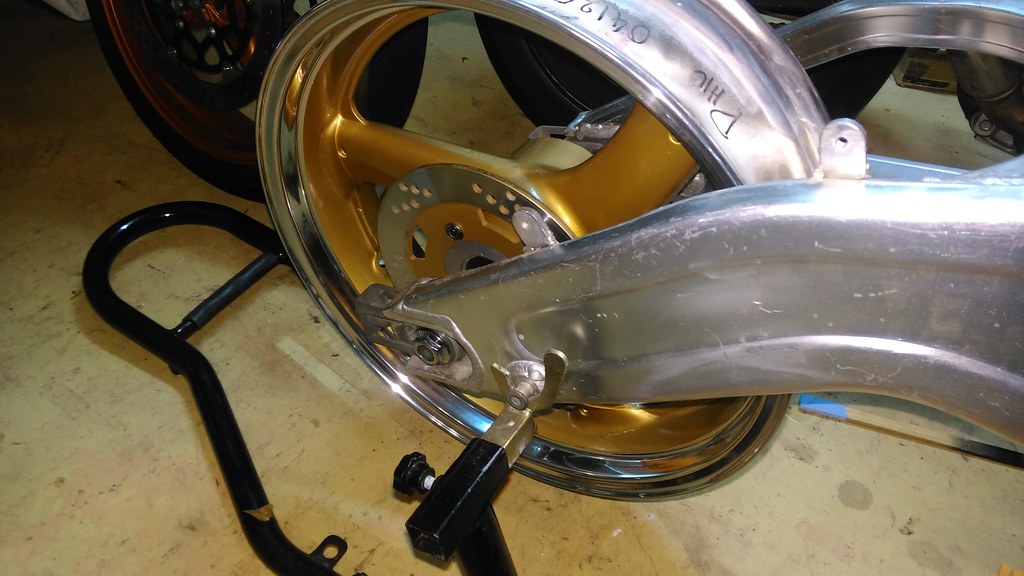
Some JL GP style pipes and rearsets came next and roughly fitted up. Next to go were the white wheels, so after much scrubbing and paint stripper, I finally got back to bare metal, repainted the wheels and polished the rims. The rotor inners were also repainted to match.
The tail section then needed customising to fit up to and align with the tank, so I split it down the middle, widened it, added a section to meet the tank and added sides to cover the space under the tank. I also turned up some inserts to weld into the subframe to take the mounting bolts.
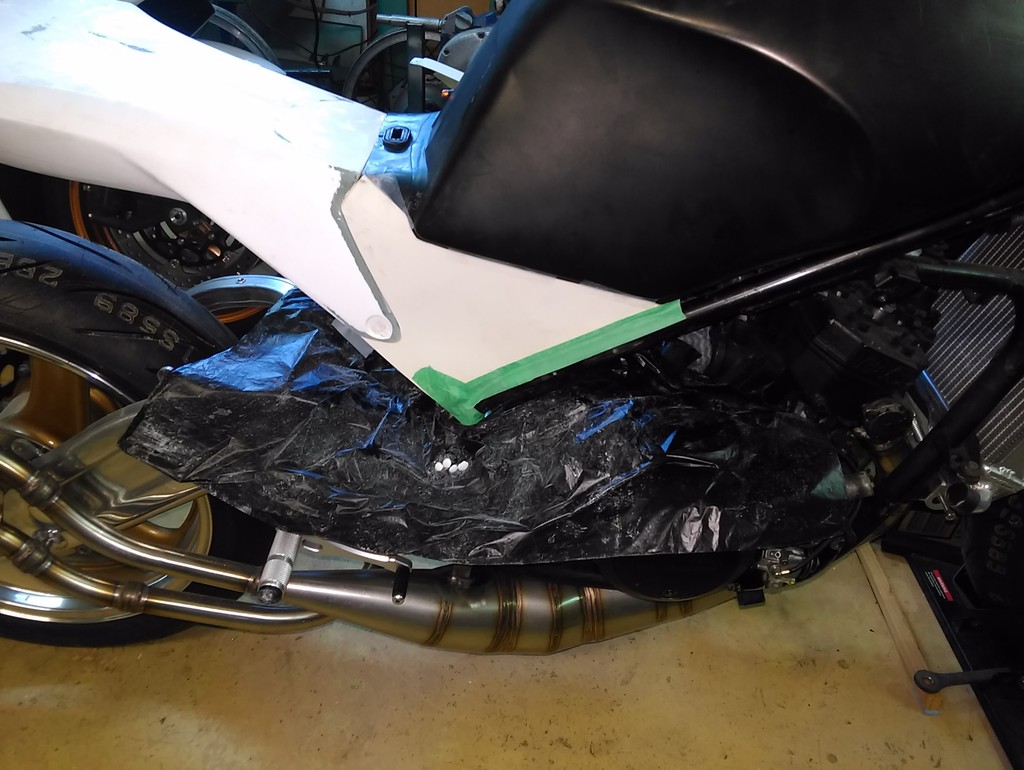
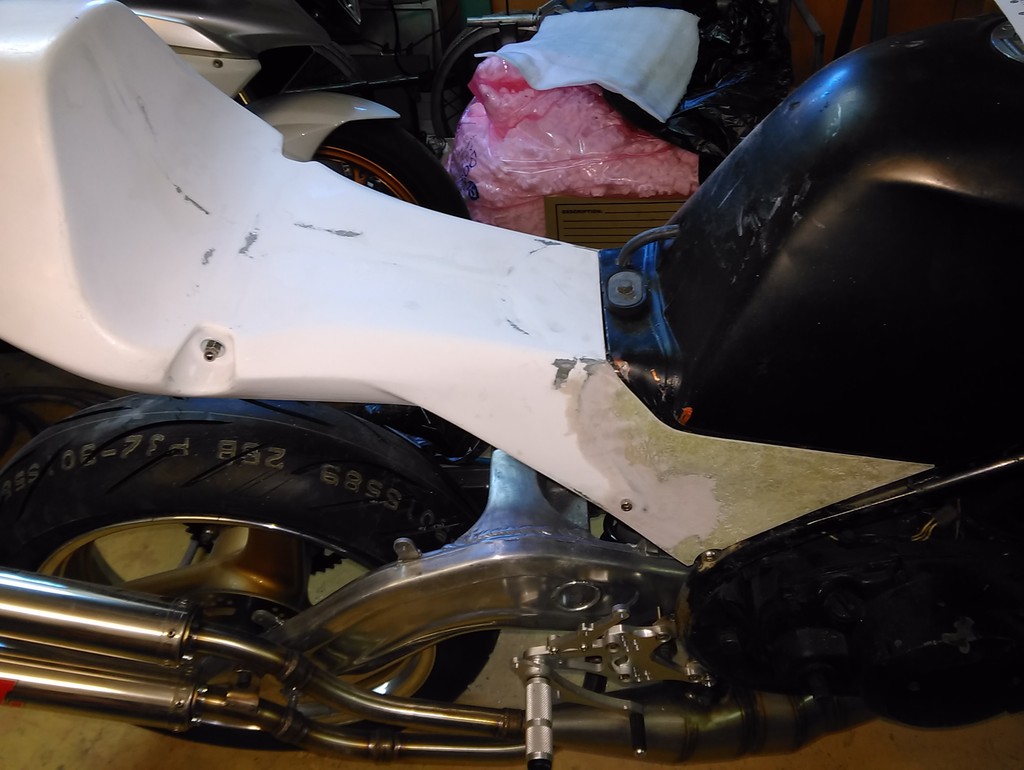
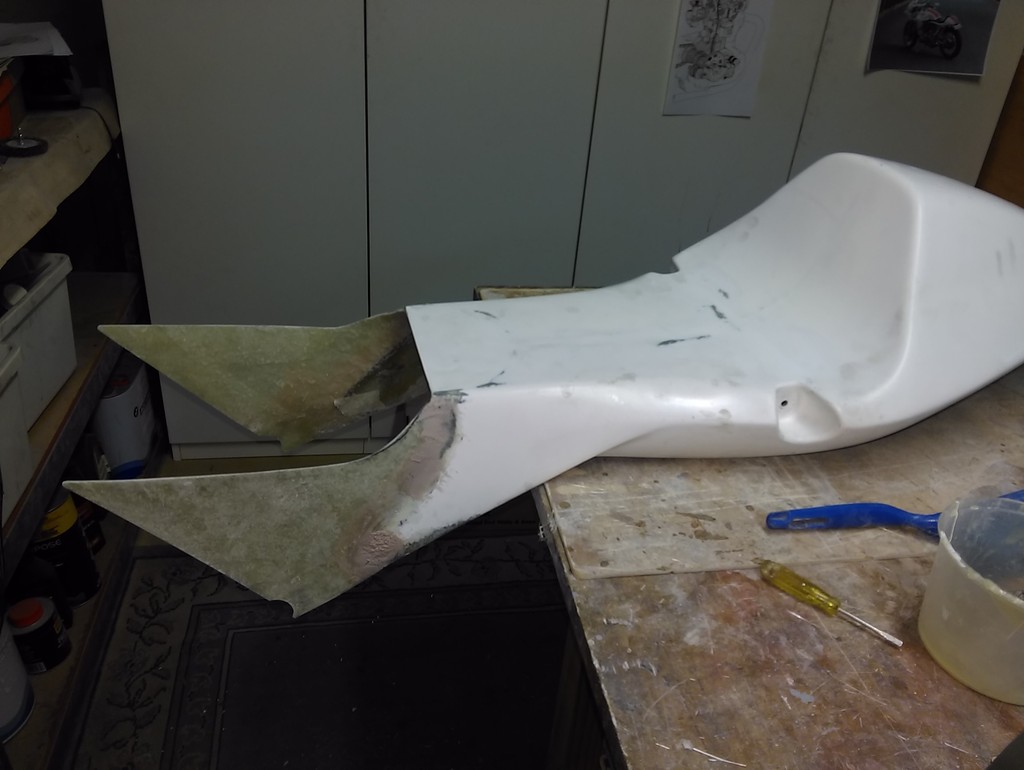
Next was a cover to fill the gap under the seat to clean up that area. Started with a foam plug which was then shaped and glassed with an inner flange to take some plastic fairing plugs.
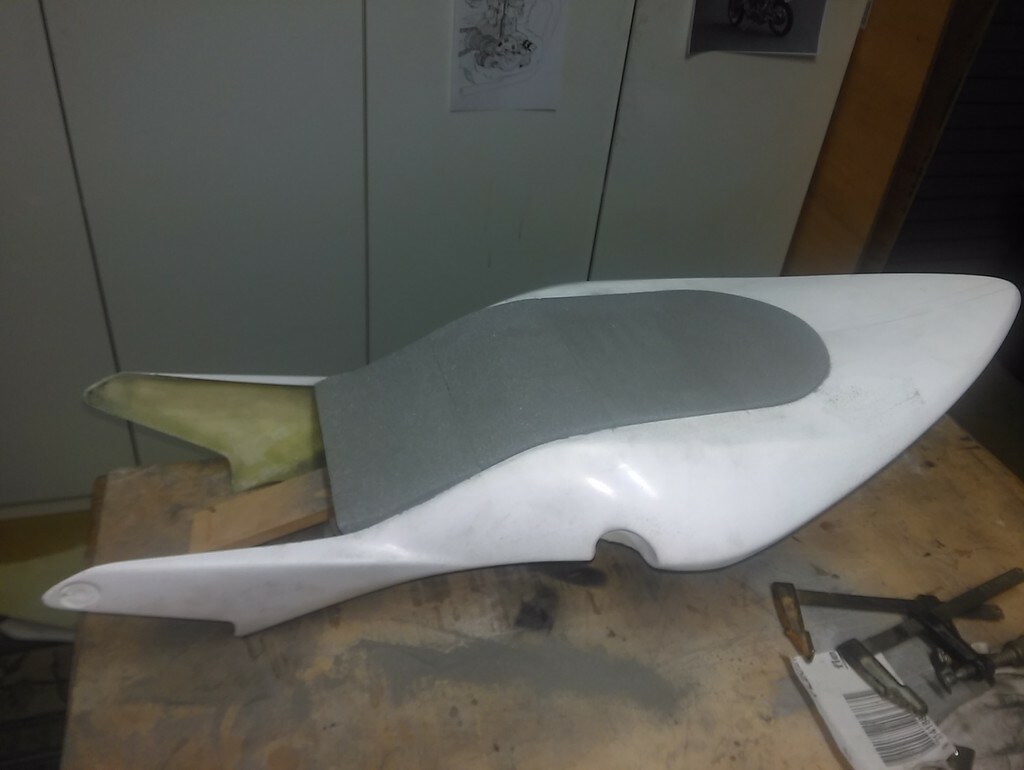
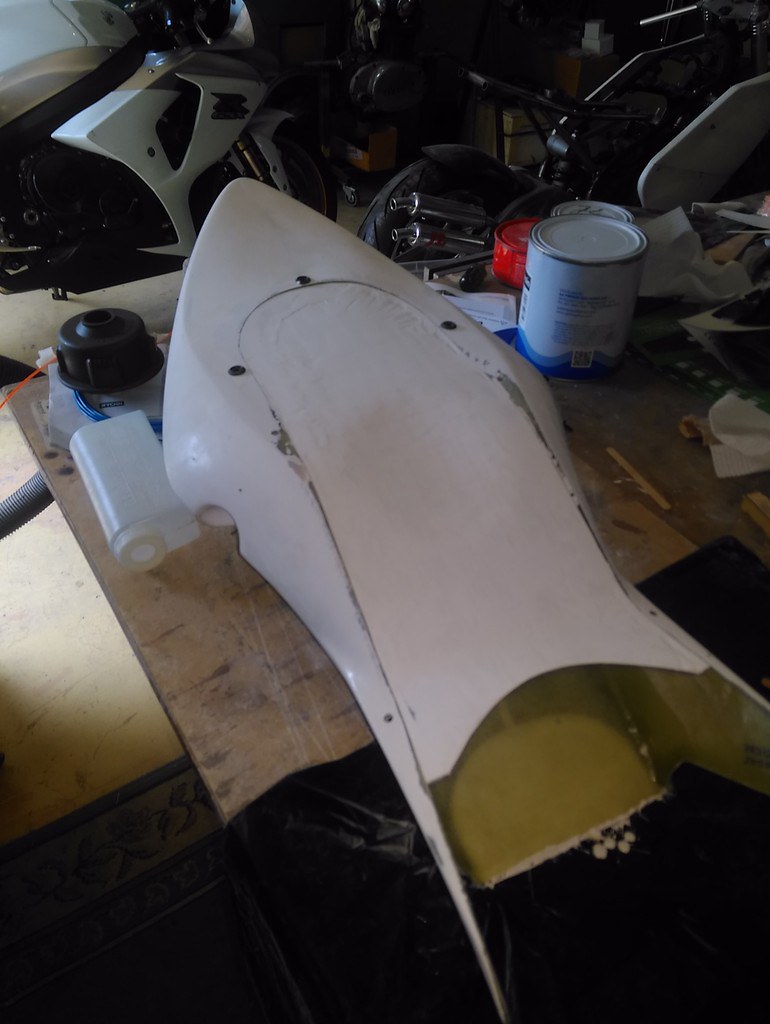
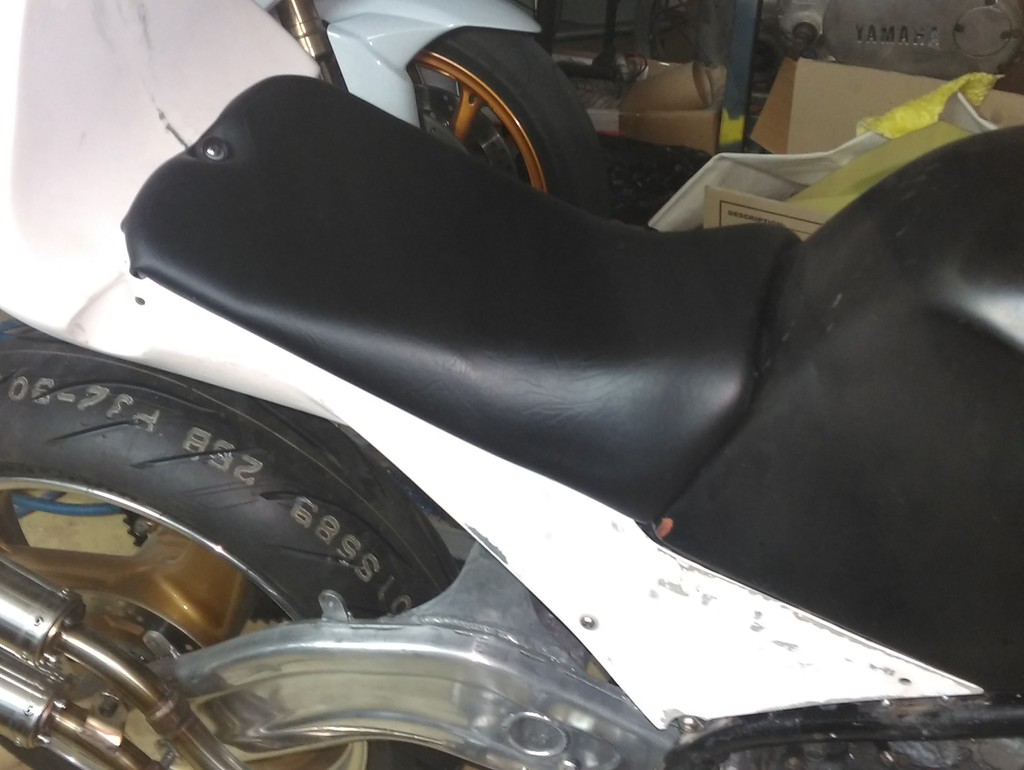
The seat pan , padding and seat cover have now been finished too.

|
|
|
|
Post by phil1rowe4 on Apr 11, 2017 15:36:05 GMT 1
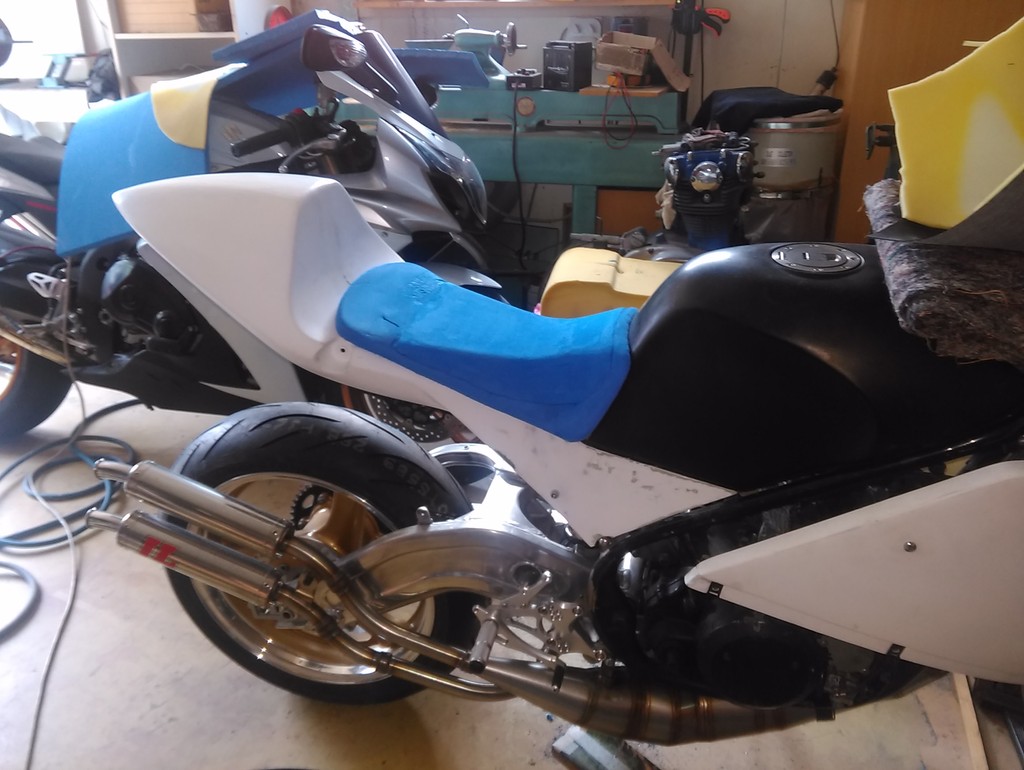
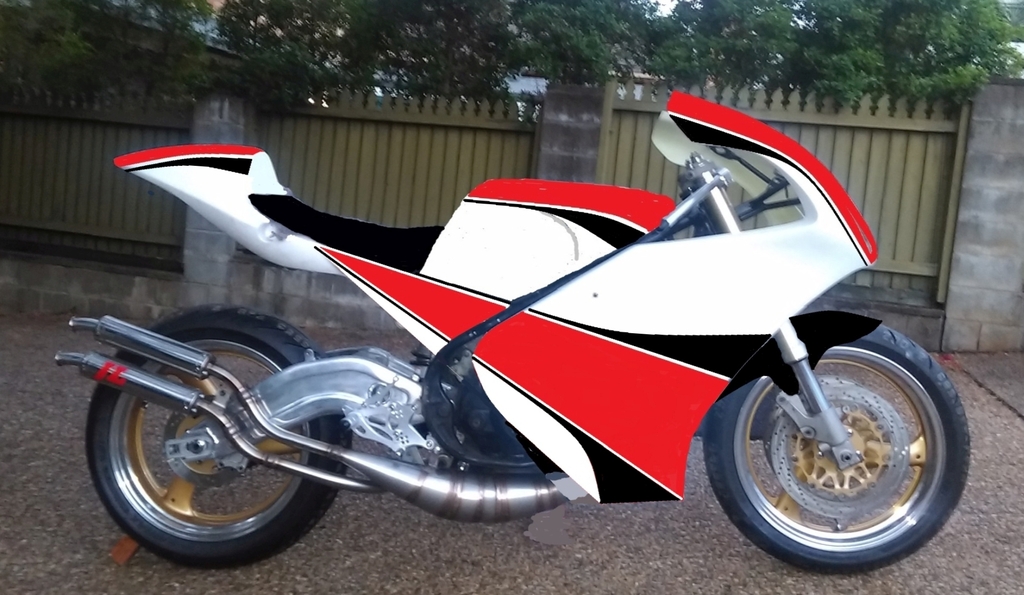
Somewhere in all this I took it outside to look at it from a distance and see the overall look. Also played around photo shopping a possible paint scheme.
|
|
|
|
Post by headcoats on Apr 11, 2017 16:00:00 GMT 1
I have some of those Lomas pipes second hand and the previous owner shortened the stinger section as they are feckin long and loopy
Could even have the end cans stick out at different angles , TZ style
|
|
|
|
Post by phil1rowe4 on Apr 11, 2017 16:18:14 GMT 1
This kinda brings me to the present day and the next challenge: the engine! (this is where I'll probably need the knowledge and experience of the collective brainpower of the forum)
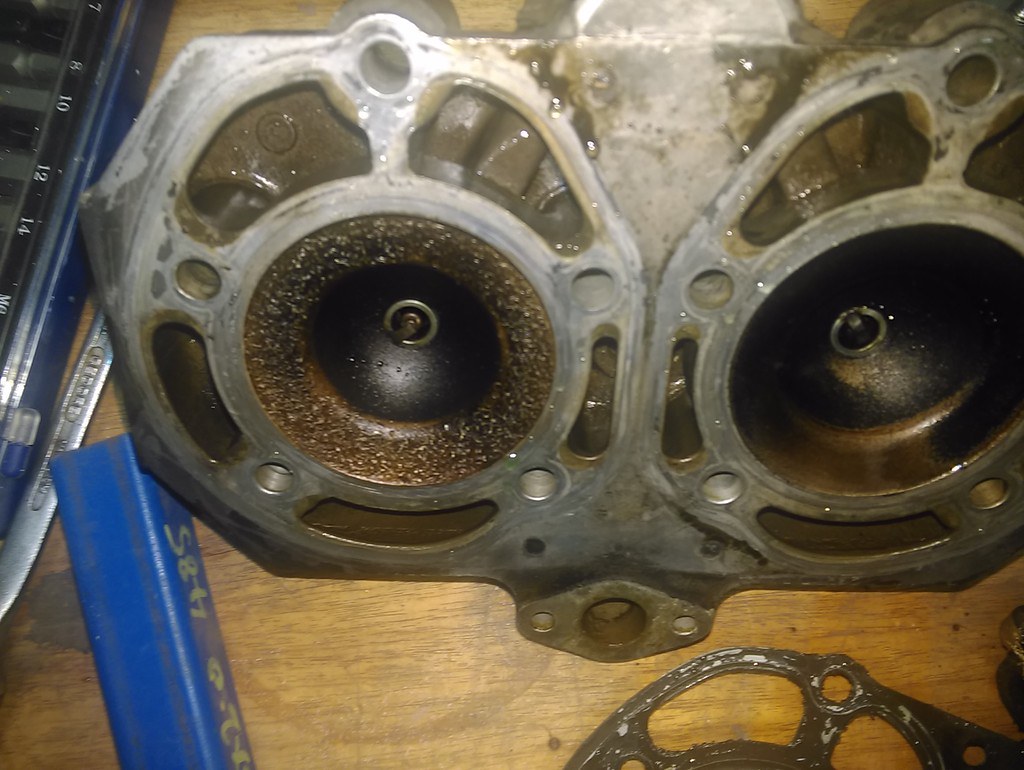
The engine was pretty sad looking and although it started and ran, it wasn't happy at all.
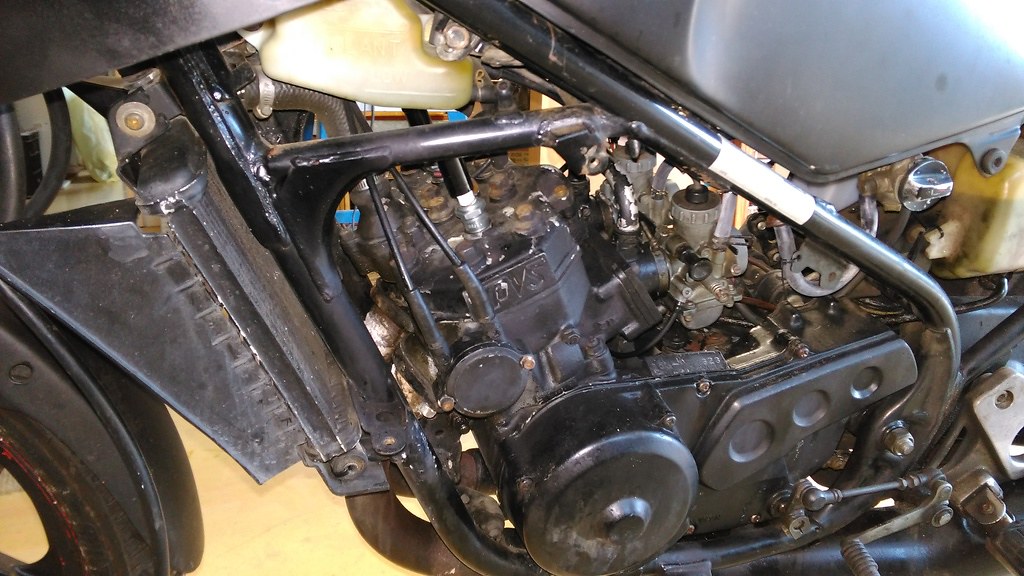
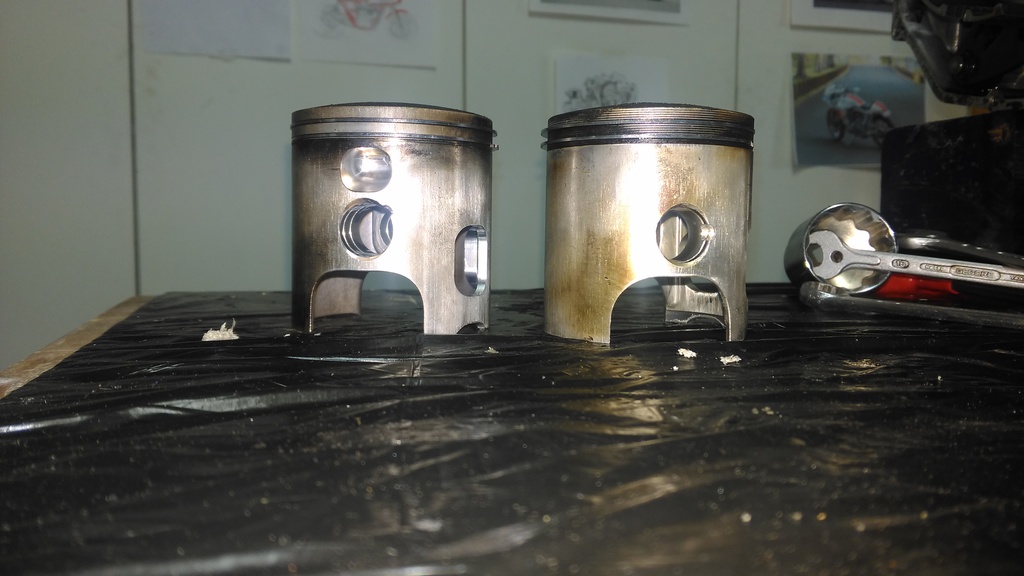
After pulling the head off I found considerable damage from, what looks like, a previous big end bearing failure sometime in the engine's past. The confusing part was that both pistons looked fine (?) until I pulled the barrels off to find the pistons were different?? Evidently someone had repaired the damaged piston and big end bearing/s and left the head as it was, so I was a bit nervous about any other shortcuts that might have been taken with the previous motor rebuild.
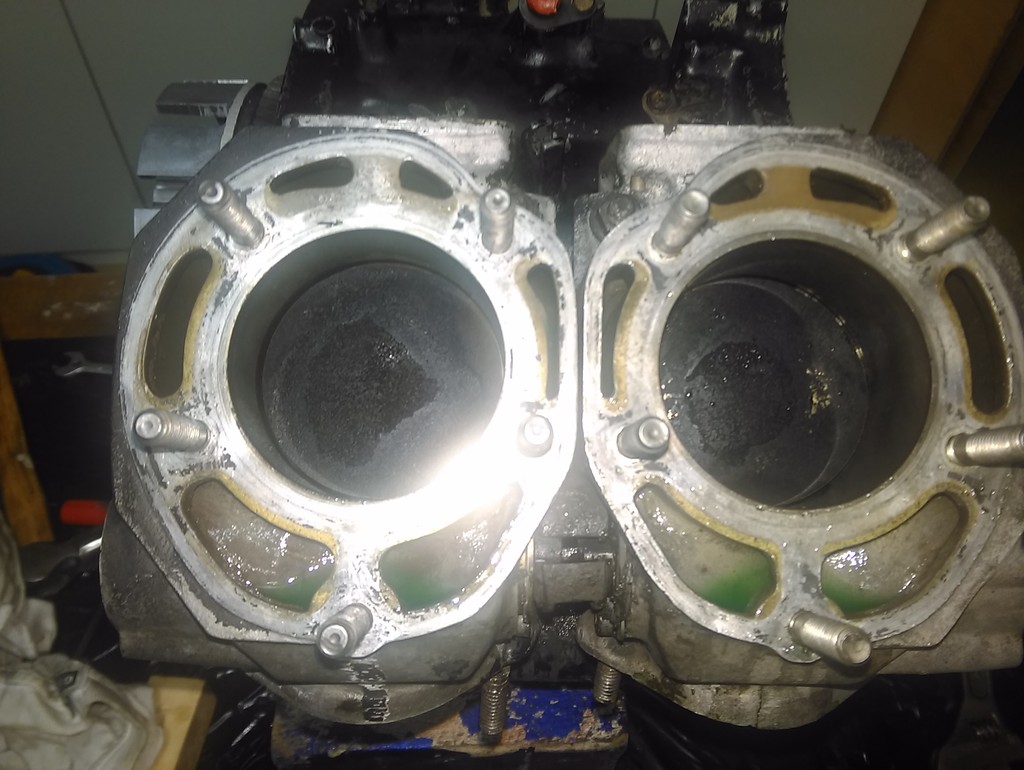
This brings me to present day where the barrels have been checked by an engine shop and the course of action is to bore the barrels out to 65.5mm (after the ring gap was found to be .9mm), fit a new set of pistons and replace the head with a Cool Head from Norbo. Crank and bearings seem to be ok and the conrod play is well within spec, so I think the crank should be ok. I'll measure it up to see if there's any bend/twist. Top and bottom cases are off being vapour blasted and new pistons and power valves ordered from the US along will all new seals, clips, tab washers and gearbox bearings. ( The Power valves were a mess and badly worn at the joiner. They couldn't have been working in sync! ) Aluminium radiator, silicon hoses and a few other bits acquired or ordered as well.
I'm hoping to make it a fun, slightly tuned road bike so turned away from the full Athena route this time. maybe later 
So, that's been the journey for the last year and the fun continues. I hope to make a few friends on here and am happy to catch up with any Brisbane RD/RZ owners who are interested.
|
|
|
|
Post by phil1rowe4 on Apr 11, 2017 16:21:39 GMT 1
I have some of those Lomas pipes second hand and the previous owner shortened the stinger section as they are feckin long and loopy Could even have the end cans stick out at different angles , TZ style Hi Headcoats,
I plan to have the stinger sections bent upwards slightly cause they look a bit low. I had to hang them slightly lower to clear the longer suspension/shockie.
Interesting idea about the different angles...
|
|
|
|
Post by mouse on Apr 11, 2017 17:37:50 GMT 1
That is looking great! Like your fabrication skills
Mouse
|
|
|
|
Post by Eyrey1 on Apr 11, 2017 17:53:49 GMT 1
sorry bud but exhausts are awfull !
why are they that long ? should sweep up where the banana bend is on the swingarm
thats why they did it like that
only my opinion but thats why people post pics
i would change how they are
unless you like them ?
|
|
|
|
Post by Tobyjugs on Apr 11, 2017 18:10:43 GMT 1
Welcome to the forum.
Don't throw that original head away as it looks serviceable from the above pictures especially if your going to start tuning
|
|
|
|
Post by Yogi on Apr 11, 2017 18:56:54 GMT 1
Hi Phil Nice project you've got there As said the pipes are too long,I've shortened mine by about 3in  I still might lift them up at the back a bit Matt |
|
|
|
Post by headcoats on Apr 11, 2017 19:25:20 GMT 1
Mine must have been shortened by several feet then LOL |
|
|
|
Post by yamark on Apr 11, 2017 20:22:04 GMT 1
Hi Phil, Welcome to the forum mate. Great skill, vision and a great write up. Look forward to your progress.
Regards Mark  |
|
|
|
Post by phil1rowe4 on Apr 12, 2017 0:12:59 GMT 1
Thanks for the welcome guys.
Those pipes certainly created some feedback!
They are 'as delivered' from the supplier and I was intending to change them by angling them upwards but hadn't considered shortening them. They certainly look better shorter. Any excuse to pull out the TIG!
|
|
|
|
Post by Eyrey1 on Apr 12, 2017 0:34:40 GMT 1
Thanks for the welcome guys. Those pipes certainly created some feedback! They are 'as delivered' from the supplier and I was intending to change them by angling them upwards but hadn't considered shortening them. They certainly look better shorter. Any excuse to pull out the TIG! i would take the left hand pipe as your sat on the bike and take it over the top of the right hand pipe in the gap on the curve of the swingarm shorten them and have them swept up more i think they would look much better than they do now . |
|
|
|
Post by phil1rowe4 on Apr 12, 2017 3:48:33 GMT 1
Hi Phil Nice project you've got there As said the pipes are too long,I've shortened mine by about 3in I still might lift them up at the back a bit Matt That's a nice bit of kit. And I agree that the pipes look better shorter. Phil |
|
|
|
Post by phil1rowe4 on Apr 12, 2017 13:08:25 GMT 1
Hi Phil, Welcome to the forum mate. Great skill, vision and a great write up. Look forward to your progress.
Regards Mark Thanks Mark,
I just saw your RD500 thread and was amazed! Well outside my skillset.
Cheers, Phil
|
|
|
|
Post by dusty350 on Apr 13, 2017 7:20:18 GMT 1
Hi Welcome to the forum You are doing some great work there - it's gonna look lovely. And I really love your Xs650  Enjoy the forum Dusty |
|
|
|
Post by phil1rowe4 on Apr 13, 2017 9:50:05 GMT 1
Hi Welcome to the forum You are doing some great work there - it's gonna look lovely. And I really love your Xs650 Enjoy the forum Dusty
Thanks Dusty,
Yes, the XS650 turned out pretty well and has won a few 'first in category' at some bike shows. That was my first major bike rebuild and was 99% home done.
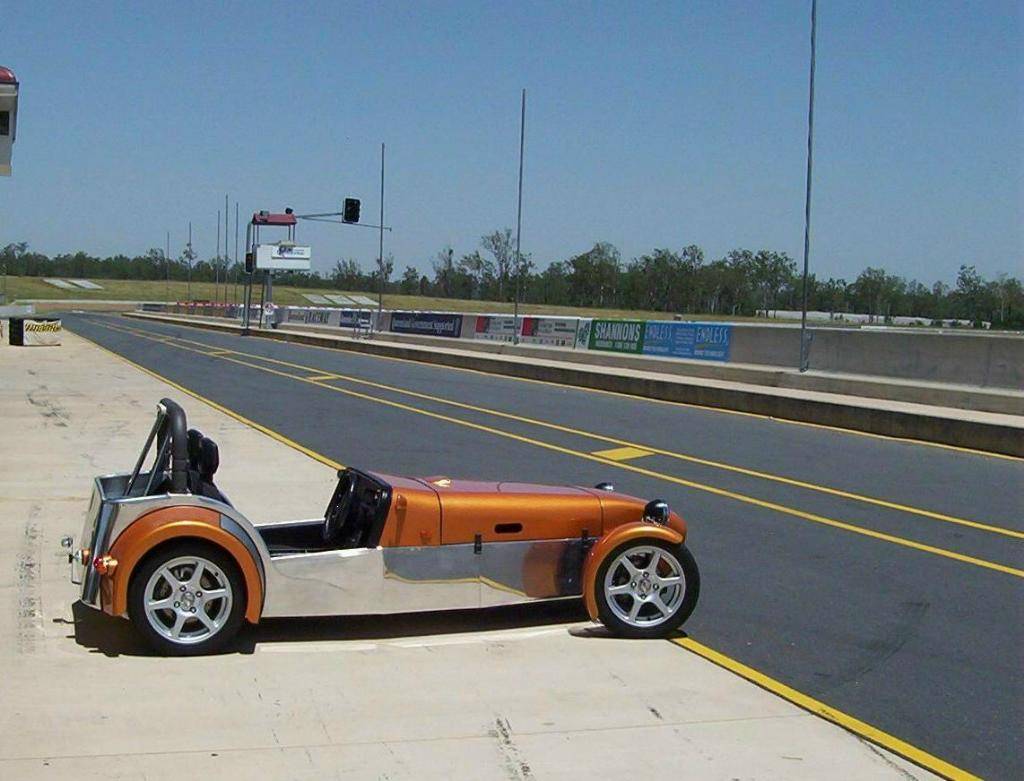
I've also built a Lotus Seven copy from scratch about ten years ago, but that's another story.
btw, I'm using your engine rebuild thread as my guide Thanks for your effort in making that thread.
Phil
|
|
|
|
Post by phil1rowe4 on Apr 15, 2017 3:19:05 GMT 1
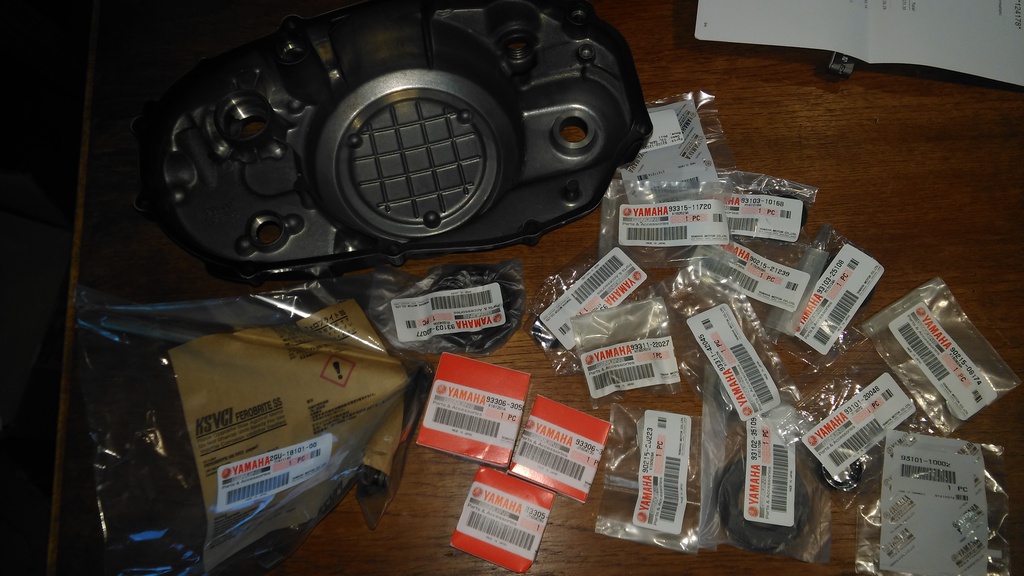
Some parts are finally arriving from O/S, but waiting for many more. It's great that parts are readily available for these bikes but a pain that they are all from overseas! I found the clutch cover had some major dents near the kickstart including one that had split the ali and would have leaked, so luckily was able to find a new cover.
Also starting to clean up and polish some of the engine bits in readiness for the rebuild.
|
|
|
|
Post by brg1200 on Apr 16, 2017 0:58:16 GMT 1
Great job
|
|
|
|
Post by iwantalc on Apr 16, 2017 9:33:30 GMT 1
looking good ,like the paint design but think yellow instead of red would be nice , only thinking out loud ,very nice build ..
|
|
|
|
Post by phil1rowe4 on Apr 16, 2017 11:29:31 GMT 1
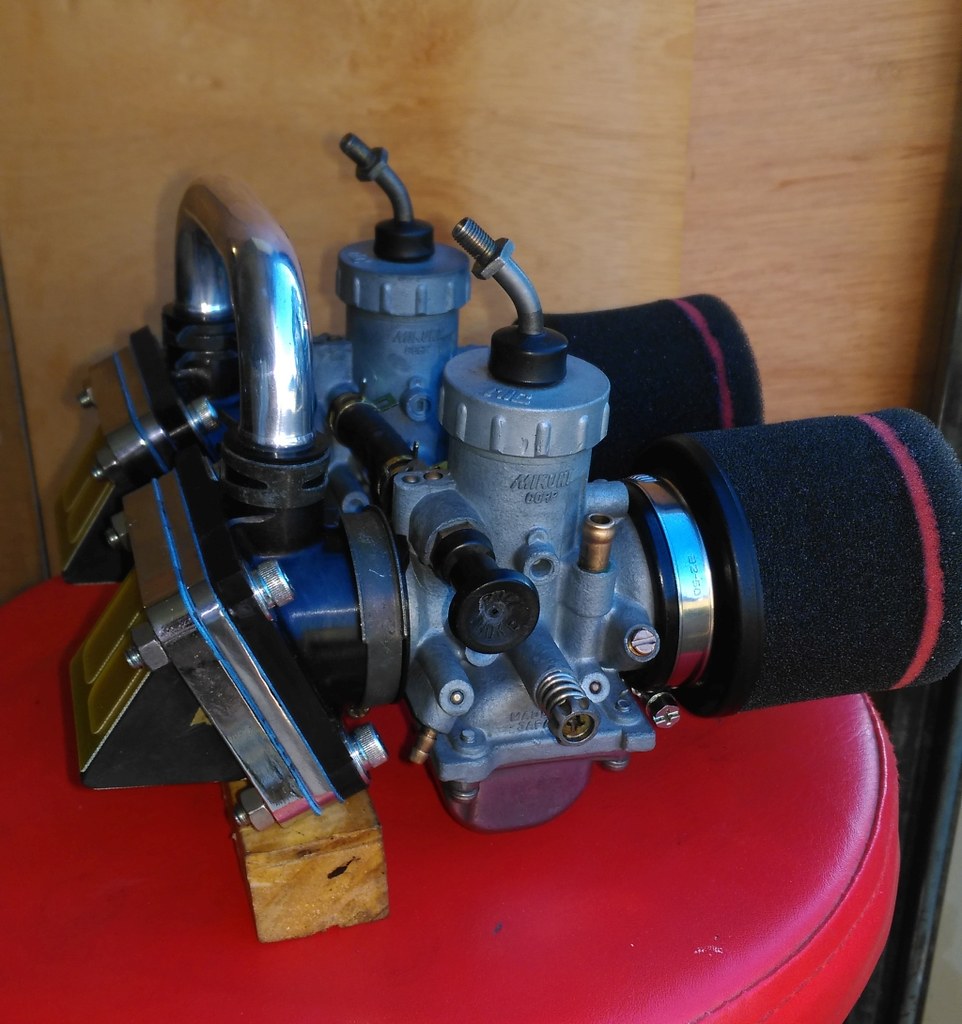
Spent the last couple of days going over the carbs. Stripped down, Ultrasonic cleaning and soda blasting followed by a wash, neutralisation (lemon juice!), air blast passages and reassembly. Polished the bowls a little just to clean them up. They were a bit of a mess but cleaned up ok. New gaskets and o rings now on order.
They are VM26's with 31K stamped on them, so seem to be standard carbs. Fitted with: 22.5 pilots 230 mains 2.0 slide 5K1 needle on clip 4 (1 being top and 5 being bottom) (Cant get 5K1 needles from Mikuni only 5L1 so don't know how different they are)
Do these pilots/mains sound ok as a starting point with pods and JL exhaust? (I'm sure there's tons of posts for me to search on carb settings!)
So, induction side cleaned up pretty well and ready for the rest of the engine. (might have to get a shiny strap for the carb/inlet side) Picking up the vapour blasted engine cases tomorrow
|
|
|
|
Post by tell7437 on Apr 16, 2017 11:59:39 GMT 1
What make are those reeds you are using?
|
|
|
|
Post by Tobyjugs on Apr 16, 2017 19:22:11 GMT 1
I think the 5L1 needle is more tapered so this would give you richer settings over the 5K1 needle.
What size needle jets are you using?
|
|
|
|
Post by phil1rowe4 on Apr 17, 2017 9:53:27 GMT 1
What make are those reeds you are using? Hi tel7437,
They are Boysen Reeds.
|
|
|
|
Post by phil1rowe4 on Apr 17, 2017 9:55:33 GMT 1
I think the 5L1 needle is more tapered so this would give you richer settings over the 5K1 needle. What size needle jets are you using? Hi tobyjugs,
I haven't pulled the needle jet out to see which one it is. I presume since everything else seems stock, that they are the stock needle jets.
|
|
|
|
Post by Tobyjugs on Apr 17, 2017 14:48:38 GMT 1
I mis read your comment. If the needles you have are 5K1 and standard needle valves P2 345. i would start with mains jets at 430 and pilot jets at 27.5 with the clip in the middle position. Be prepared to go bigger but it does depend on your tune.
To clean your carbs well i would also remove the needle jet
|
|
|
|
Post by phil1rowe4 on Apr 20, 2017 10:16:39 GMT 1
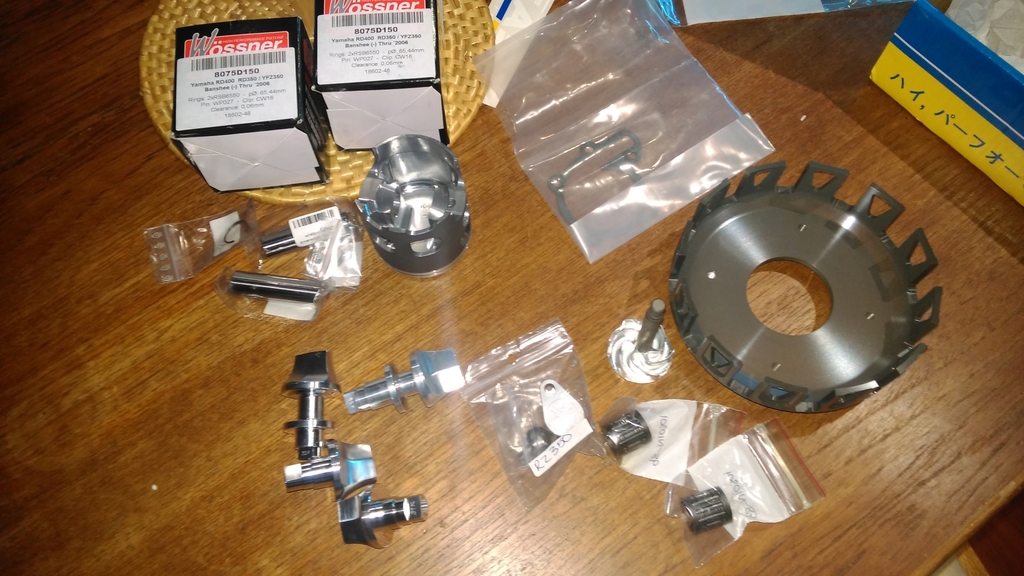
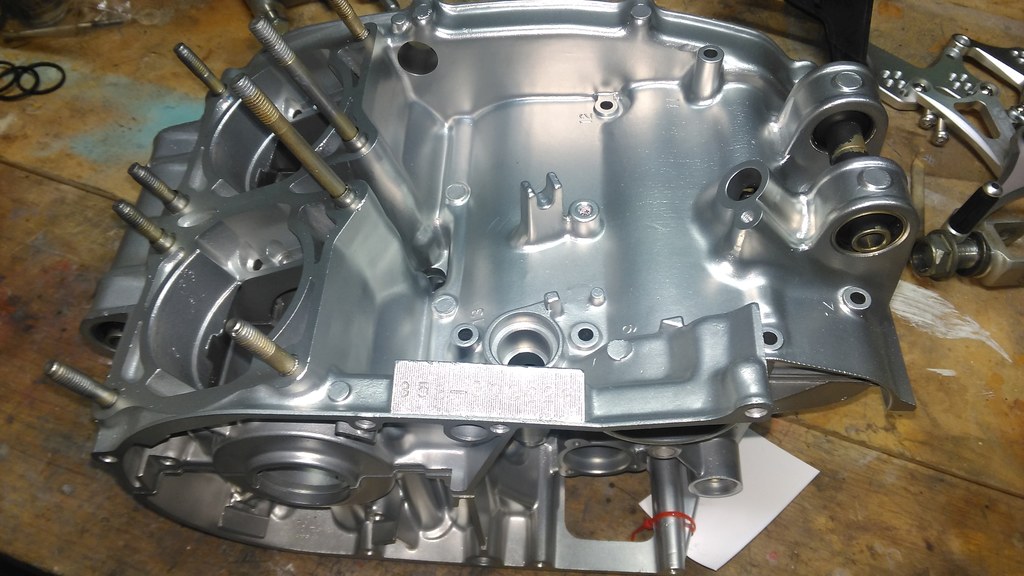
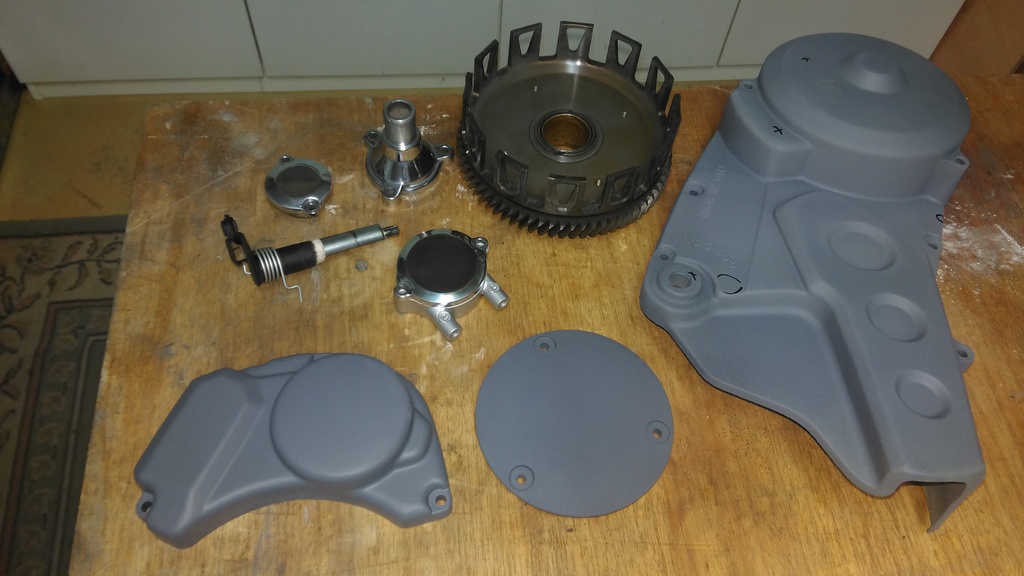
Parts are starting to roll in with the clutch basket, carbie bits, power valves and pistons arriving today. (better than Christmas!) Vapour blasted engine cases have also been picked up and are looking very pretty.
A few jobs I can get stuck into now: - Pistons can go off to the engine machinists to get the barrels bored to fit. - fit gaskets and o-ring in carbs - Original clutch basket replaced with new one - Wash out the engine cases and fit the clutch bearing to the top case. New, longer bush for the shifter shaft is on order from Norbo which should arrive in about a week, before I can start on the bottom case.
I've also started cleaning up the plastic engine side cases and prepping them for painting. Not sure how many others have painted the plastic side covers and have any tales to tell?? I'm looking to paint them silver to match the cleaned up engine cases and barrels, cause I'm too much of a cheap b*****d to spend a fortune on billet ali side covers. I'm planning to have an all silver engine. It seems a shame to me to black out the engine after all this work has gone into fixing it up.
|
|
|
|
Post by lb on Apr 24, 2017 10:14:01 GMT 1
Wow Phil thats quiet a project you've got going there,very impressive.
Where abouts are you based?
|
|


