|
|
Post by markhoopy on Nov 14, 2019 18:23:36 GMT 1
The Dremel 3000 I bought around eight years ago packed up yesterday .. ordered a new one from Amazon, free delivery, arrived this afternoon.
Five minutes use cutting an engine bracket off the NWS frame and it died. I'm not sure whether the EU or Corbyn are to blame but it definitely must be one or the other.
|
|
|
|
Post by steeley on Nov 14, 2019 20:22:48 GMT 1
Hmmm , maybe you should have got some thing from machine mart or tool station like an angle grinder . Just saying . Oh Nice Project by the way .
|
|
|
|
Post by muttsnuts on Nov 14, 2019 21:16:10 GMT 1
Mark, give me a shout if you need a custom radiator making, I have a local guy who makes all my radiators, he does a top job, I've got to get back on posting up some photo's of my projects and some of the trick stuff I've made or had made by my suppliers, my radiator guy is a master at making them, the one on my Mito is a work of art
|
|
|
|
Post by muttsnuts on Nov 14, 2019 21:16:40 GMT 1
BTW - project is looking good, give me a shout if you need any help or advice etc, you have my number
|
|
|
|
Post by stusco on Nov 14, 2019 21:42:56 GMT 1
The Dremel 3000 I bought around eight years ago packed up yesterday .. ordered a new one from Amazon, free delivery, arrived this afternoon. Five minutes use cutting an engine bracket off the NWS frame and it died. I'm not sure whether the EU or Corbyn are to blame but it definitely must be one or the other. My first dremel did about an hours work before it packed in ,it was from amazon they had a new one to me in less than 24hr I just sent the old one back in the same box but they are still lightweight crap |
|
|
|
Post by midlifecrisisrd on Nov 15, 2019 10:15:30 GMT 1
DVLA were happy for me to use it - it seems that Back Street Heroes readers have been doing a similar thing with lowriders or chops or whatever it is they put together for many years now, and as long as I keep hold of the donor frame it is perfectly okay to drill out the pop rivets holding the VIN plate to it and swap it over to the NWS frame. Unfortunately my GT had the sticker rather than the alluminium plate that some have Bit of searching and I have just had this pic sent to me of my new vin plate with my numbers getting posted today 😁 Cheers for the heads up with dvla on this Steve  |
|
|
|
Post by veg on Nov 15, 2019 10:54:40 GMT 1
The Dremel 3000 I bought around eight years ago packed up yesterday .. ordered a new one from Amazon, free delivery, arrived this afternoon. Five minutes use cutting an engine bracket off the NWS frame and it died. I'm not sure whether the EU or Corbyn are to blame but it definitely must be one or the other. Pmsl 😁 |
|
|
|
Post by markhoopy on Nov 22, 2019 21:41:44 GMT 1
Simon Martin aka Enid Puceflange aka Mr NWS had a regular column in PB magazine in the early 1990s. I trawled through loads of indexes of PB on ebay from around that time and bought four issues so I could refresh my memory on what he was building and why. Many of the frames he made were for the Sound of Singles race series, and as the frame number of the one I have here is NWSXBR followed by the date it was made it doesn't take a genius to figure out that it was from March 1994 and to suit a Honda XBR500 engine. Little wonder there isn't much room to squeeze a radiator in the space between engine and front wheel .. It's a ninety-minute clip but worth watching SoS here: Sound of Singles on YouTubeThe offset rear engine mounts on the YPVS cases meant the frame lugs had to be cut off so new ones can be welded in place. As there are no front engine mounts on the frame yet I had to ask my good friend Heath Robinson to build a skellington round the cases to get them square and level in the frame. The end result looks ridiculous but the cases are in place, square, level, and solid. Before the wheels, forks and swinging arm were removed from the frame a spare set of chain-damaged cases were set up level in it so this temporary front 'downtube' could be made. It gave a starting point on the front of the cases but not much else.  This length of box section tube was then fixed to the side of the cases and bolted to the swinging arm pivot to get the cases square in the frame. 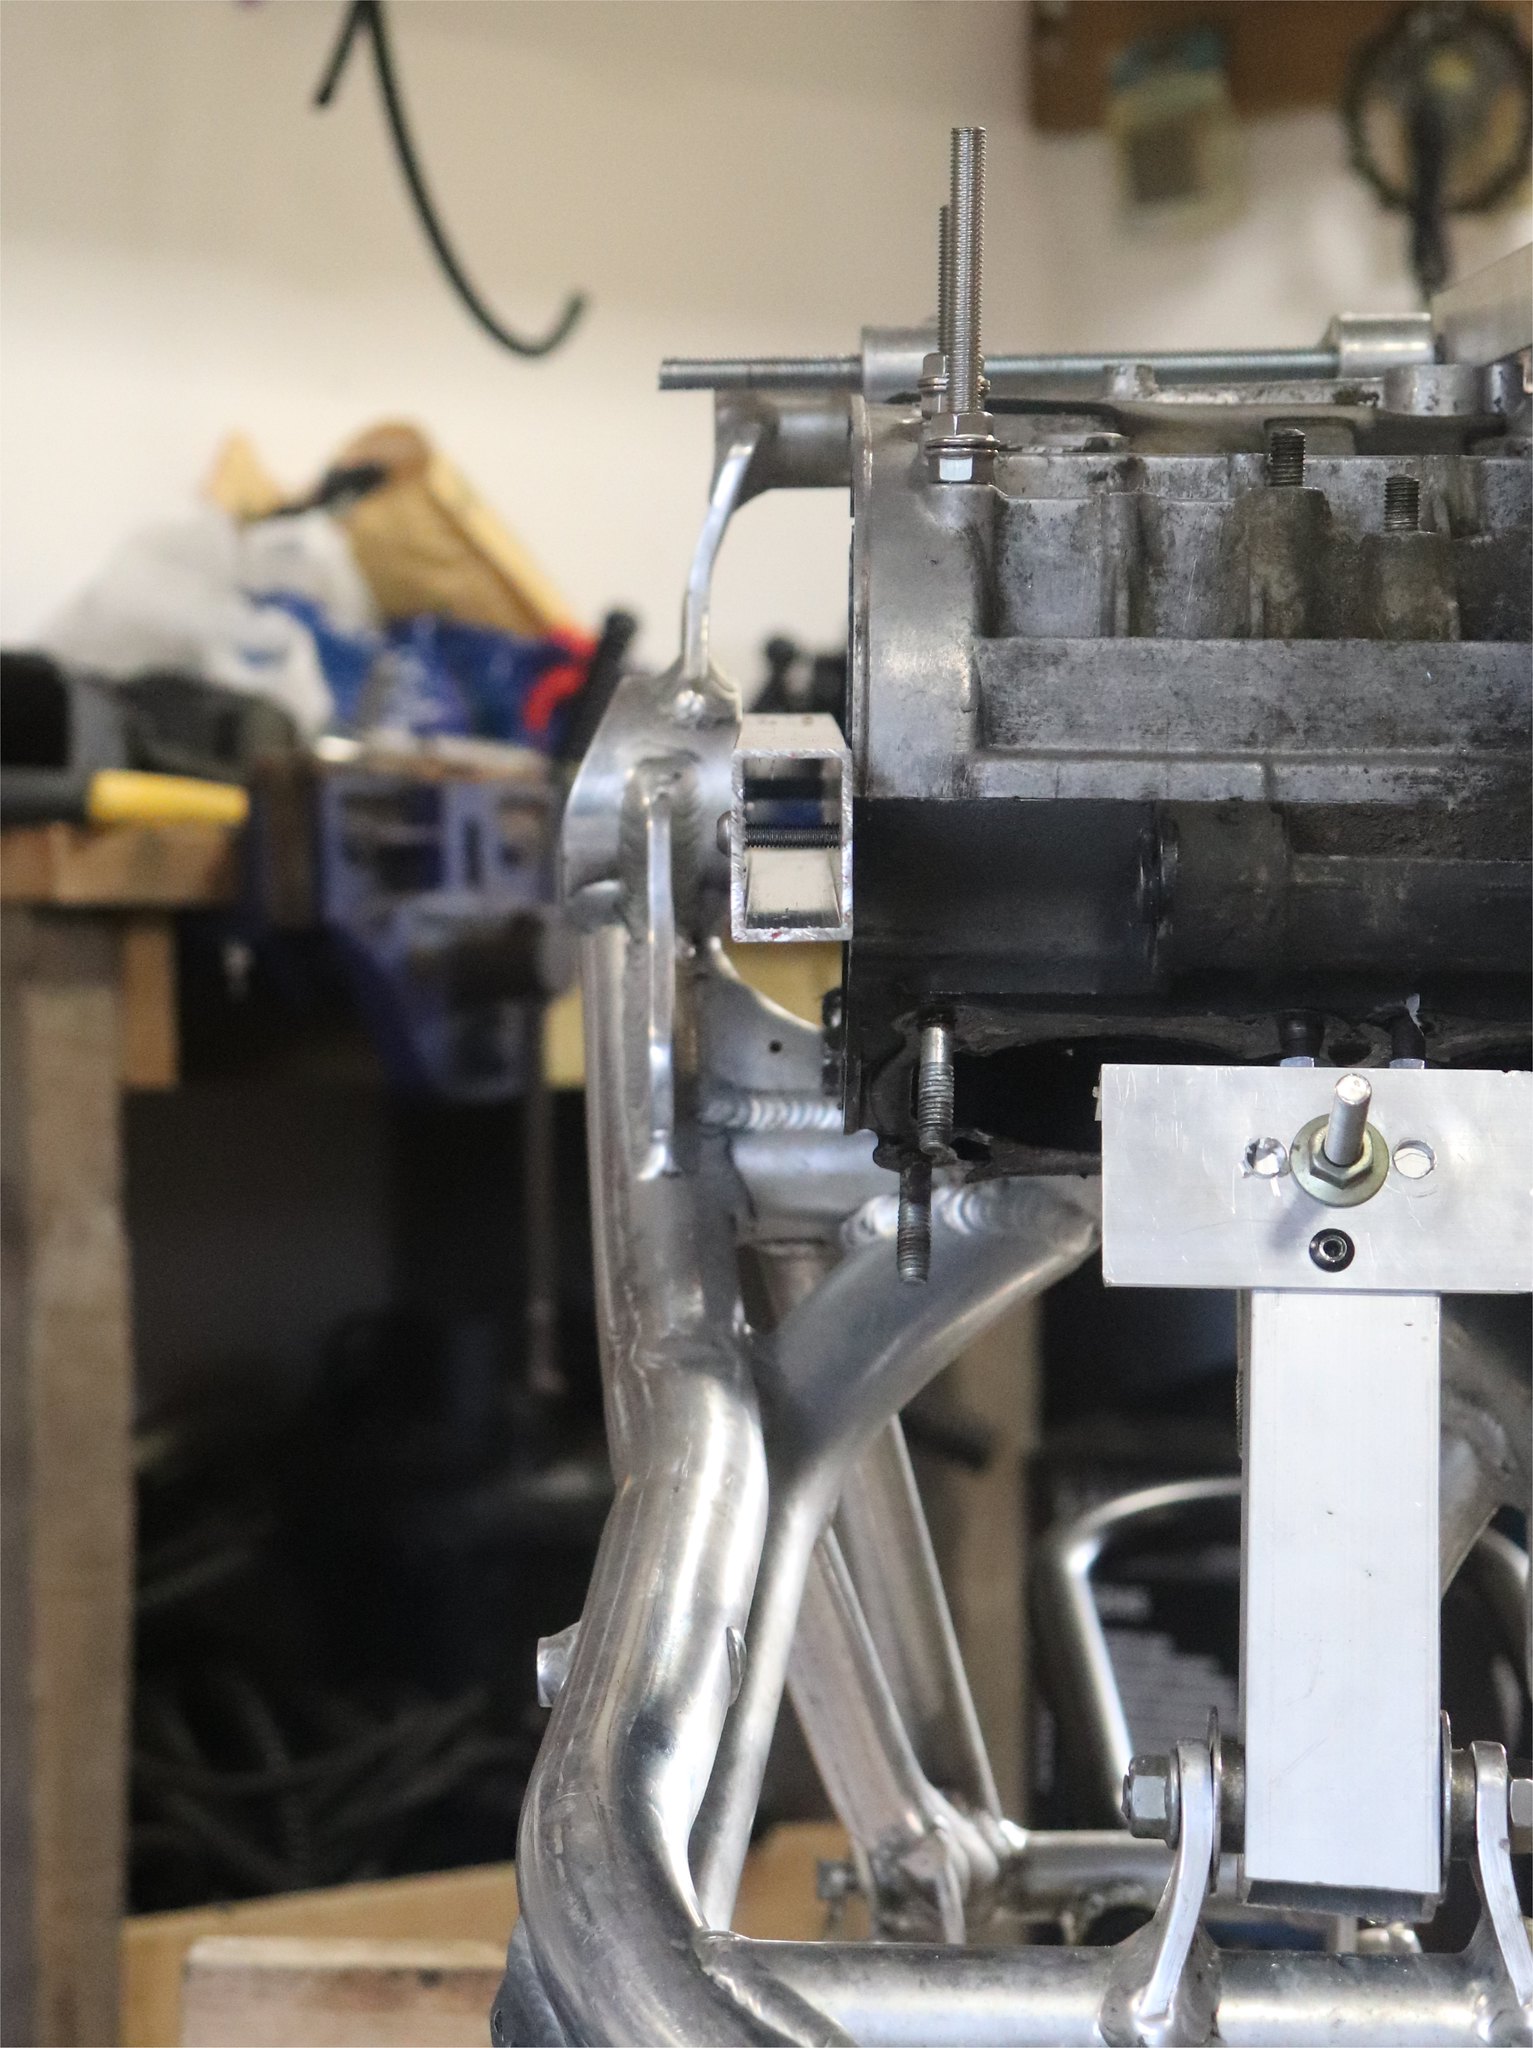 Studs to extend from the bottom case meant that another length of box section could then be bolted on. Locknuts allow this to be adjusted up or down to get the cases level in the frame.  L sections fixed to each side of the frame and along under the box section - M6 screws into the fairing stay mounts on the frame, pop rivets holding the L sections tight together.  The stud/adjuster gubbins and how it works should make sense from this photo ..  Length of M10 stud holds the 'cradle' in place through the rear lower XBR500 engine mounts.  Madness .. but it does seem to work ..  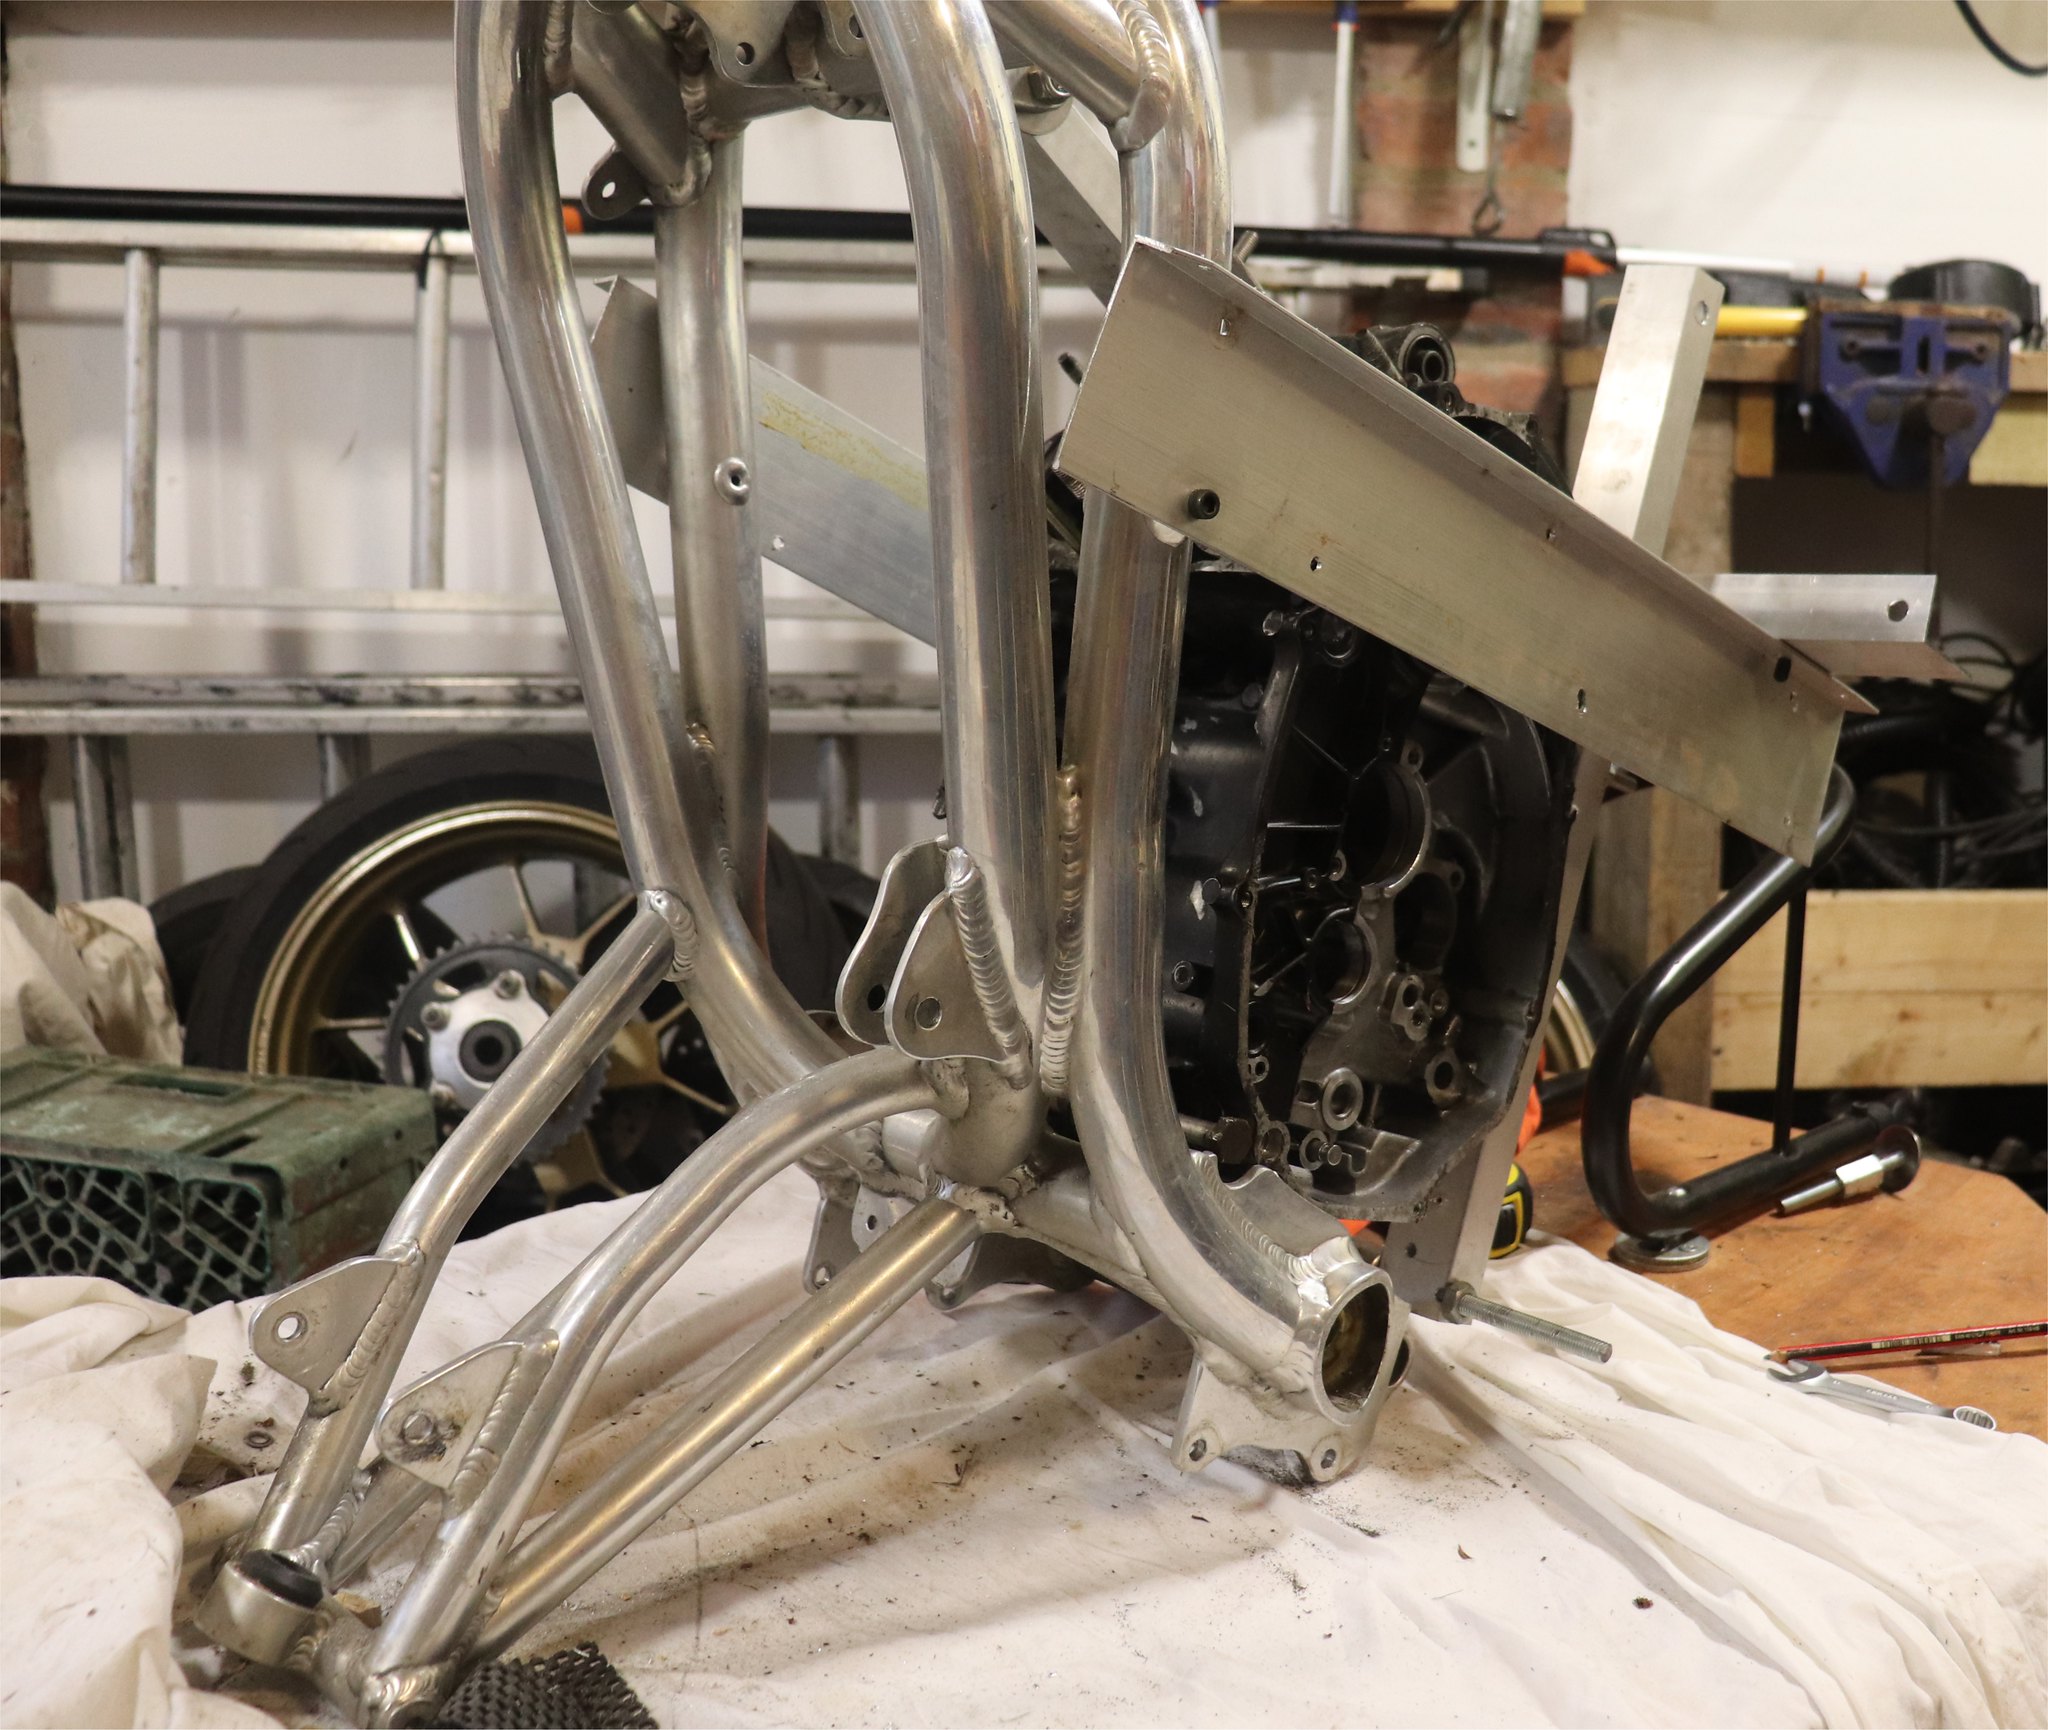  Just enough room for the clutch side casing to be fitted without touching the frame bracing plate.  Though the cases are square and level in the frame they aren't central. I want to use a spacer between the top rear engine mounts and frame lugs so that once the engine bolt is removed the spacer will drop out and give lots of 'wriggle room' so the engine can easily be lifted out. The plan is to fit the spacer to the wrong side of the engine mounts, have the frame lugs welded in place, then swap it to the correct side so the engine is central in the frame. Fingers crossed and all that .. |
|
|
|
Post by veg on Nov 24, 2019 21:05:17 GMT 1
Remember old Enid built a great cbx750, looking good and liking the problem solving.
Enjoyed the vid as well thanks for that mark.
Always fancied a gilera nord west.
|
|
|
|
Post by markhoopy on Nov 24, 2019 23:55:10 GMT 1
Remember old Enid built a great cbx750, looking good and liking the problem solving. Enjoyed the vid as well thanks for that mark. Always fancied a gilera nord west. I subscribed to PB for years - always enjoyed his projects and the ideas behind what he did. Once I had read each new magazine I passed it on to a mate so having to buy them again at more than double the price isn't my idea of fun! The BABIYOS project bike he built using the engine from a Yamaha R1 looked similar to a Cagiva Nordwest but with a little extra poke  |
|
|
|
Post by markhoopy on Jan 9, 2020 18:47:07 GMT 1
NWS made the frames using 6082T6 alloy so I bought a few lengths of flat bar in the same material to make the rear engine mount brackets. The brackets were bolted to the rear of the engine along with a 20mm spacer at one side, so that once the brackets were welded to the frame the engine bolt can be put in place allowing the engine to be slid side to side by 20mm to get it central in the frame, which was nigh on impossible just using the daft jig contraption alone. This shows the 20mm spacer. The old bracket that had to be cut off the frame is on the engine bolt and shows how much longer the new brackets had to be.  Right-hand side of the engine casing behind the mount is as close to the frame as possible to try keep as much clearance as we could between the cylinder heads and front wheel. The swinging arm bolt is in place so that a set square could be placed against it to get the engine cases square and level in the frame.  New brackets welded in place, daft jig discarded, and the bare YPVS cases swapped for the 535 engine.  Now the jig is out of the way we can use long strips of ali to support the front of the engine and fix it in place so that two downtubes and front engine mounts can be made. The ali is a decent thickness so the two strips are adequate for keeping it all square and level but I also plan on making up the engine tie bars and fitting them before having the front downtubes welded on.   Once the 535 was back in the frame it showed the next problem - not enough room between the cylinder heads and frame crossmember to put a spark plug in, and dropping the engine to fit a spark plug then lifting it back in to place worked ok but there wasn't enough room to get the plug caps on. The only solution is to lift the front of the engine by about 25mm. At the moment the forks, swinging arm and wheels aren't in the frame but once they are we will be able to see whether this will work or not - it may well be that the engine is level in the frame but until we get it all back together we won't know for sure. Old hole, new hole ..   |
|
|
|
Post by veg on Jan 9, 2020 19:23:23 GMT 1
Looking really good, you doing the Ali welding yourself?
|
|
|
|
Post by markhoopy on Jan 9, 2020 19:40:17 GMT 1
Looking really good, you doing the Ali welding yourself? My neices boyfriend is a welder at a fabricators in Wakefield - he welds steel but they have someone there who does ali welding, so that's where it goes. 'Side jobs' are Friday afternoon or Saturday mornings and they were closed for a couple of weeks over xmas and new year hence the wait to get it done but .. free  |
|
|
|
Post by 4l04ever on Jan 9, 2020 20:42:27 GMT 1
|
|
|
|
Post by jon on Jan 12, 2020 10:27:10 GMT 1
WOW they’re expensive. Jon |
|
|
|
Post by yamark on Jan 12, 2020 22:31:15 GMT 1
Absolutely love it, great work Mark
Cheers, Mark  |
|
|
|
Post by markhoopy on Jan 12, 2020 23:59:53 GMT 1
Absolutely love it, great work Mark
Cheers, Mark Just plodding along thanks! I spent three hours this afternoon looking at hub widths on ebay - the Aprilia rear wheel I have is far too big to fit in the swinging arm if I add a spacer on the sprocket side and caliper hanger for the disc and I doubt your 'lathe trick' would be a solution I could use    |
|
|
|
Post by Tobyjugs on Jan 13, 2020 9:07:10 GMT 1
Do you know what the standard fitment is?
|
|
|
|
Post by markhoopy on Jan 13, 2020 11:24:09 GMT 1
Do you know what the standard fitment is? No idea unfortunately. Engine would have been Honda XBR500 but I doubt they would have used the standard Honda Comstars .. I really don't want to consider them as an option either |
|
|
|
Post by Tobyjugs on Jan 13, 2020 11:41:00 GMT 1
I've seen rims where the brake disc sits deeper into the centre of the rim. For example late TZ models
Is it possible to machine the rim to make the disc sit deeper?
Can you post some detailed pictures of the sprocket carrier?
What size back tyre do you want for this build?
|
|
|
|
Post by markhoopy on Jan 13, 2020 12:18:11 GMT 1
I've seen rims where the brake disc sits deeper into the centre of the rim. For example late TZ models Is it possible to machine the rim to make the disc sit deeper? Can you post some detailed pictures of the sprocket carrier? What size back tyre do you want for this build? The Aprilia rear is six inches wide which is really too big for this bike - Eyrey1 had his machined in a big lathe to slim it down to fit in the RS250 arm but I can't do the same with this one as the arm is only 240mm wide. I need at least 25mm because the sprocket carrier studs already touch the arm even when the wheel is pulled back as far as it will go, and 25mm would mean the chain touching the tyre too. I'll get some better photos tomorrow to show the carrier this is the only one I have from that side ..  |
|
|
|
Post by Tobyjugs on Jan 13, 2020 14:06:14 GMT 1
Check out the rear sprocket arrangement on the Bakker project. It's on the second page about half way down.
One other thing which I've done which could be a mistake is I've used four of the standard rubber engine mountings. Whilst on the dyno I could see the engine moving slightly. Bear this in mind whilst constructing your engine mountings.
|
|
|
|
Post by markhoopy on Jan 13, 2020 16:49:57 GMT 1
I looked at the rear sprocket on your Bakker a couple of weeks ago funnily enough. I really don't think the Aprilia wheel I have will fit in the NWS arm but I'll have a proper look once it's all back together tomorrow.
A 165 rear tyre is what I'll probably end up with - the hard part is finding a wheel to carry it.
My tie bars will be very similar to your setup and I know about how important the front mounts are to hold the engine solid in the frame. Plenty to think about!
|
|
|
|
Post by midlifecrisisrd on Jan 13, 2020 17:08:08 GMT 1
I looked at the rear sprocket on your Bakker a couple of weeks ago funnily enough. I really don't think the Aprilia wheel I have will fit in the NWS arm but I'll have a proper look once it's all back together tomorrow. A 165 rear tyre is what I'll probably end up with - the hard part is finding a wheel to carry it. My tie bars will be very similar to your setup and I know about how important the front mounts are to hold the engine solid in the frame. Plenty to think about! Don't laugh too hard at this suggestion 😁 www.ebay.co.uk/itm/Lexmoto-LXR125-Rear-Wheel-17-x-4-5-SY125-10-J2/183871740356?hash=item2acf9c19c4:g:3DkAAOSwsV1dHh~pSteve |
|
|
|
Post by midlifecrisisrd on Jan 13, 2020 17:13:20 GMT 1
|
|
|
|
Post by markhoopy on Jan 13, 2020 17:15:17 GMT 1
Quite possibly  |
|
|
|
Post by 4l04ever on Jan 14, 2020 1:56:46 GMT 1
|
|
|
|
Post by reggieperrin on Jan 14, 2020 12:11:07 GMT 1
RS 125 are virtually identical to the Pegaso.
They take a 150 rear rather than the 160 on the pegaso.
I had a spare set of RS wheels that I just sold on here, they're really nicely made.
|
|
|
|
Post by markhoopy on Jan 14, 2020 17:18:24 GMT 1
RS 125 are virtually identical to the Pegaso. They take a 150 rear rather than the 160 on the pegaso. I had a spare set of RS wheels that I just sold on here, they're really nicely made. Just put the front end back in the bike to see how everything lines up now the rear engine brackets are fixed in place .. sometimes the things that should be so obvious somehow seem to merge into the background ..  |
|
|
|
Post by tipfinchy on Jan 14, 2020 18:06:46 GMT 1
love the build
as for a 165 tyre the ideal rim width is 5.5 , used 160 road tyres on a 5 inch but to use race 165 tyres I got a couple of pairs of Marchesini wheels which are 5.4 x17
mart
|
|


