|
|
Post by dusty350 on Apr 22, 2014 10:43:43 GMT 1
Really keen to get the rolling chassis together so i can get the welding sorted. The plan is for it to be as minimalist as practically possible, like a racer on the road. It wont be particularly trick, just trying to use what i,ve got left from the Belgarda Tzr. Good thing is,once the rolling chassis is finished,i know everything else will just bolt on,so i can powder,polish and paint as money allows. It will have straight bars, digi speedo and temp gauge, standard f2 engine with non pj carbs plus i have a y boot to try. Thinking of getting plate welded between the back frame spars to act as a mudguard too. Expecting some more suspension parts to arrive this week so hopefully get a bit more done
Dusty
|
|
stevep
Thrash Merchant

Posts: 396
|
Post by stevep on Apr 23, 2014 0:06:12 GMT 1
Gotta be right summers riding winters building
|
|
|
|
Post by dusty350 on Apr 24, 2014 7:53:13 GMT 1
Lol, I'm always building something, summer or winter ! Seat unit arrived yesterday, and although it's designed for an F2 its gonna need some cutting to get it to fit  Got some suspension parts coming too so I can mock up the rear end at the weekend hopefully. Dusty |
|
|
|
Post by dusty350 on Apr 25, 2014 11:45:00 GMT 1
Hi Here's the seat unit; 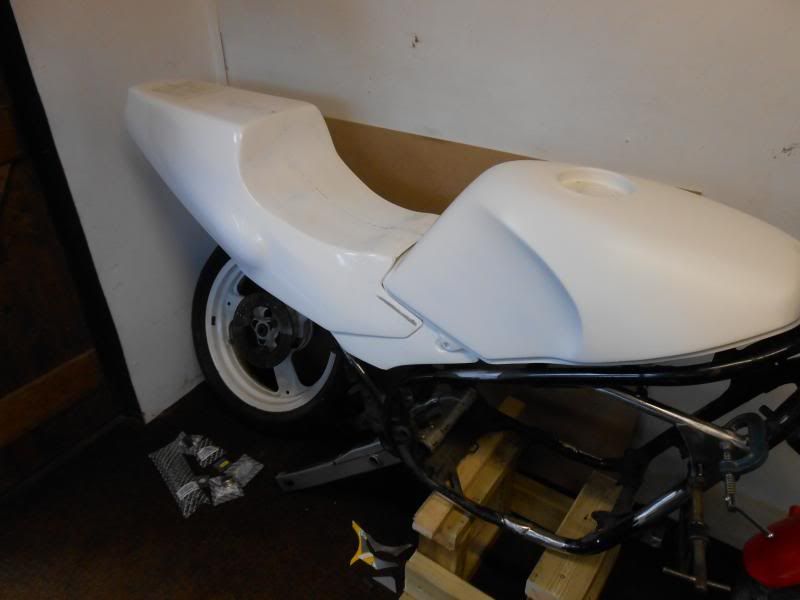 I chose this one as it is for the F2. Unfortunately, the front part of the seat on both sides bow inwards, so it wont fit the tank properly; 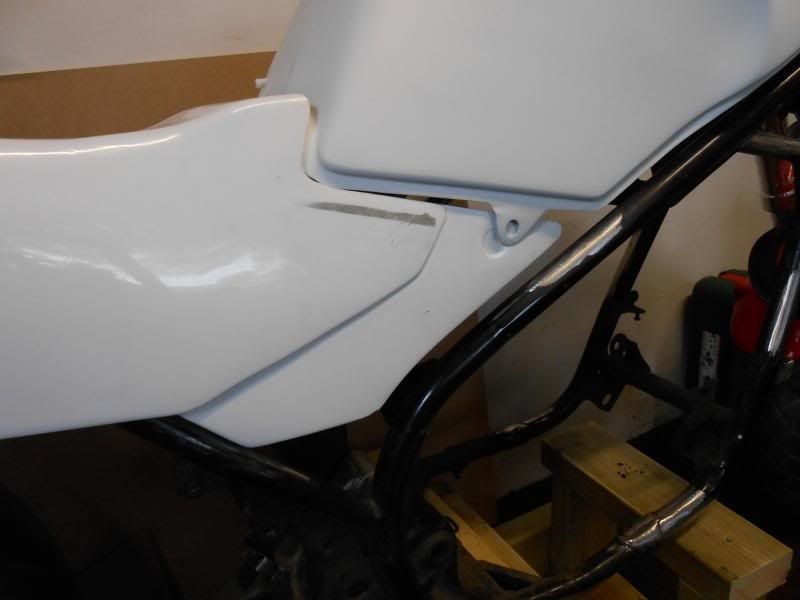 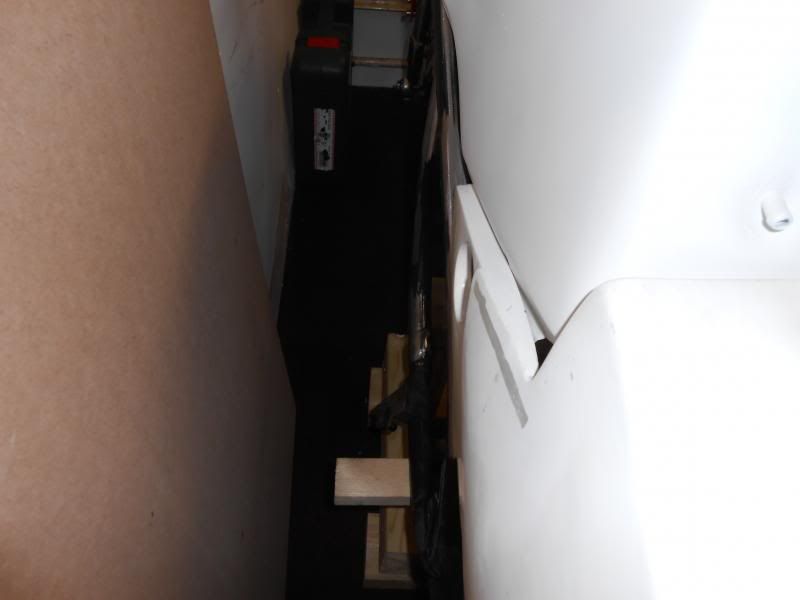 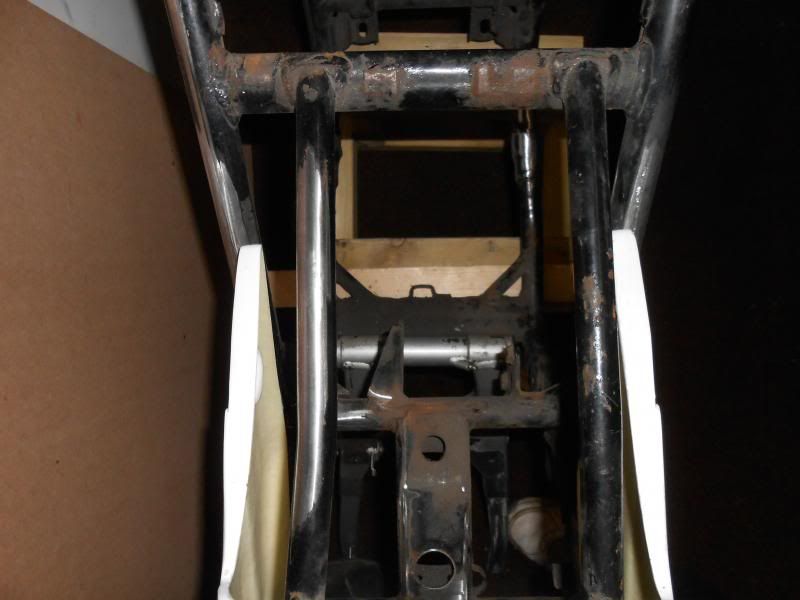 Not sure which way to go now. Do I cut the front side parts off completely, thus removing most of the offending fibreglass, and trim the rest as best as possible ? Or do I stick it back on ebay and try and get some money back. I suppose if it was going on a track bike it wouldn't matter but as this is a road bike the aesthetics are more important. Not seen another race seat that suits the Ypvs and I was hoping this would be a good fit. Also popped in to my local engineering place and got some more steel to play with; 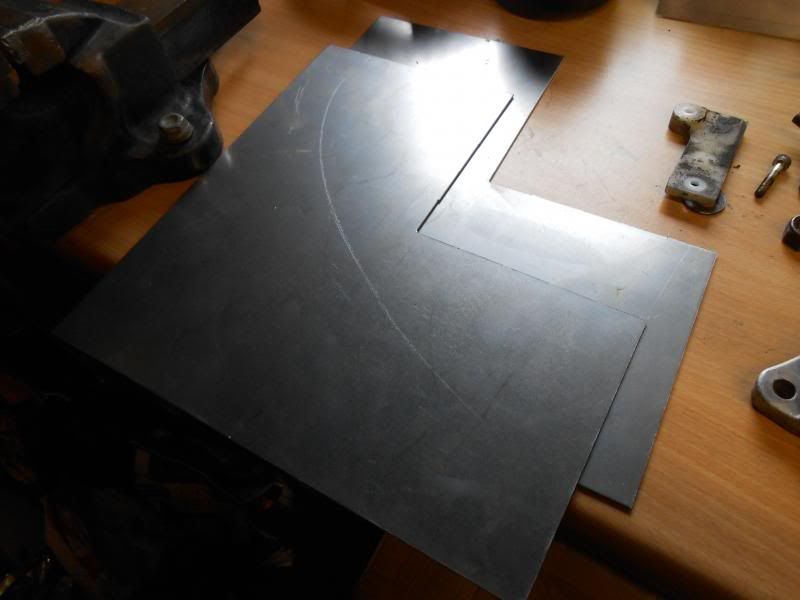 Will be making some more plates up. Also decided to mount the ignition toggle switch on the top yoke, as there was a threaded hole on the underside of the yoke that was doing nothing; 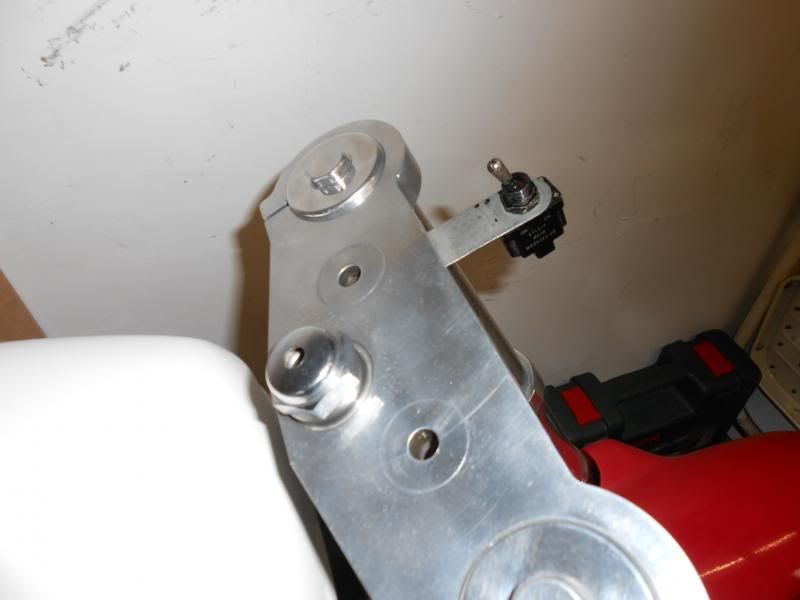 Obviously not finished but you get the idea. I will make a new side plate without the switch hole. Dusty  |
|
|
|
Post by dusty350 on Apr 26, 2014 16:09:05 GMT 1
Highs and lows today with this build. To get the seat anywhere near fitting, I had to cut off the front sides - the parts that would fit to the tank. There was no way they would fit properly. Now the seat does fit better but not as good as I hoped for; 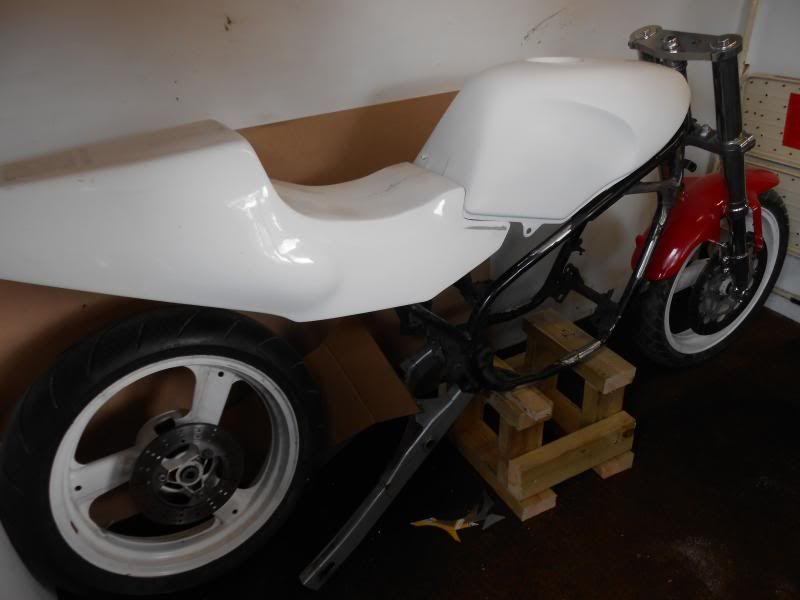 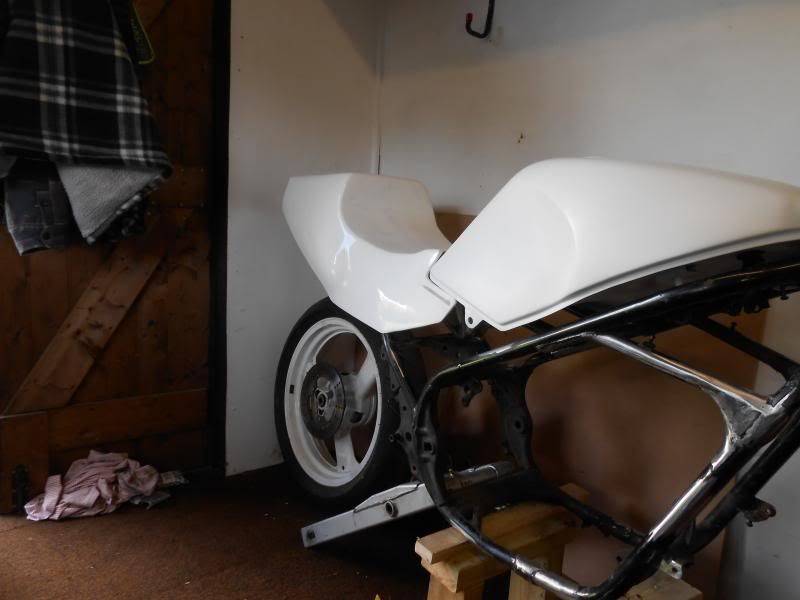 Having second thoughts with this now. Will probably go with something else. Trouble is, until you offer something up you never know how it will look. The high point was finding that the oil tank mounting holes were exactly the same spacing as two holes in the tank mounting plate on the frame; 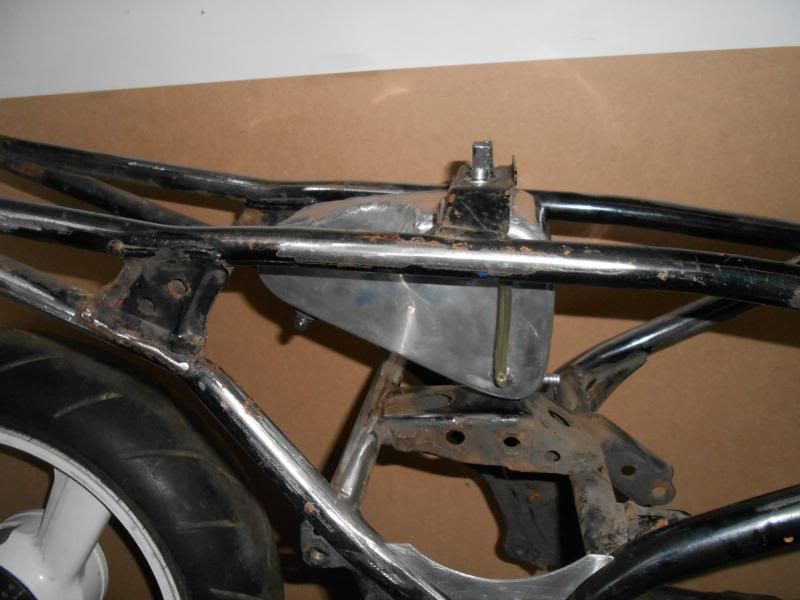 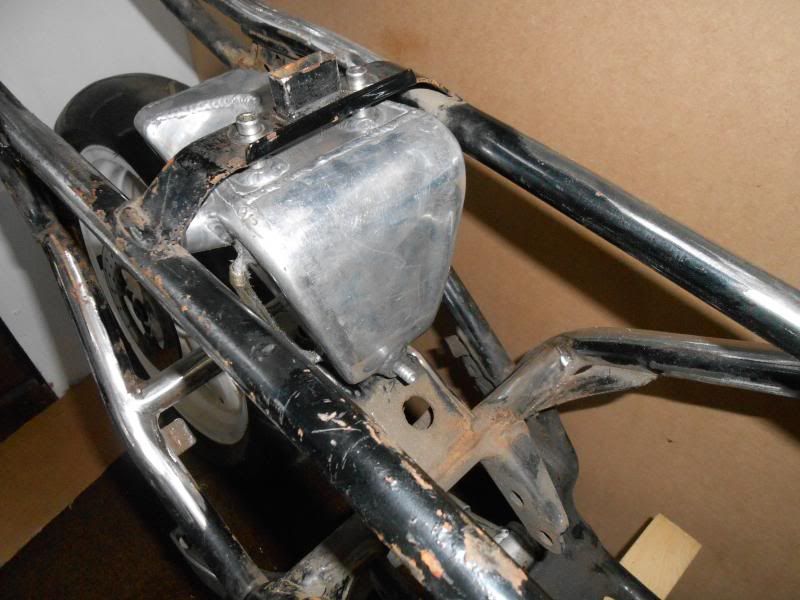 This cardboard template shows where I want a plate/mudguard welded in; 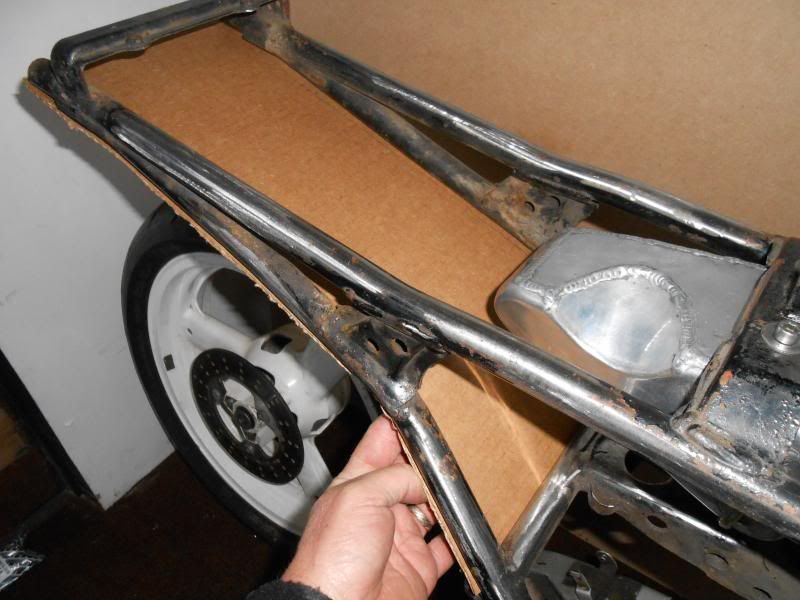 Some suspension parts have arrived now so I will be able to finish mocking up the suspension soon. Dusty |
|
|
|
Post by 350wayne on Apr 26, 2014 23:52:33 GMT 1
Hi Dusty , i think that seat unit looks fine just lose the lug off the bottom of the tank and jobs a good un ! Shouldn't that oil tank be on my bike ( Betty ) ? Lol |
|
|
|
Post by dusty350 on Apr 27, 2014 8:40:16 GMT 1
Hi Wayne, The lugs will probably come off the tank, just want to be sure of the final look before I do it. Oil tank fitting as it did is a real bonus, I thought it would need brackets making to sit it further back on the bike. Had thought it might be easier to go premix, but it will be autolube now. I'm now thinking along the lines of a short, minimal seat, cafe racer style. Just got to search for the right one now ! Regards Dusty |
|
|
|
Post by Ade on Apr 27, 2014 13:17:10 GMT 1
Looking great Dusty - fascinating project, watching this with interest mate 
Love the cut down foot rests, how did you get the cuts so neat? |
|
|
|
Post by dusty350 on Apr 27, 2014 14:19:54 GMT 1
Hi, I have limited skills and tools when it comes to modding metalwork ! I placed a washer of the right size on top of the footrests and drew round it, then clamped the footrest to my workbench and cut the back part off with a jigsaw fitted with a metal cutting blade. I tidied it up with an angle grinder fitted with an abrasive disc and job done. I had a pair already done on the Yamasaki, so knew it was fairly straightforward. The jigsaw has been useful cutting out the repair plates and mounting plates for this frame, and the angle grinder has earned it's keep with all the brackets I have removed. My plan is to make all the plates/brackets and mudguard in the shed and then deliver them with the frame to the welder, to save time and money  Dusty |
|
|
|
Post by dusty350 on Apr 27, 2014 18:39:02 GMT 1
Here's are a rough mock up of the rear brake; 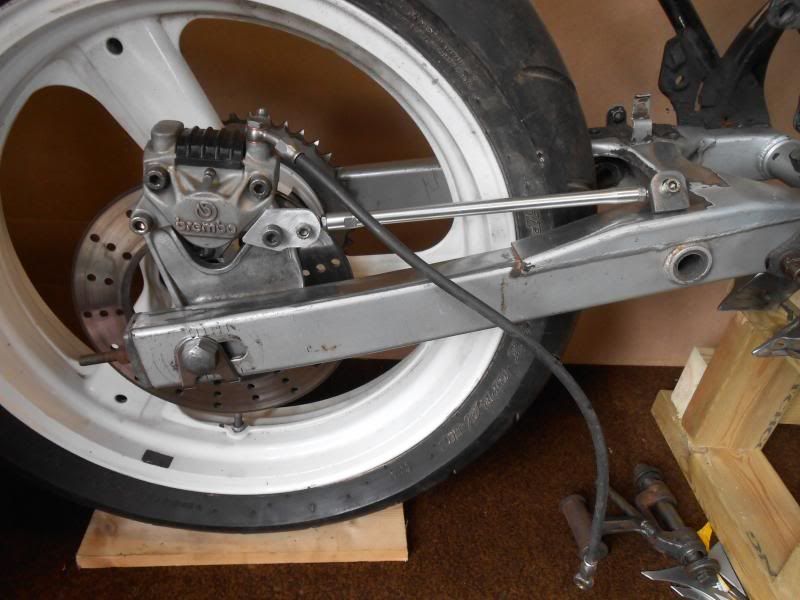 Will need to get the mount welded onto the swingarm, and the torque arm will adjust at both ends for chain adjustment. The small plate on the caliper is the mk 1 version, I will make something neater when I have time. The seat I bought is not staying  It does look good on the bike, but I have an idea of keeping the bike "short" looking if you know what I mean. I've got used to the look of it without a seat on it and like the stubby look ; 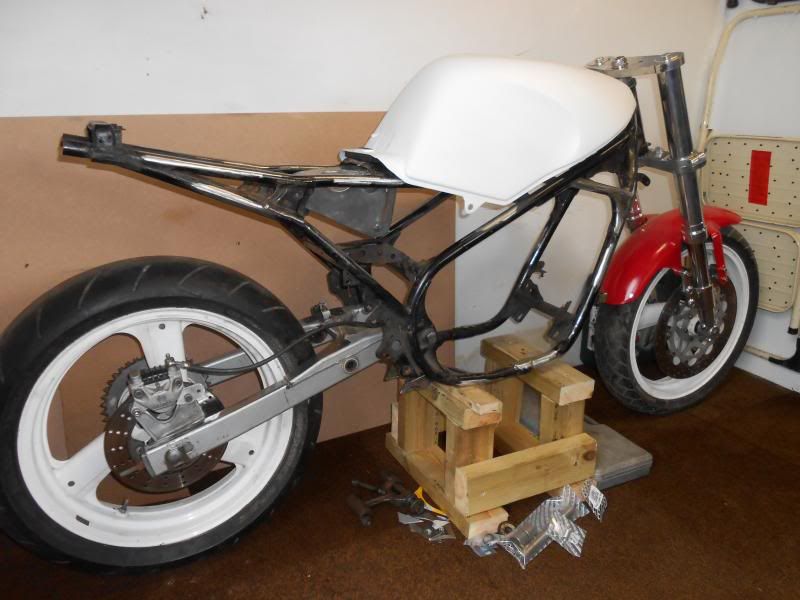 Gotta find the right seat now, something short and flat ish. Dusty |
|
|
|
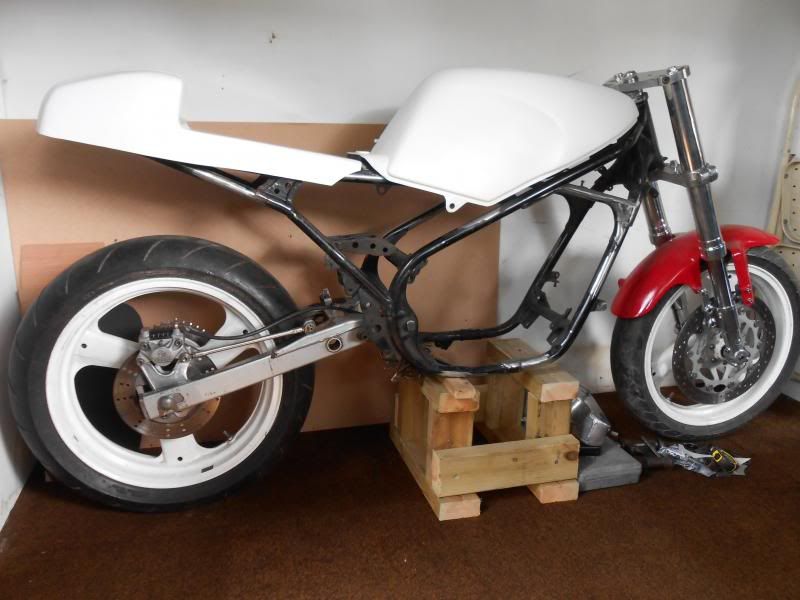
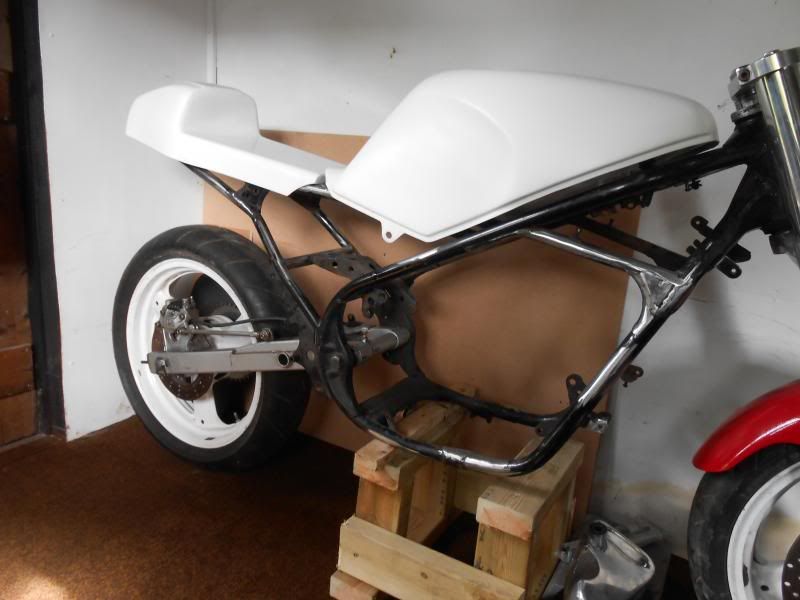
Post by dusty350 on May 10, 2014 16:30:32 GMT 1
Hi, After spending a lot of time looking at all sorts of seats, I finally got one off ebay. I wanted something shorter than the last one I got, and this is the look I was after; 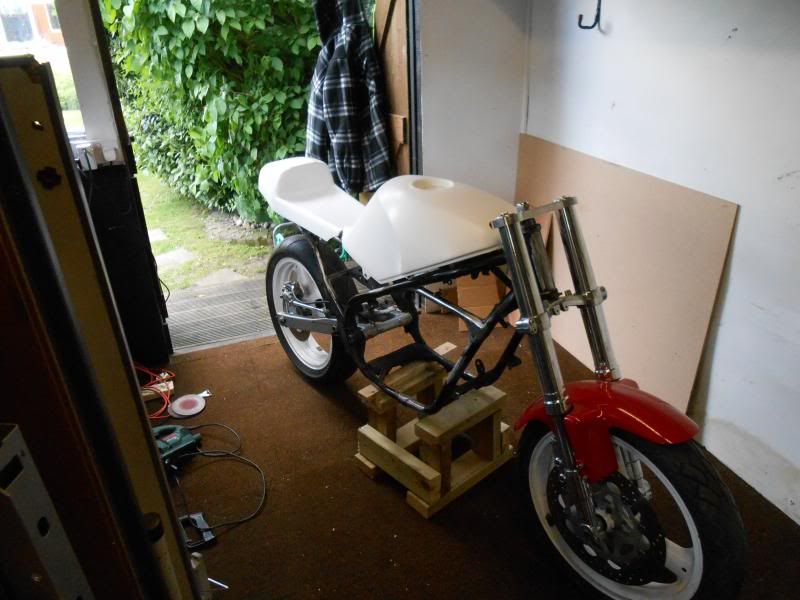 It's surprisingly strong, and seems well made too. I had to chop even more off the frame to get it to fit though; 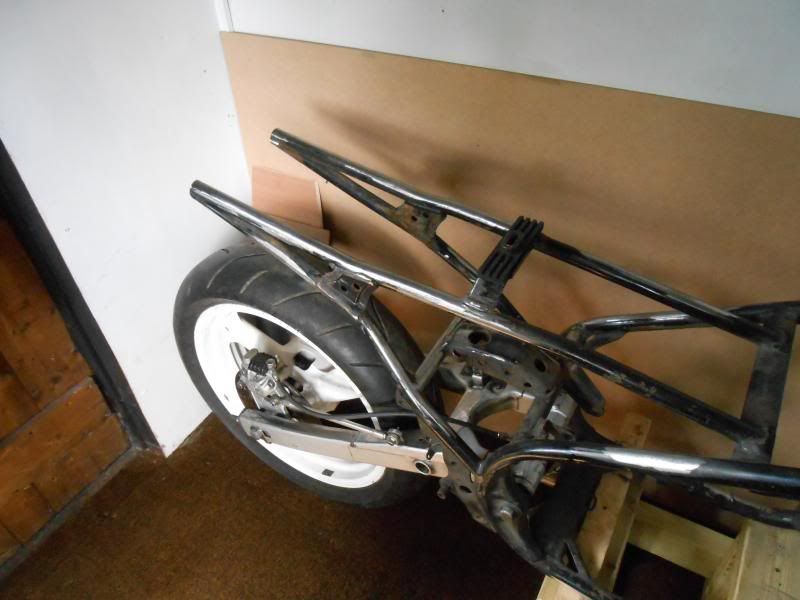 I placed the seat on a sheet of 12mm ply and drew around it, then cut out the shape with a jigsaw, cutting inside the line to account for the thickness of glassfibre. The ply template sits on the frame rails and then the seat sits on the ply. This means the seat is in contact completely with the ply and thus totally supported. I will get some spars welded across the frame that the ply will bolt to. Then I will need to make a seat pad of some sort. Also did a bit more with the rear brake torque arm. I binned the small bracket that I made initially, and pressed out the socket in one of the ball joints so I could fit an M8 bolt through it and directly into the caliper; 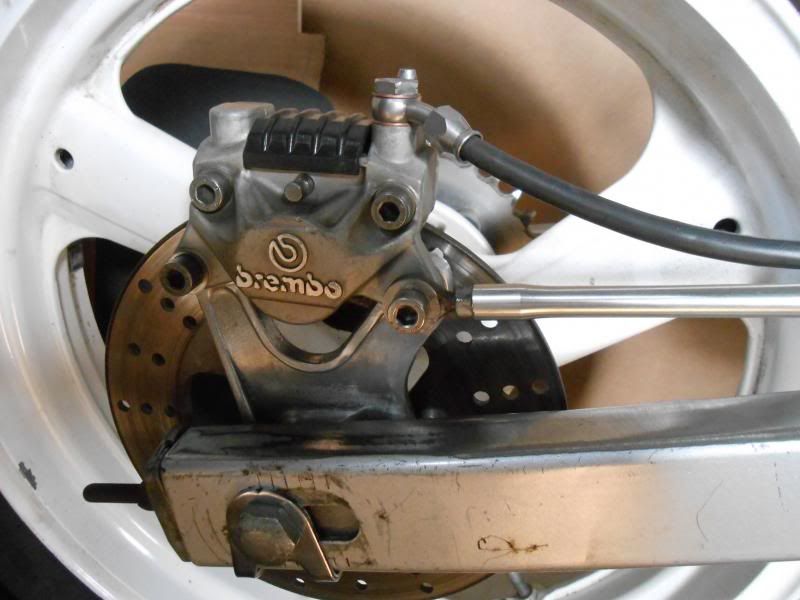 You may also notice I reshaped the caliper bracket as it was much chunkier before. Nearly ready for the welders now ! Dusty |
|
|
|
Post by dusty350 on May 10, 2014 16:32:28 GMT 1
  Dusty |
|
|
|
Post by dusty350 on Jun 5, 2014 19:59:11 GMT 1
Hi,
Update time - highs and lows ! The frame I have is more rotten than I thought and would need a lot of time spent getting it right. I knew there were areas of rot, but cleaning it all up with the grinder made me decide to start over with a better frame. I got a "K" reg F2 off Soccersmyth, and chopped it all up again !! This is a solid frame though and I feel much happier moving forward with it. I got some 3mm steel plate and cut out a rear mudguard, plus made up some cross members to mount the seat to and also cut of the old lock stop and made a new one to suit the 4dl bottom yoke. All being well it's off for welding on Saturday, so hopefully I'll update with some pics soon.
Dusty
|
|
|
|
Post by dusty350 on Jun 5, 2014 19:59:23 GMT 1
Hi,
Update time - highs and lows ! The frame I have is more rotten than I thought and would need a lot of time spent getting it right. I knew there were areas of rot, but cleaning it all up with the grinder made me decide to start over with a better frame. I got a "K" reg F2 off Soccersmyth, and chopped it all up again !! This is a solid frame though and I feel much happier moving forward with it. I got some 3mm steel plate and cut out a rear mudguard, plus made up some cross members to mount the seat to and also cut of the old lock stop and made a new one to suit the 4dl bottom yoke. All being well it's off for welding on Saturday, so hopefully I'll update with some pics soon.
Dusty
|
|
|
|
Post by 1966baz on Jun 5, 2014 20:47:44 GMT 1
Thanks for the update Dusty. Looking forward to seeing the progress.
|
|
|
|
Post by dusty350 on Jun 20, 2014 15:26:11 GMT 1
Hi, Finally had some time today to get in the shed and get some pics of the welding I had done a couple of weeks back. I've been decorating the hall, stairs and landing plus totally revamping the shed, so I haven't had any time for the bike  Anyway, all the diy is finished now, so back to the bike. I found a local welder in my town who had a workshop in his garden and was happy to do the bits on my new frame. I pre cut/shaped all the parts I wanted welding on to make life easier and cheaper ! Steve - the welder, is a really nice fella and very chatty, and was happy for me to watch him do the welding, using his spare mask. He even let me loose on the frame - the first welding I've ever done ! Due to the 4dl yokes having different lockstops to the Ypvs, I had cut off the frame mounted lug on the headstock and made a new one to be welded on; 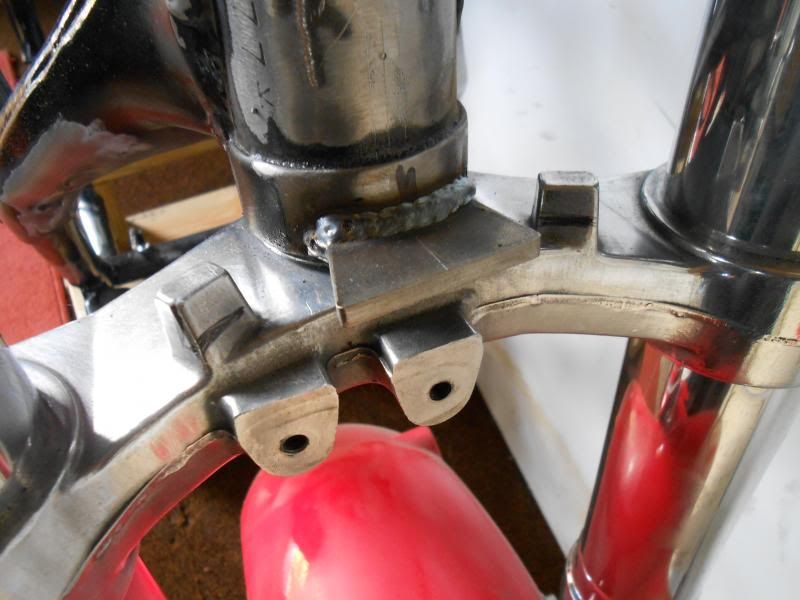 The lines you can see on the ally stops on the yoke are where I need to grind back the metal so I can get a better lock. Dusty |
|
|
|
Post by dusty350 on Jun 20, 2014 15:31:00 GMT 1
Next was some 3mm steel plate off cut that I thought I would use to mount the pv controller box and rectifier to. Excuse the welding, but this is the bit I did, and I found it really hard to see what I was doing !!; 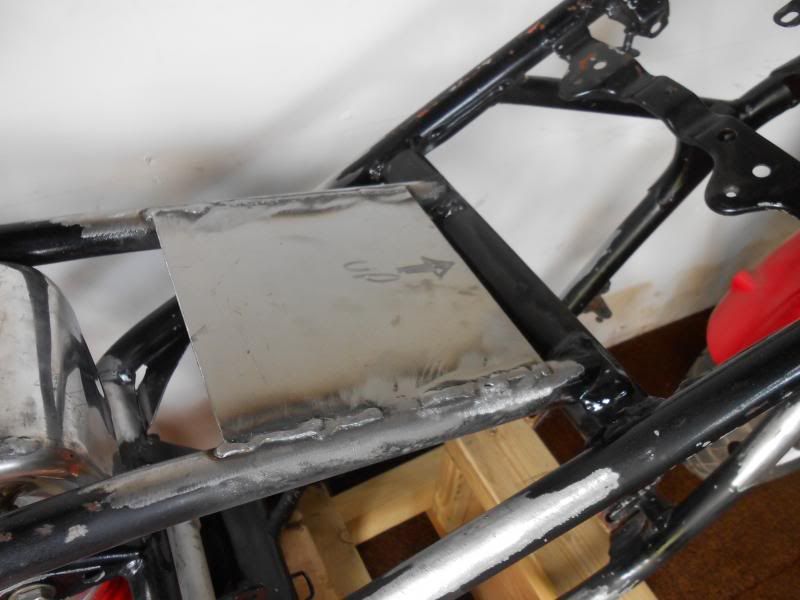 This bike wont have an airbox, and the electrical components will mount on the underside of this plate. I was going to mount them on the back mudguard, but didn't want to drill lots of holes in it. Dusty |
|
|
|
Post by dusty350 on Jun 20, 2014 15:39:47 GMT 1
The main part needing welding was the rear mudguard. I bought the steel sheet, and using a cardboard template, cut out the shape with a jigsaw with a metal cutting blade. I thought I would need to get the sheet pressed to follow the contours of the frame, but once I started clamping in place with "G" clamps, it "formed" quite easily, saving me a trip to the local engineering guys. Really pleased with how this came out; 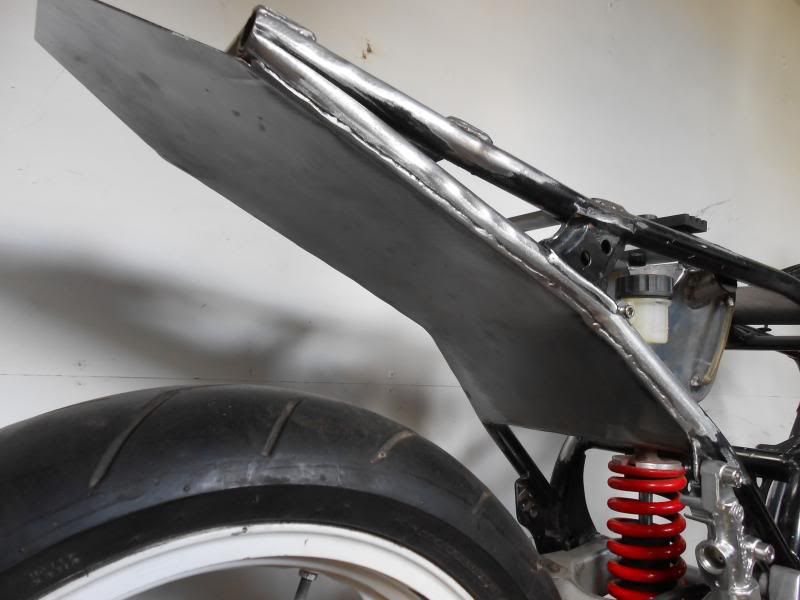 The only hole I need to drill will be for the pipe from the reservoir to the back brake master cylinder. I left it a bit longer at the back so I can make up a plate to mount a rear light and numberplate to it, which I've yet to source. Also got 3 seat supports welded on that will allow the solo seat to bolt to so it will be solid; 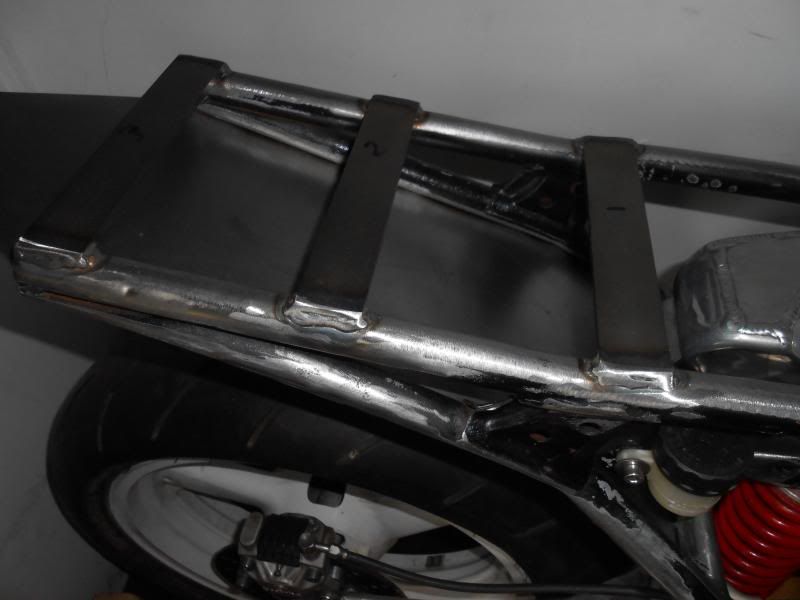 Will need to drill some holes in these so bolts can pass through to mount the seat firmly. Dusty |
|
|
|
Post by dusty350 on Jun 20, 2014 15:42:44 GMT 1
Also got the little bracket I made for the torque arm welded on; 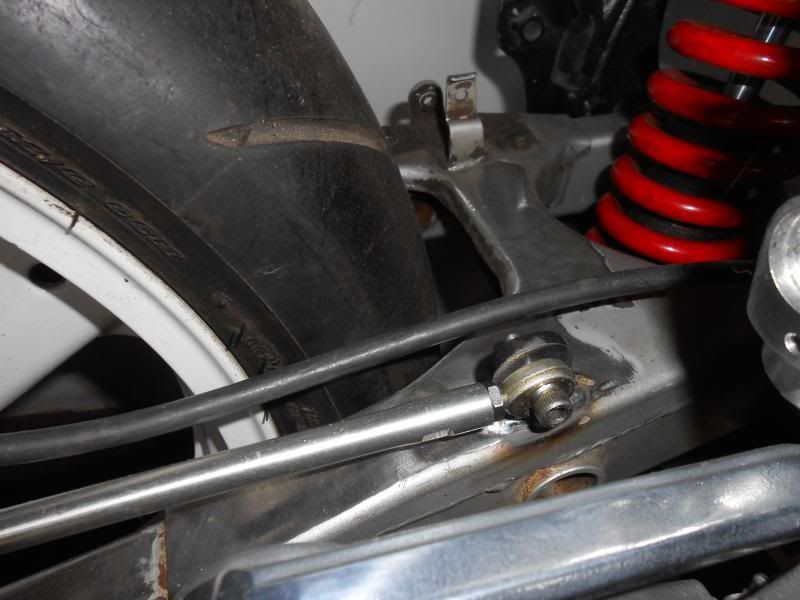 Dusty |
|
|
|
Post by dusty350 on Jun 20, 2014 15:48:47 GMT 1
So that's all the welding done now. I also made up an ally plate that sits the oil tank a bit further forward as I think it looks better a bit more central in the frame; 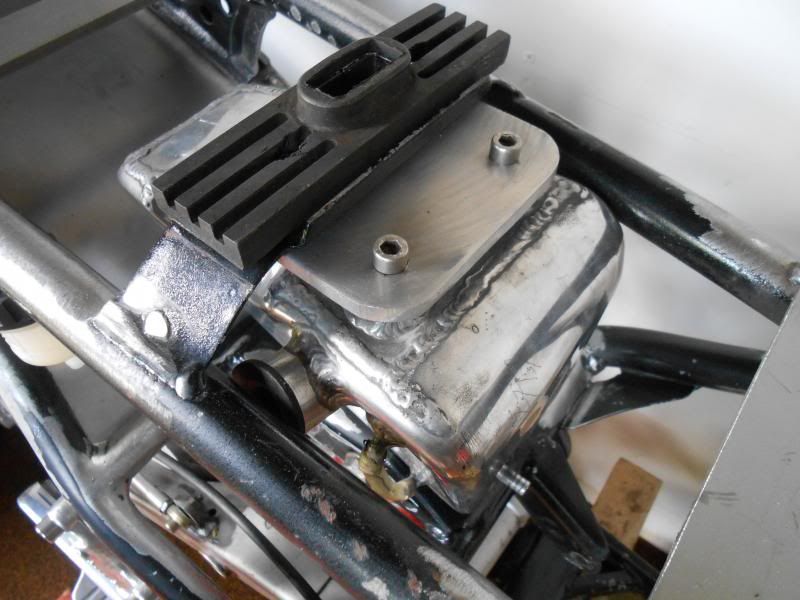 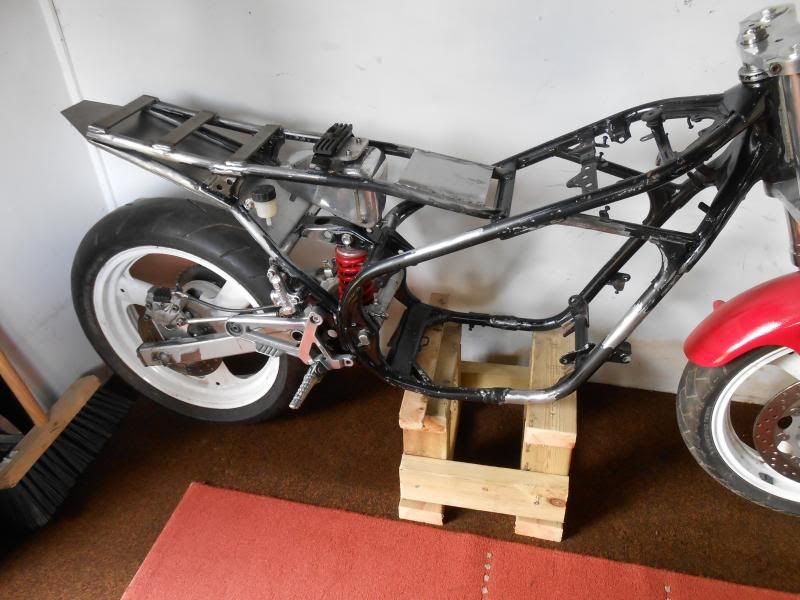 Once I've drilled all the holes I need, the frame and swingarm can go off for powdercoating. I got some new polishing mops from Kempton a few weeks back so the forks and yokes will get another going over, and then I can start cleaning everything up and putting back on the bike. More soon. Regards Dusty |
|
|
|
Post by jon on Jun 27, 2014 19:09:42 GMT 1
Dusty, have you seen that seat unit is on Enay again!
Think it must of gone through 4 hands that I know of.
I wonder where it will end up, and after going though how many people's hands?
I almost feel sorry for it.
|
|
|
|
Post by dusty350 on Jun 28, 2014 1:43:18 GMT 1
Hi
I ve listef it on ebay as i am now using a different seat. Need to get some money back on it !. Shame i had to modify it but it would never have fitted an f2 otherwise. it is a well made seat apart from that and seems strong. Some you win and some you dont !!
Regards
Dusty
|
|
|
|
Post by dusty350 on Jul 1, 2014 22:11:33 GMT 1
Hi Took the frame, swingarm, engine mounting plates, tie bars and rear wheel hub over to Microblast today so they can do the gloss black powdercoat. The swingarm bearings were a bitch to remove, but I won in the end ! While it's away, I plan to re polish the yokes and forks and the risers for the bars. Also clean up all the electrical items so they can bolt on when I get it back. I have ordered a spring compressor tool for the rear shock so I can dismantle it for refurbing - loosening off the preload collars isn't enough for me to release the top collar holding the spring on. Still, it will be a useful tool to have. I'm making a template for a rear light and numberplate holder that I can then cut from some ally plate I have. Also thinking about colours for the wheels - I might do something a bit different this time. I'll post some pics when I get the frame back. Dusty |
|
|
|
Post by dusty350 on Jul 8, 2014 10:36:10 GMT 1
Hi, Frame and other parts are still away at the mo, but I have had some time prepping other parts. I polished the yokes - didn't want them too shiny as they are difficult to keep like that; 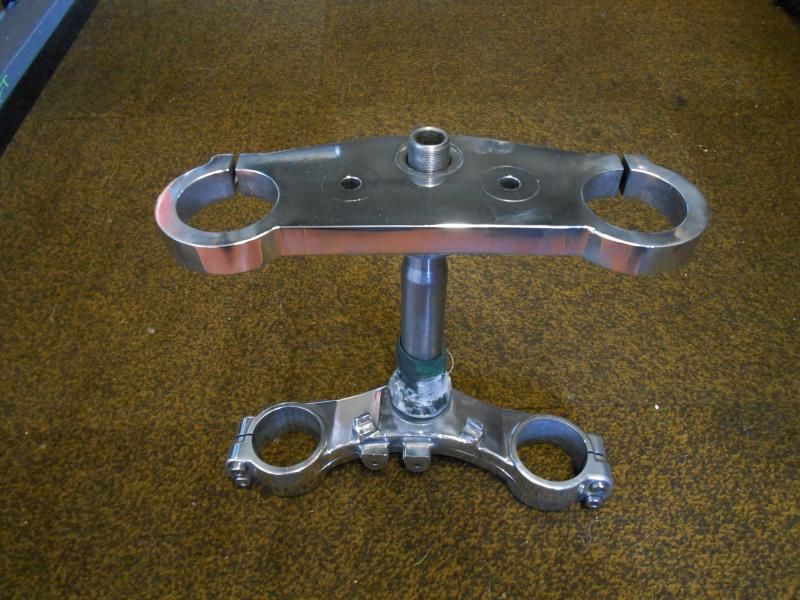 Also re-polished the forks. They got some marks on them where I kept taking them in and out of the yokes; 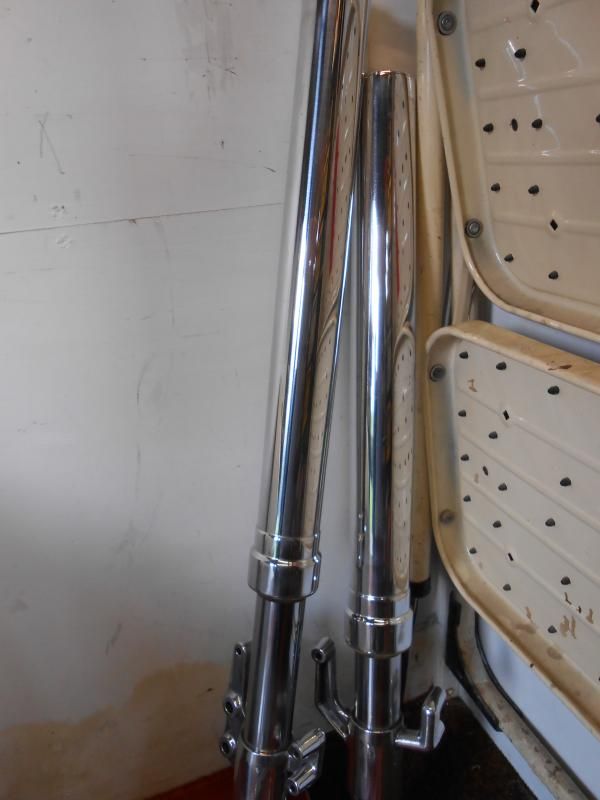 I removed the spring from the rear shock and cleaned the shock body back to bare metal ready for painting - I will drop the spring off for powdercoat when I pick up the frame; 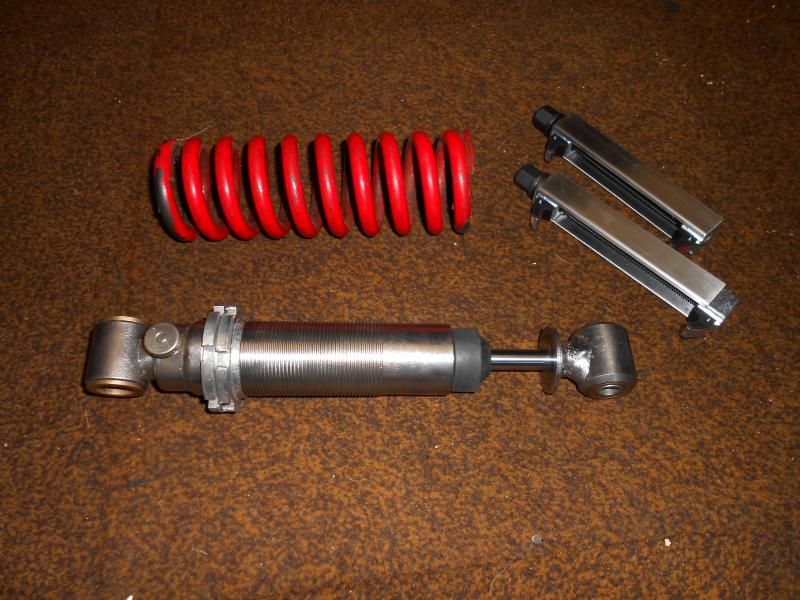 I cleaned up all the electrical components so they are ready to go back on; 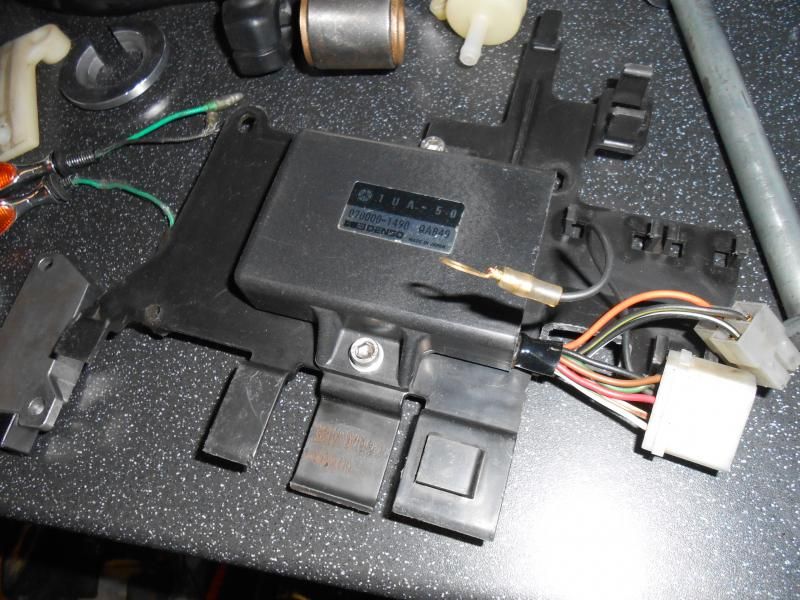 The throttle body and footrests also had some polishing; 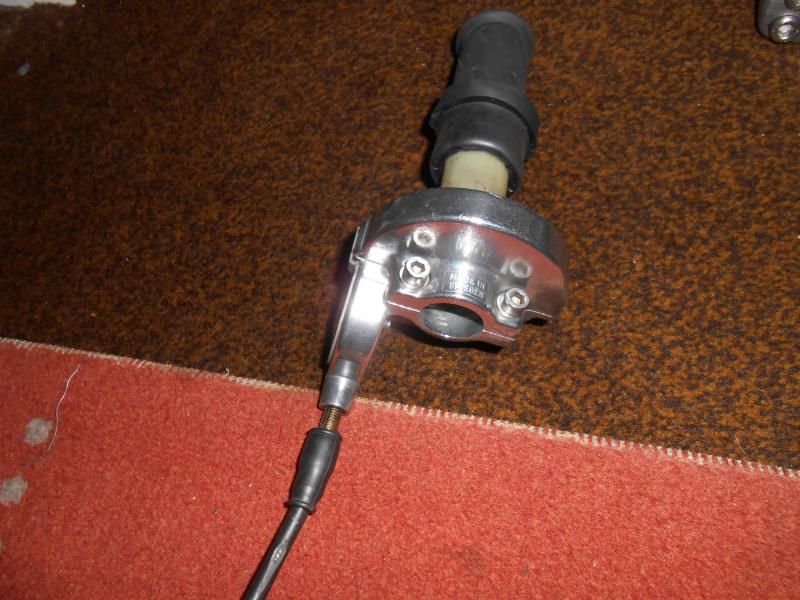 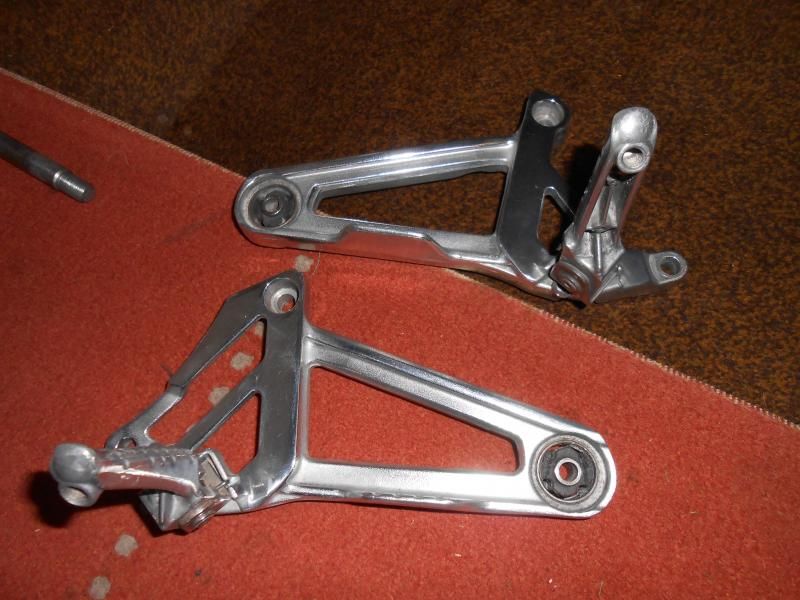 The pile of bits done is now bigger than the pile of "bits to do" ! More soon. Dusty |
|
|
|
Post by fatfastroger on Jul 8, 2014 14:34:57 GMT 1
Spring compressors look neat, I used a huge car one with a windy gun but it marks the spring as its a bit overkill.
I like the polished forks too, guess they'll be hard to keep that way though.
|
|
|
|
Post by LC_BOTT on Jul 9, 2014 8:47:46 GMT 1
Nice job, and very interesting reading, isn't the rear shock body nickel plated, the one I have is (although it's getting a few rust spots on, same as yours??) just wondered why you were painting it.
Another point, did you make any water drain points in the rear mudguard plate, as it looks to be totally welded all round?
Interested in the rear caliper work, as have something similar myself to sort.
|
|
|
|
Post by dusty350 on Jul 9, 2014 10:05:00 GMT 1
Hi The shock was in a sorry state when I got it, and although the piston is rust free, the main body had rust which I've now removed. I only got this shock as a temporary measure for mocking up the frame set up, but I will paint the body to protect it and get the spring powdercoated, and bolt it on until I can afford something better. It's standard length , and I want to raise the rear end a bit, so I am hoping to get some NK Racing shorter dog bones to raise the rear by about 1". I haven't drilled any drain holes yet - I was hoping not to as I wanted to keep the steel sheet as hole free as possible. I was going to mount the reg/rectifier to it but had another plate welded in under the tank so it would mount to that instead, along with the powervalve controller. I did drill a hole for the rear brake fluid line to the reservoir though as it was the neatest option. I have made a template for a rear brakelight / numberplate / indicator mount that will bolt to the guard, and need to get it formed to the right angle. I polished the two small alloy indicators that I had as they were black chrome originally and they came up nice. I had to chop off the standard Ypvs caliper carrier boss on the swingarm to get the 4dl carrier to fit. I also reshaped the 4dl carrier to look better as it wouldn't look right otherwise. I haven't decided what finish to go with the calipers yet, the rear especially needs something doing to it. Trouble is, it's getting out of hand - originally I was just bolting parts from the Ugly Betty Tzr on to a spare Ypvs frame, but I've since bought a better frame, had fabrication and powdercoating done, bought lots of bits like swingarm, shock, digital speedo, tank etc etc, and the Yamasaki has sat untouched in the garage for ages ! Never seem to be able to finish one before starting another  Regards Dusty |
|
|
|
Post by dusty350 on Jul 10, 2014 22:19:30 GMT 1
Hi, Picked up my powdercoated parts today, Microblast have done a great job again. Got the frame into the shed and fitted the front end and some other refurbed parts; 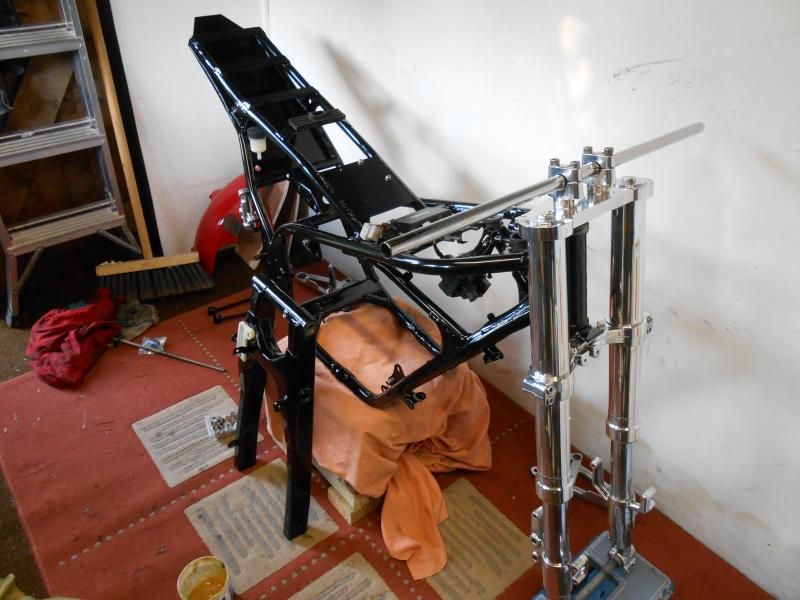 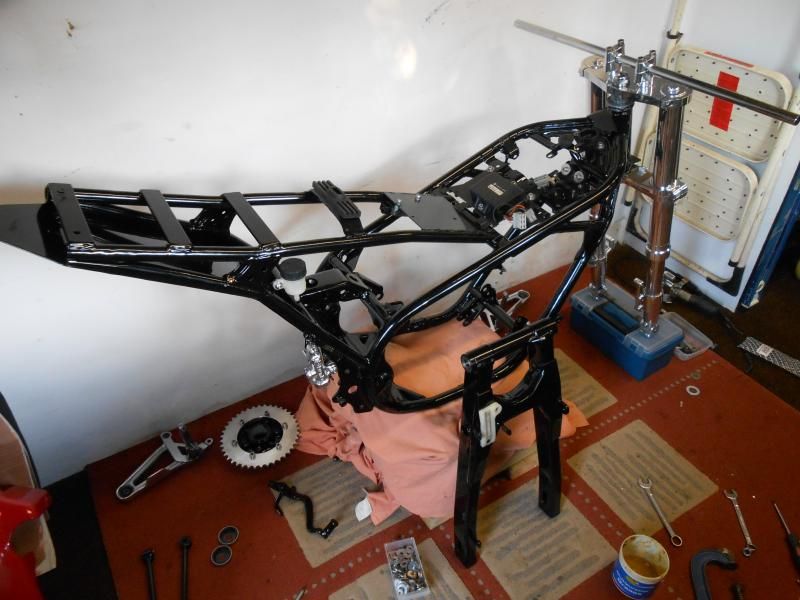 I fitted new bearings, inner sleeve and dog bone bushes and seals to the swingarm too. Just saving up for some shorter dog bones and then the back end can go together. Dusty |
|
|
|
Post by botty on Jul 10, 2014 23:31:46 GMT 1
Looking good as usual Dusty.
|
|
|
|
Post by mikee on Jul 11, 2014 8:40:13 GMT 1
Neat , really neat
Some nice touches there
Mike
|
|


 Got some suspension parts coming too so I can mock up the rear end at the weekend hopefully.


 It does look good on the bike, but I have an idea of keeping the bike "short" looking if you know what I mean. I've got used to the look of it without a seat on it and like the stubby look


 Anyway, all the diy is finished now, so back to the bike. I found a local welder in my town who had a workshop in his garden and was happy to do the bits on my new frame. I pre cut/shaped all the parts I wanted welding on to make life easier and cheaper ! Steve - the welder, is a really nice fella and very chatty, and was happy for me to watch him do the welding, using his spare mask. He even let me loose on the frame - the first welding I've ever done ! Due to the 4dl yokes having different lockstops to the Ypvs, I had cut off the frame mounted lug on the headstock and made a new one to be welded on;